Leather Treatment

It had been several years since I treated the leather seats in the car. When I tried using my Leatherique kit that I purchased in 2007, I found the product had separated, and was pretty much unusable. This time I went to Amazon.com and sorted by price and reviews. I came up with this:

I vacuum the seats, used the cleaner with some rags, then used the conditional liberally. I covered the seats with some dry cleaner bags, and let it sit for a few days:

I finally wiped off the excess conditioner, but it still left a fine residue on the seats which I’m sure my clothing will eventually absorb. The seats don’t look any different, partially because the car is always garaged and almost never in the sun. Still, it’s good to clean and condition them.

Costs

Item

Vendor

Cost

Shipping

Tax

Total

Leather Honey Leather Cleaner – 8 Ounce

Amazon.com

$15.16

$0.00

$1.12

$16.28

Leather Honey Leather Conditioner – 8 Ounce

Amazon.com

$17.83

$0.00

$1.32

$19.15

Total:

$35.43


New Starter, Oil Change

While continuing to troubleshoot my car’s electrical issues, I decided to replace the starter. The car refused to start a few times earlier this year, probably due to a weak battery, and/or weak poor connections. This would give me an opportunity to clean and tighten the starter wiring, along with upgrade to a lower amperage starter. The new starter also weighs several pounds less than the stock Paris-Rhone starter. I purchased a compatible, rebuilt starter with a lifetime warranty. I would have preferred new over rebuilt, but these starters aren’t being manufactured anymore. Unfortunately, the core charge of $40 would be non-refundable, since the new starter is not the same unit as the stock Paris-Rhone starter. I also wanted to keep the stock starter for any future problems or projects.

I was able to complete at my club’s local tech session, on a car lift! I unfortunately didn’t get many pictures, since time was running short for my car’s work.

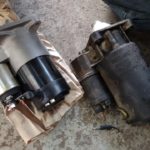
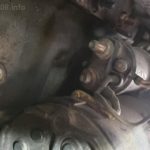
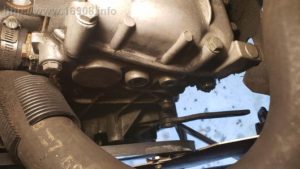
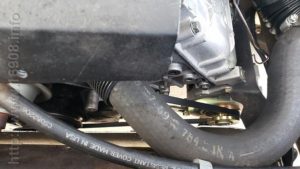
The oil filter limits access and removal of the starter. Time for an oil change, which is good because I haven’t changed the oil since 2016?!?! Anyway, the starter is relatively easy to remove. It bolts to the bellhousing with three 13mm bolts. After disconnecting the wiring, I unbolted it from the bellhousing. With some assistance, and some pinched fingers on my helper, the starter was out. Here it is with the new starter:


Pics courtesy of Tom S

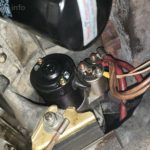
The stock wiring setup has three positive cables terminating on two positive posts. The starter solenoid had two wires bundled together onto a terminal, and another wire connected with a bullet connector:

I stacked all the positive cables onto one positive post. All the solenoid wires can be connected and terminated at the small post. I was able to crimp them all together with a ring terminal:

The car started on the first try. The new starter makes a fun “WHEEE” noise.
This is my last oil filter from a 6-pack I purchased with SpecialTAuto.com in 2008. SpecialTAuto’s owner passed away in 2019. Rest in Peace, Mr. Hervey.

Current Mileage: 35,699
That’s it for the 2021 driving season. I probably won’t have the car out of the garage until 2022.

Costs:

Item Purchase Date Vendor

Quantity

Cost

Shipping

Tax

Total

Castrol 20-w50 – 1 Quart

9/24/2021

Walmart

2

$4.94

$0.00

$0.79

$10.67

Castrol 20W-50 – 5 Quarts

5/21/2018

Amazon.com

1

$18.47

$0.00

$0.82

$19.29

Bosch Oil Filter

5/9/2008

SpecialTAuto.com

1

$4.99

?

$0.00

$4.99

1991 Eagle Premier Starter

9/24/2021

O’Reilly Auto Parts

1

$91.99

$7.02

$10.56

$102.55

1991 Eagle Premier Starter – Core Charge

9/24/2021

O’Reilly Auto Parts

1

$40.00

$0.00

$0.00

$40.00

Total:

$177.50


Time Machine Costume

I decided to enter my car as an exhibit at a local Halloween themed event. It was time to build a time machine “costume” for the car. This is in no way meant to be screen accurate. Here’s my goals:

  1. 100% removable, and non-destructive. No drilling or cutting the stainless, fascias, fiberglass underbody, or the wiring harness. No removing the rear windows.
  2. Exterior only. Sorry, no time circuits. No flux capacitor.
  3. Keep the costs around $100
  4. Have fun!

Let’s get started.

Base & Vents
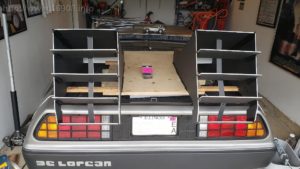
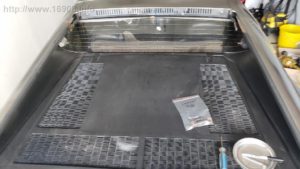
First, I had to remove the sunshade, or the louvers. I had been wanting to repair a crack in it, and re-paint it. Maybe this will jumpstart that project. Remove, bag, and tag the bolts:

I bought an ½ inch sheet of MDF several years ago for a subwoofer project that never happened. I couldn’t find the receipt, so the 2021 price is listed below. The base only sits on the engine cover, it is not fastened down. This is intended for display only, and not for driving.

I use a thin piece or carpet, or mat I purchased for $1 or $2 to protect my engine cover. I used some other scrap wood to start building the base of the vents.

I could have used wood or metal to make the vents, but I opted to use foam core for ease and low cost. Five sheets cost me a total of $5! With a lot of measuring, I began to create the vents:
 

I used carpet tacks to hold them together, then silicone to glue them. It didn’t work well, but the price was right:

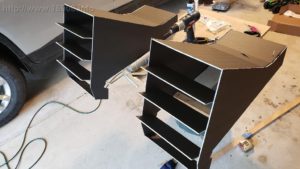
I first used a tube of silicone that was several years old. It wouldn’t set up, and turned into an oily, gooey mess. After wiping most of it away, I used a new tube:

Finally, I tried to make them water resistant with some black undercoating. This, unfortunately, made the foam core wrinkle. Oh well:

Mr. Fusion
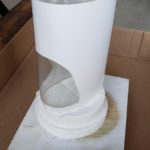
After some searching, I found I already had the perfect plastic containers to make the Home Energy Reactor:
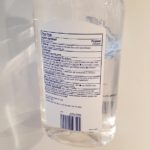
  

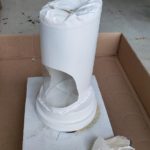
After removing the label on the hand sanitizer, cleaning of the label residue with Goo Gone, and cutting it apart:
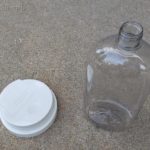
Hot glue it together, tape off the window area, and paint:
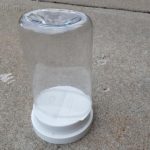
I found the logo online, and printed it on some clear labels:

Costs: $0!

Reactor
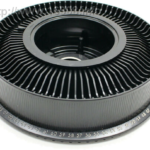
I found a slide carousel for $2, and a plastic container for $1. I painted them black:
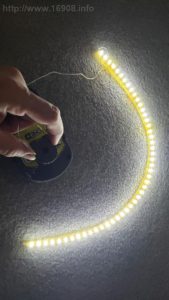
I had an unused 18 inch flexible LED strip. I bought it several years ago on eBay, but I can’t find the order… maybe $4? The reactor will now glow:
I connected Mr. Fusion with two screws, and a SATA cable. The cable is a cheap hinge, since I ran out of time to find an actual hinge. With some black spray paint and some wood screws, it all came together:

Costs: Roughly $7

Wormhole Emitter
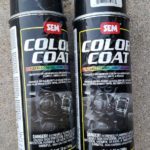
Scrap 1×4 wood, wood screws, silver spray paint, and empty spray paint cans.
 

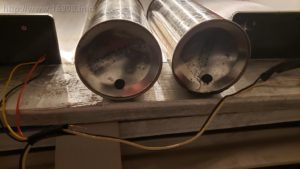
I had some LED lights I originally purchased several years ago for my engine compartment, but they were too cheap to use. I finally found the perfect use for them. Speaker wire and electrical tape connects them together:
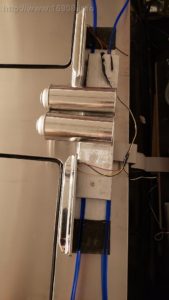
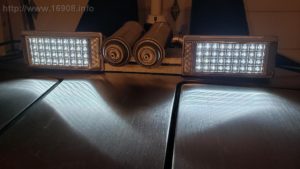
Side mounted electrical boxes and wires
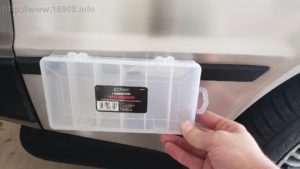
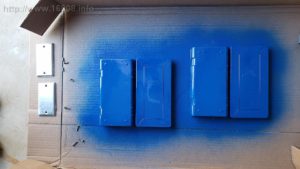
I measured the marker lights, and found some cheap plastic boxes, slightly smaller in length.

I cut off the pegboard hanger, painted them blue, and screwed on some electrical box covers:
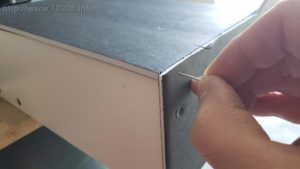
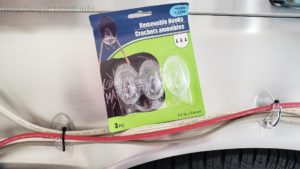
They are mounted to the body using the same mounting holes and screws used for the front marker lights. I have many old printer and SCSI cables I had been saving for this. I also have scrap wires, and cord ducting. Finally, to attach them to the stainless, I used cheap removable hooks with a hole drilled in them for a zip tie:
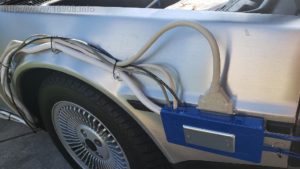
The box makes it easy to install, and add or remove components:

Miscellaneous capacitors, tanks, hoses, etc
There’s nothing special about any of these. It’s mainly leftover parts from the car that have been replaced, scrap materials from home improvement projects, and other junk.

This PVC pipe also doubles as a carrying handle:

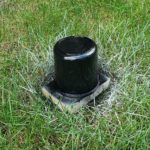
This empty container is my janitrol tank:
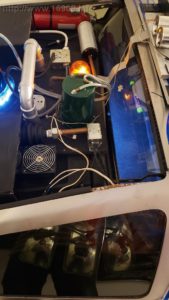
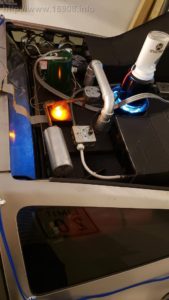
Delorean fuel hoses, a Delorean CV Boot, Delorean headlights, electrical boxes, BX wire, household copper pipe, an empty food container, a 220 electrical whip and outlet, a red light that I retrofitted with an LED, a PC IDE ribbon cable, a toilet tank hose, spark plug wires, and a fire extinguisher:
Flux bands
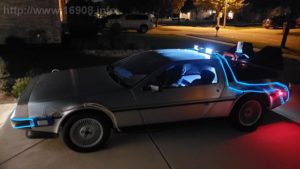
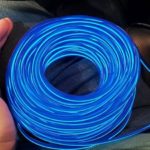
This would be the most expensive part of the project. Since it would be displayed at night, having working flux bands was essential. I opted for blue, as they appear in the movie. Note: the actual color used in the movie was white, but it appeared blue on film. After measuring the car, I found a 65 foot strip on eBay that should be perfect:

I attached them to the stainless using adhesive hooks, with a hole drilled in them, and a zip tie. I should have used the removable kind of adhesive hooks. To make them easy to remove, I first stuck the adhesive to felt to pick up some fibers and make it less tacky:

I kept the 65 foot strand as one strand, and concealed some of it in cord duct.

On the front and rear facias, I opted for painters tape:

OUTATIME license plate
I found the image online, printed it on some photo paper, and used painters tape to stick it over my real plate at the event. Cost to me: $0.

I’ve got around 40 hours into the project, including this blog post! Several people helped me on this project, and I could not have done this without them.
It was fun to build, and the car got some great reactions at the event. Unfortunately, the car narrowly missed winning an award. Maybe I’ll enter it again in a few years.

I intend to improve upon this “time machine costume” over time. Other than coming in over-budget, I accomplished my goals.

Final Pictures
 

Materials On Hand:
White, Gloss Black, Green, Blue Spray Paint
Masking Tape, painters tape
Hand Sanitizer refill bottle
White bottle top
Avery clear printable stickers
Hot Glue
IDE disk ribbon cable
1×4 wood
Black Zip ties
220 Electrical whip
220 Electrical outlet
Electrical boxes
1/2 copper plumbing
3/4 copper plumbing from hot water heater install (The water heater burst open on 10/22/2015, BTTF 2 day!)
Delorean CV boot
Delorean KJet fuel hoses (stock)
Delorean headlights (stock)
White 1/2 inch split cord duct
Black 1 inch cord duct
Parallel Printer cables
SCSI cables
Romex wire
Telephone wire
8 Gauge Electrical wire
Spark plug wires
6 inch PC fan
1-1/2 PVC pipe
1-1/2 PVC Couplers
Red light
Speaker wire
Small screws and bolts
Drywall or wood Screws
Kodak Photo Paper

Final Costs:

Mini Project Purchase Vendor Unit Cost Quantity Shipping Tax Total
Flux Bands              
  65 Feet – Welted Neon LED Light Glow EL Wire eBay

$41.25

1

$0.00

$3.20

$44.45

  Removable hooks – 4 Pack Dollar Tree

$1.00

1


$0.06

$1.06

  Self Adhesive Hooks – 6 x 2in Dollar Tree

$1.00

4


$0.25

$4.25

  Clear Cable ties – 60 pieces Dollar Tree

$1.00

1


$0.06

$1.06

  Adhesive Hooks Dollar Tree

$1.00

3


$0.19

$3.19

Reactor    


  Slide Carousel Goodwill

$1.99

1


$0.15

$2.14

  Food container Dollar Tree

$1.00

1


$0.06

$1.06

  Flexible LED light eBay

$4.00


$4.00

Wormhole Emitter    


  36 LED Silver Dome Light eBay

$7.18

2

$3.40

$1.11

$18.87

Side electrical boxes and wires    


  Electrical Box cover Home Depot

$0.63

2


$0.10

$1.36

  6-Compartment Small Parts Organizer Menards

$1.99

2


$0.34

$4.32

  Removable hooks – 3 Pack Dollar Tree

$1.00

3


$0.19

$3.19

Base & Vents    


  1/2in MDF Panel 2×4 Menards

$6.76

1


$0.57

$7.33

  2×3 carpet mat Menards

$1.99

1


$0.17

$2.16

  Black Foam Core Dollar Tree

$5.00

5


$1.56

$6.56

  Utility Knifes Dollar Tree

$1.00

1


$0.06

$1.06

  Carpet Tacks Menards

$2.29

1


$0.19

$2.48

  Black Silicone Menards

$3.97

1


$0.34

$4.31

  1-1/2 PVC Bushings Home Depot

$1.57

2


$0.24

$3.38

  1-1/2 PVC Elbow Home Depot

$0.94

2


$0.15

$2.03

  Flat Black Spray Paint Home Depot

$1.48

1


$0.11

$1.59

  Rubberized Undercoating Home Depot

$5.48

1


$0.42

$5.90


Total

$125.77

New Alternator

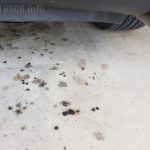
My alternator has been leaking a black gooey substance, and staining my garage floor for years:

Recently, my car has had an un-diagnosed electrical gremlin, causing the car to need periodic jump starts. I also needed to replace the alternator belt, so I decided it was time to replace the alternator.

The popular alternator to retrofit into the Delorean is the GM Delco-Remy CS130, and the popular car to cross reference is a 1991-1994 Saturn. I was considering buying one of these alternators from a parts store, with a lifetime warranty. Buying an off-the-shelf CS130 usually means having to swap a serpentine pulley for the V-belt pulleys. A 1/2 inch spacer is needed behind mounting ear. Some bolts need to be changed to mount and tension it correctly. A wiring harness is also needed to plug into the alternator. A new “Saturn” CS130 was near $165, while rebuilt alternators are cheaper.

I was also interested in the “Iceberg” upgrade for the CS130, which adds more cooling fins for the casing. Check out the details here: https://alternatorparts.com/iceberg.html
I wanted to stay away from high amperage output alternators, since they sometimes fail to provide adequate amperage at idle speeds. I’ve read stories of owners having to raise idle speeds since their high-output alternators were failing to charge during city driving.

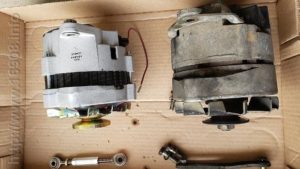
After totaling the cost of new parts-store alternator, pulley, harness, and bolts, I opted to instead buy a 120 amp alternator from DMC Midwest. Their alternator, a version of the CS130, includes a different casing which mounts easily to the Delorean’s alternator bracket without a spacer. It also includes bolts, wiring harness, the correct pully, and a new belt:

Several years ago, someone posted the parts needed for a stainless turnbuckle alternator tensioner. I added the parts to another order I was already purchasing.

The hardest part of removing the old alternator is access to bolts. Also, the AC belt needs to come off when changing the alternator & water pump belt.

I spent a few hours cleaning belt shavings off the engine:

I needed a longer M8 bolt to mount the new tensioner to the timing cover. After purchasing a stainless bolt and mounting everything, I found the tensioner is too long! I cleaned up the stock bracket, and reinstalled it:

Installed, working:

Costs:

Item Purchase Date Vendor

Quantity

Cost

Tax

Total

Notes

Alternator

8/10/2021

DMC Midwest 1

$217.67

$16.87

$234.54

PTFE-Lined Stainless Steel Ball Joint Rod End, 5/16″-24 Right-Hand Male Shank, 5/16″ Ball ID, 1-1/4″ L Thread

3/31/2015

McMaster-Carr 1

$12.14

$0.96

$13.10

unused
PTFE-Lined Stainless Steel Ball Joint Rod End, 5/16″-24 Left-Hand Male Shank, 5/16″ Ball ID, 1-1/4″ L Thread

3/31/2015

McMaster-Carr

1

$12.14

$0.96

$13.10

unused
Easy-Adjust Threaded Connecting Rod, 2″ Overall Length, 5/16″-24 Threaded Female Ends

3/31/2015

McMaster-Carr

1

$17.53

$1.38

$18.91

unused
Type 18-8 Stainless Steel Left-Hand Threaded Thin Hex Nut, 5/16″-24 Thread Size, 1/2″ Wide, 3/16″ High, Packs of 5

3/31/2015

McMaster-Carr

1

$4.20

$0.33

$4.53

unused
Stainless M8 bolt, locknut, washer

9/30/2021

Ace Hardware

1

$6.23

returned
Total:

$284.18

Inspiration

I’ve received a lot of positive comments over the years about this blog. I’ve also seen my blog posts referenced online when Delorean owners are looking for help. Before I started my blog, I regularly reviewed similar blogs for how-to procedures, as well as the materials, vendors and costs associated with projects. I thought I would reference some of the other blogs that inspired me, and still use regularly:

http://www.projectvixen.com – I checked this blog continuously in the early 2000s. Someone buys a disassembled Delorean, and documents the experience, and costs of resurrecting the car.

http://www.1561project.com – Another blog about resurrecting a neglected Delorean, and the costs associated with the project.

http://www.noroads.com/delorean/ – Another great Delorean maintenance blog with tons of pictures

Delorean 40th Anniversary Bash

The Delorean 40th Birthday Bash & DCS Lite & Delorean Midwest Open House was held August 12-15th in Crystal Lake Illinois. I attended several of the speaking events. I also got to meet John Delorean’s son.

I had to return home a few times during the show, so I unfortunately missed some speakers and events. On Saturday, I finally drove my Delorean to the show. My car, second from the left:

A crowd near my car:

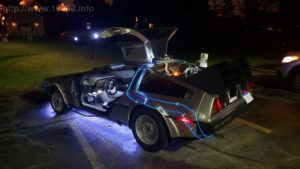
Saturday night, my car with the blue-ish underglow:

Illinois License Plate Renewal Problems

I hadn’t driven my car much due to the ongoing pandemic, which started around March of 2020. My license plate renewal was up in April of 2020, which I let lapse. Ongoing maintenance was keeping the car off the road. This year, in March of 2021, I finally renewed:

3/4/2021

State of Illinois Renewal Fee :

$164.00

3/4/2021

Payment Processor Fee :

$3.69

3/4/2021

Total Fee :

$167.69

That’s a $50 increase from previous years, but oh well. Anyway, I received my renewal sticker, and was horrified to see it renewed for the period of April 2020 to April 2021! I just paid $167 for about a month of driving! After some research, I concluded I would not be able to get a refund. The state also sent me brand new plates with newer styling. So I mounted them, and began driving the car again.

For my next renewal, I visited the Secretary of State office to attempt a renewal from July of 2021 to July of 2022. The office explained it wasn’t possible to renew for the desired period until it had lapsed over two years. I had the idea to switch from a standard license plate to an “Expanded-Use Antique License Plate.” The rules state:
“Vehicles displaying these plates during the months of January-March and November-December may only be driven to and from an antique auto show or exhibition, service station or demonstration.
Vehicles displaying these plates during the months of April-October may be driven on the highways without being subject to the restrictions of a standard antique vehicle plate.”

I don’t drive the car much between November and March, and a lower priced plate and renewal fee was appealing. I was also able to start a new renewal period. I chose to use off-the-shelf generic plates, instead of the vanity plates I’ve had since 2007. For the second time this year, I mounted my new plates.

7/1/2021

State of Illinois Expanded-Use Antique license plates:

$51.00

7/1/2021

Fees :

$1.15

7/1/2021

Total Fee :

$52.15

Transmission Leaks

For as long as I’ve owned the car, the automatic transmission leaks. A lot. I’ve previously tried a silicone gasket on the pan, which didn’t work because the pan wasn’t perfectly flat, or the bolts were over torqued. Either way, I decided to try my luck at fixing the leaks again.

The leaks are everywhere:

March 28th, 2021
Here’s how much it leaks in 20 hours:

I removed the pan, disconnected all the wiring connections, and started cleaning all the surfaces:

I bought some steel brackets and clamped them in a vice. This was used as a flat surface to hammer the pan as flat as possible.

I brought my used O rings to the hardware store, and after comparing new ones, I purchased an assortment:

After test fitting a few, I used the tightest fitting O rings. That should work, right?

The coolant pipes were in the way of the transmission pan. I drained the coolant and disconnected the pipes.

I scraped off the old RTV with plastic knives, and my fingernails to avoid gouging the transmission casing. I then cleaned the surfaces with lacquer thinner. I purchased Permatex Automatics Transmission RTV Gasket Maker. I resealed the dipstick tube with the new RTV. I used two beads of RTV around the pan, without a gasket. This should work, right?

April 27th:
It wasn’t easy, but I got the pan on, and torqued the bolts to spec with my inch-LB torque wrench. I gave the RTV several days to cure.

May 5th:
Before I even put any fluid in the trans, it’s leaking around the casing. I don’t understand this thing. I know the torque converter stores fluid, which would probably drip into the pan. But my transmission is sweating ATF. Not good…

Then it was time to fill and bleed the coolant and put the car on the ground.

May 14th:
I was now able to start the car, and warm it up. After checking the ATF fluid level several times, I finally found the correct level, and was able to get the car in gear. Time to drive! I haven’t driven in about a year or more!

My 5 mile test drive went great! The car shifted smoothly, and I didn’t see any fluid on the ground in my rearview mirror. I returned to my garage to inspect:

I’m glad I didn’t drive far. I was defeated. I considered trailering the car to DMC-MW. I solicited advice.

May 29th:
After a several days, I went back into the garage to inspect. After a little bit of prying, the pan came off with most of the RTV. Barely any RTV stuck to the transmission:

In the past year I’ve spent more on ATF than on gas for the Delorean.

I decided to try again. I purchased a nitrile bonded cork gasket – i.e. a modern version of the original cork type and much more flexible. It’s supposed to seal very well. I also a high-tack sealant to help the gasket stick to the pan, but opted not to use it. Then I waited too long to return the sealant, so it’s mine now!

Someone suggested using Permatex Anerobic Sealant. After searching stores, I ended up with two different sized tubes. Once again, I waited too long to return one. Anyway, I used the sealant around the heads of the pan bolts.

I caught some of the transmission fluid in a clean container, filtered it with a shop towel, and reused it:

Torqued the pan bolts. Check the fluid level. Time to drive! This should work, right?

June 3rd:
The test drive went fine. Except I still had a decent leak:

June 12th:
After a few more days, I once again raised the car, shimmied underneath, and inspected. In my tight working space, I’d mistakenly caught a zip tie between the pan and transmission:

June 16th:
After loosening a few bolts, I pulled the zip tie out, and retorqued the bolts.

I’m done trying to fix the leak for this year. I’ll try again someday. Until then, I’ll keep emptying my drain pan on the floor of my garage.

Costs:

Item Purchase Date Vendor

Quantity

Cost

Shipping

Tax

Total

Valvoline Automatic Transmission Fluid – 1 Gallon

1/27/1900

Meijer

1

27.96

0.00

$2.38

$30.34

Permatex ATF RTV 3oz

4/2/2021

Advance Auto Parts

1

9.49

0.00

$0.76

$10.25

Miscellanious O rings

4/2/2021

Ace Hardware

7?

10.00


$10.00

Automatic Transmission Pan Gasket

5/22/2021

DeloreanGo.com

1

22.99

24.99

$0.00

$47.98

Permatex Anerobix Sealant .20oz

5/30/2021

O’reily Auto Parts


6.99


$0.56

$7.55

Permatex Anerobix Sealant 1.69oz

5/31/2021

Advance Auto Parts


16.49


$1.03

$17.05

Permatex High Tack Sealant 4oz

6/1/2021

Advance Auto Parts

1

10.49


$0.84

$11.33

Valvoline Automatic Transmission Fluid – 1 Quart

?

Meijer

1

6.19

0.00

$0.53

$6.72

Prestone Predilluted Coolant

?

Meijer

1

10.19

0.00

$0.87

$11.06

Steel Brackets

?

Menards

2

?

?

?

$7.00

Total:

$159.27

Cleaning the air filter

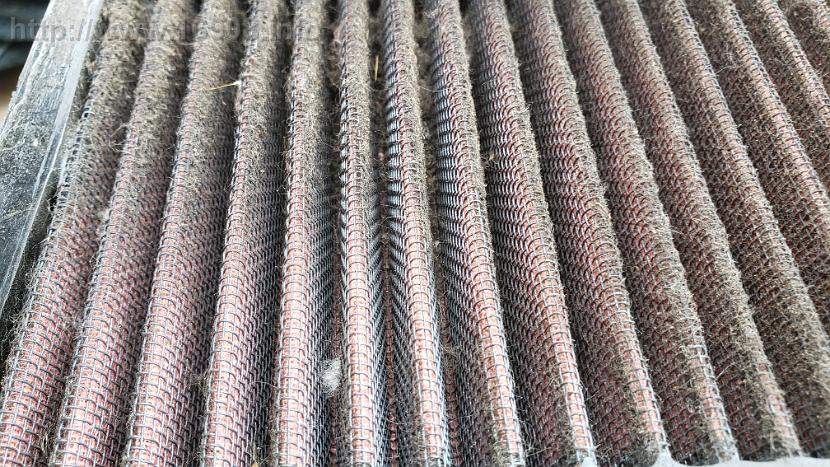
I installed the K&N air filter in 2007, and I can’t remember ever cleaning it. It has only been a few thousand miles, but after 14 years, I figured it was time. I had bought the cleaning kit around the same time, and never included it in the blog.

Following all the instructions, a lot of crud did get cleaned out of the filter!

Costs:

K&N Air Filter Recharger and Cleaning Kit – 16.99