Axle Rebuild #3

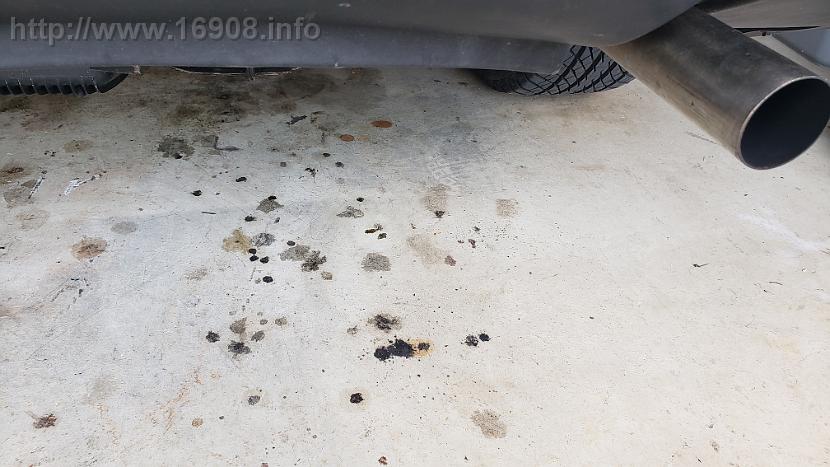
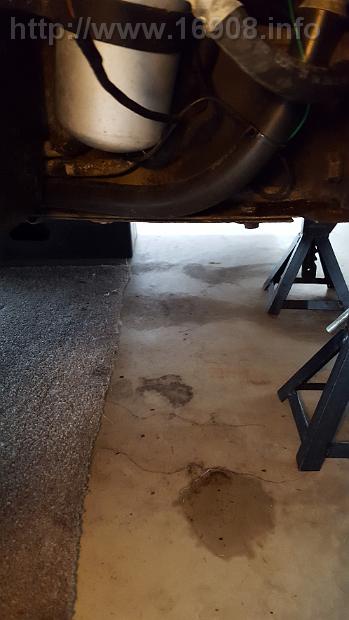
One of my CV boots tore open, and threw grease everywhere. Again.

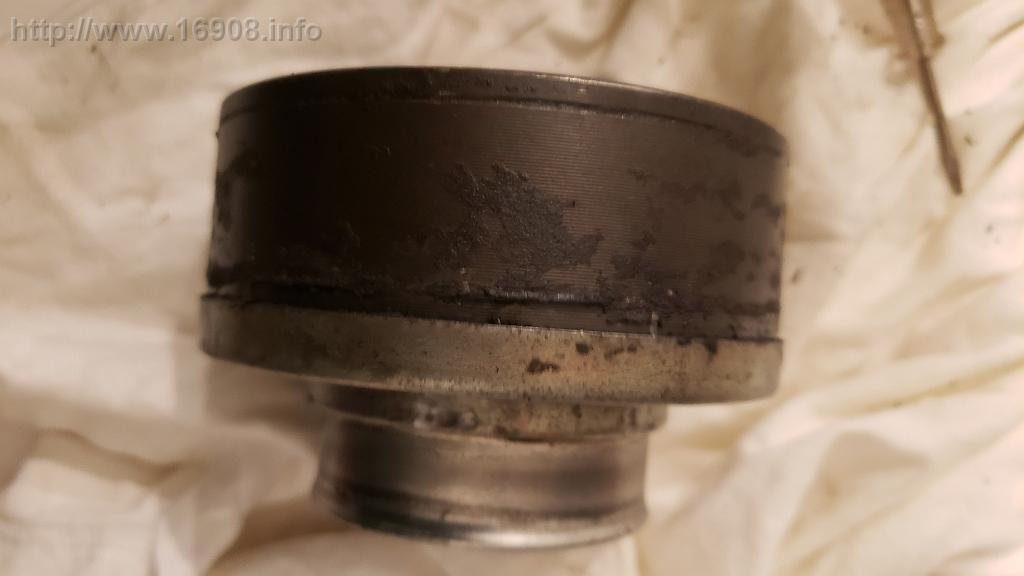
The stock axle flanges are thin, stamped metal. They’re so thin, they require “lock plates” under the bolts, probably so the flange doesn’t twist and tear apart. The flange was damaged by a previous owner, and no longer functional. Every time I put a CV boot on it, it would slide out of position. I previously tried using multiple clamps to keep it in place, but the clamps end up cutting into the boot.

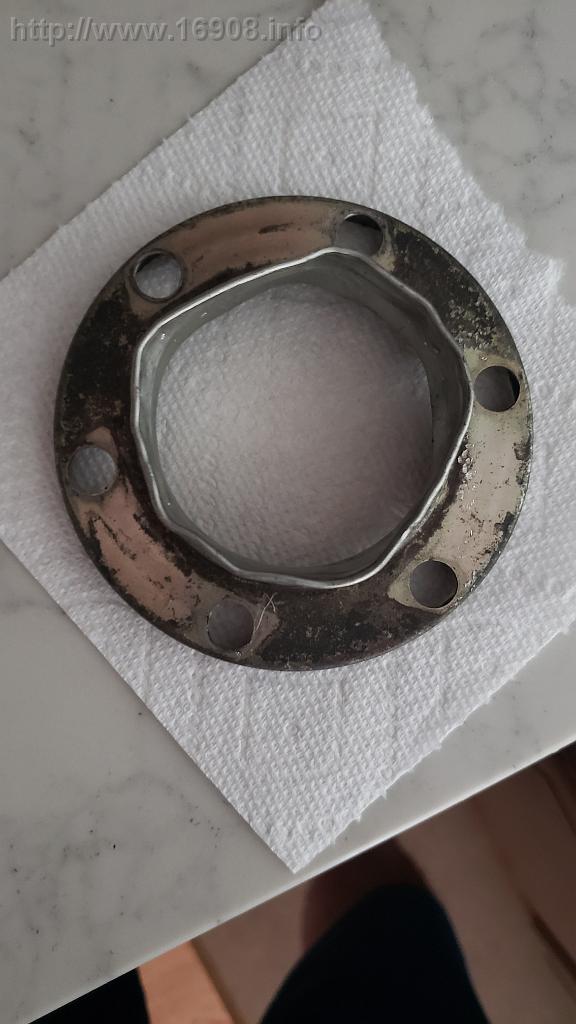
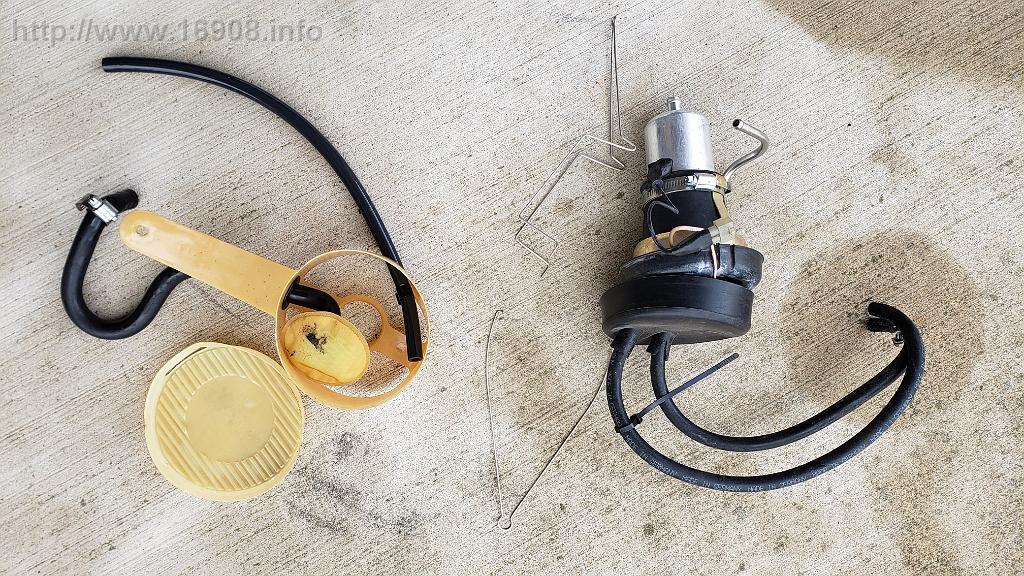
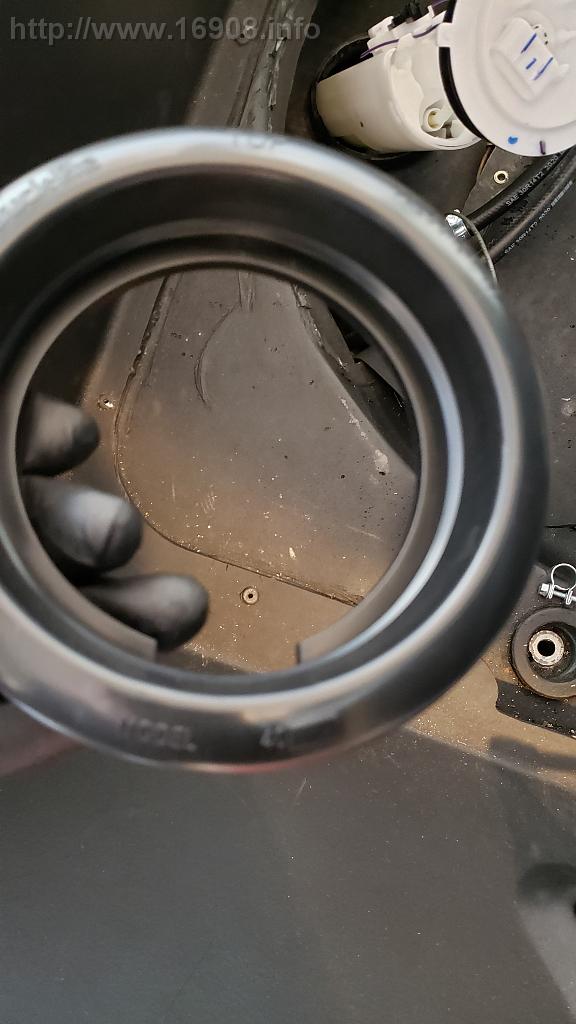
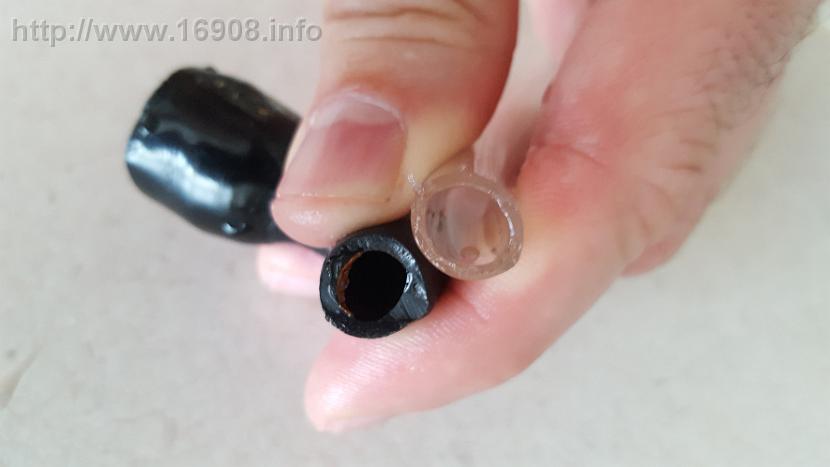
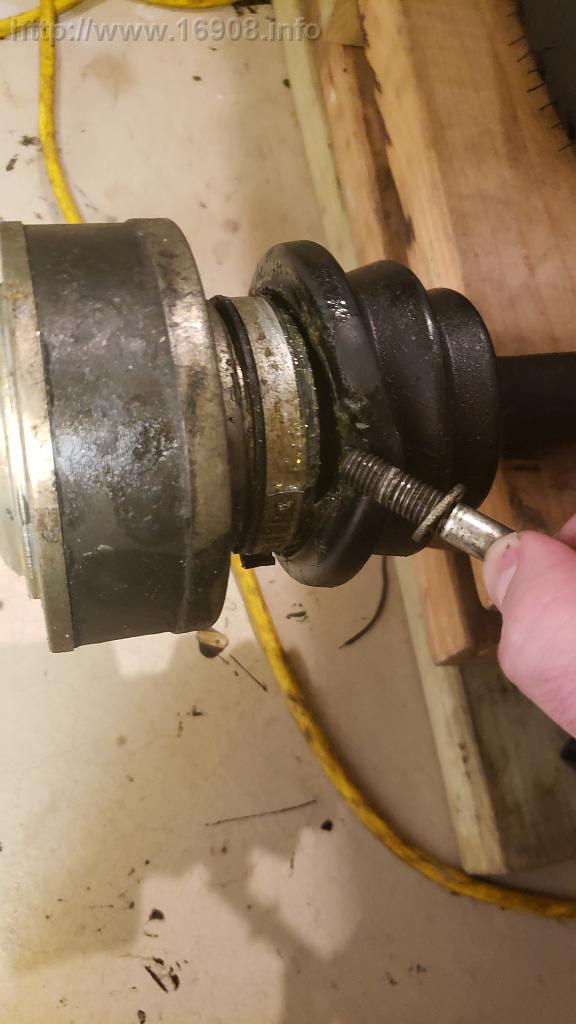
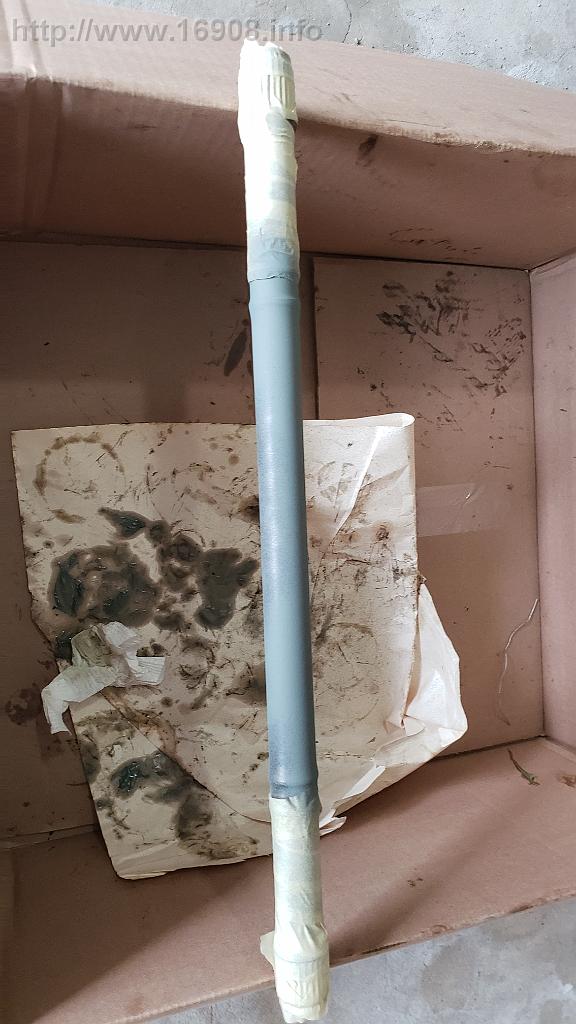
NOS flanges are not available. I tried to repair my flange with a tailpipe expander:

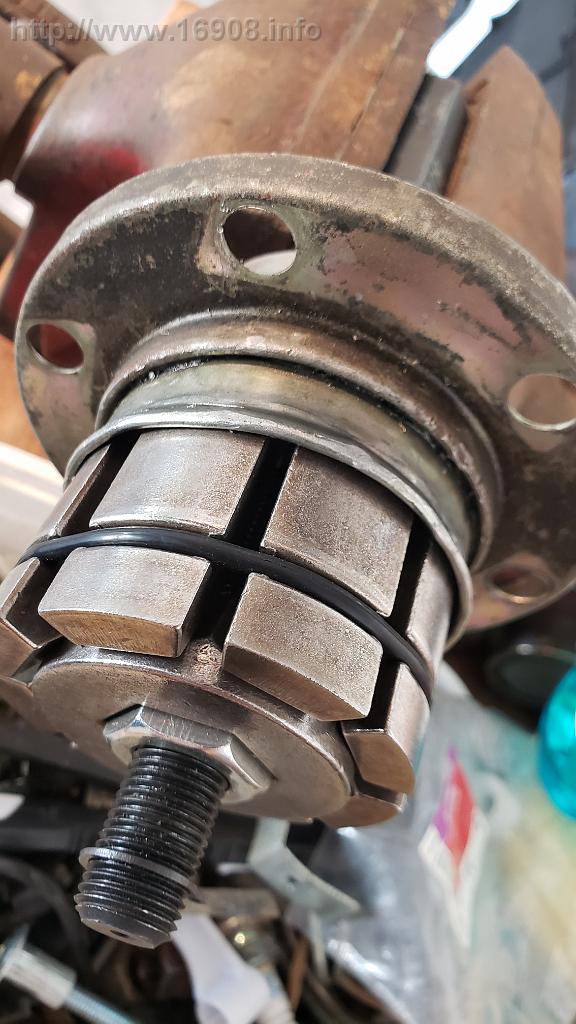
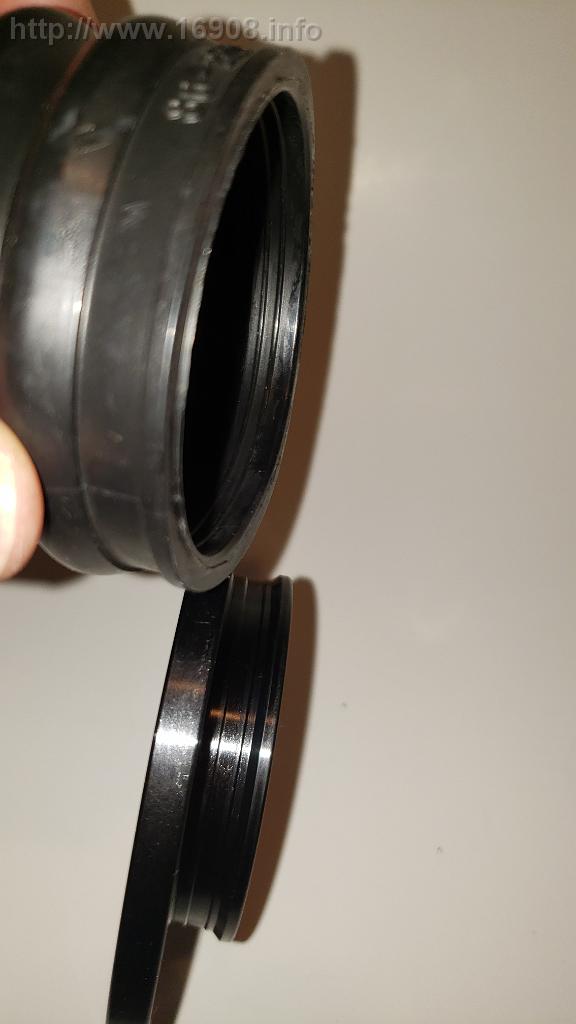
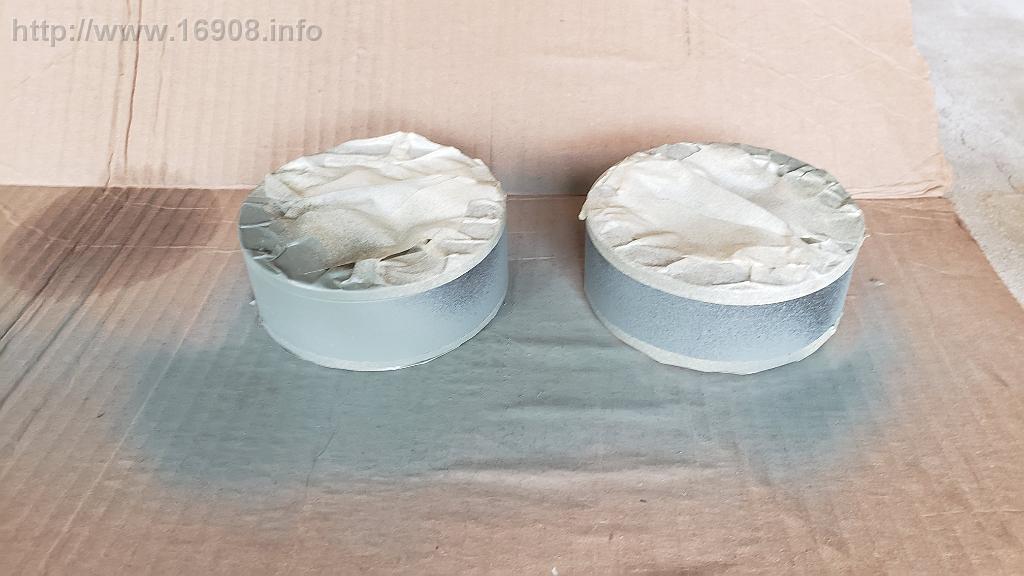
And, while now rounded out perfectly, CV boots still slid right off. It needs to be replaced. I set out to buy a new flange and boot. The axles are Porsche parts, so this shouldn’t be hard, right? I was warned not to buy the wrong size. I researched, and bought a Porsche 911 axle flange with boot, and another spare boot.

Compared to the stock flange, those were the wrong size. Too small. I didn’t need the Porsche 911, I needed the Porsche 930. Oops. I sent those back.

Next, I ordered some Porsche 930 parts, from different vendors.

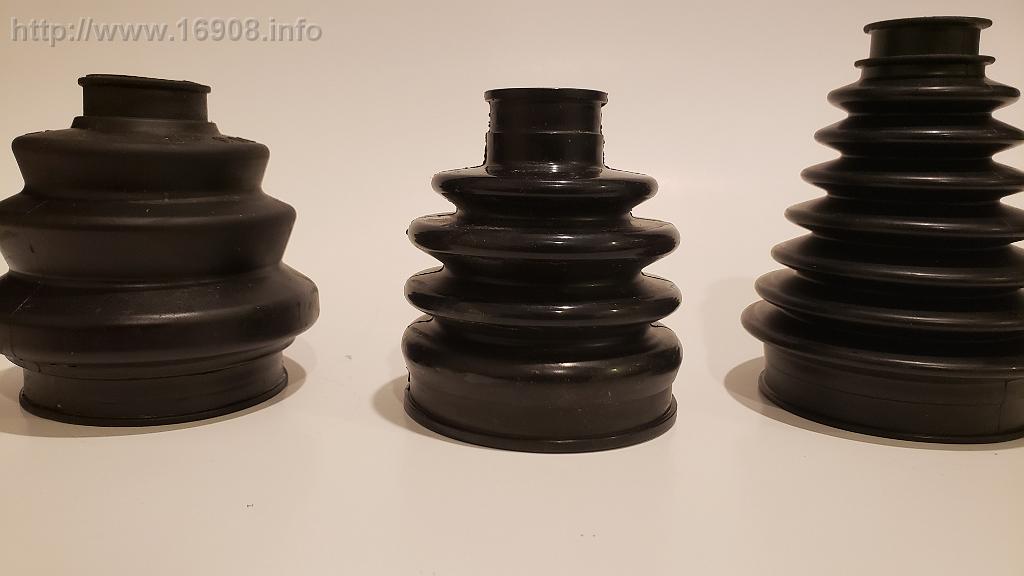
Nothing fit the stock flange, and nothing fit together correctly since all the parts were from different vendors. I returned everything again. I finally settled on one vendor, kartek.com, for a matching flange and boot. I also picked up their stainless clamps. While their boot is a tough fit over the axle shaft, the boot works well.

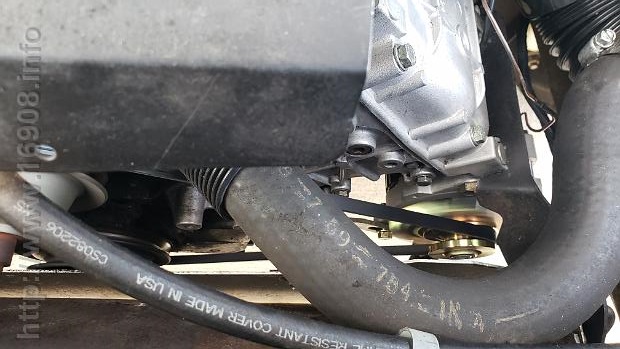
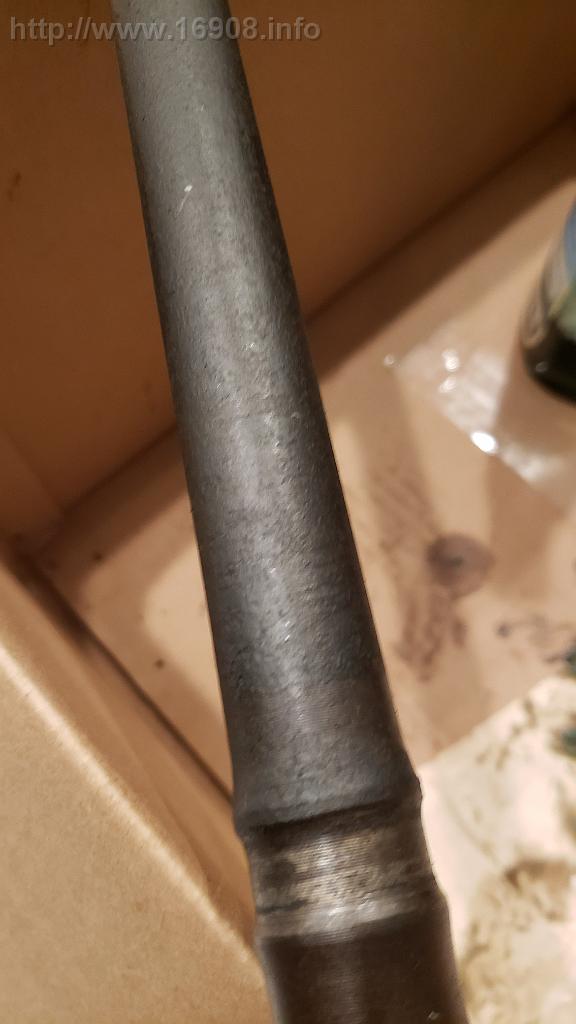
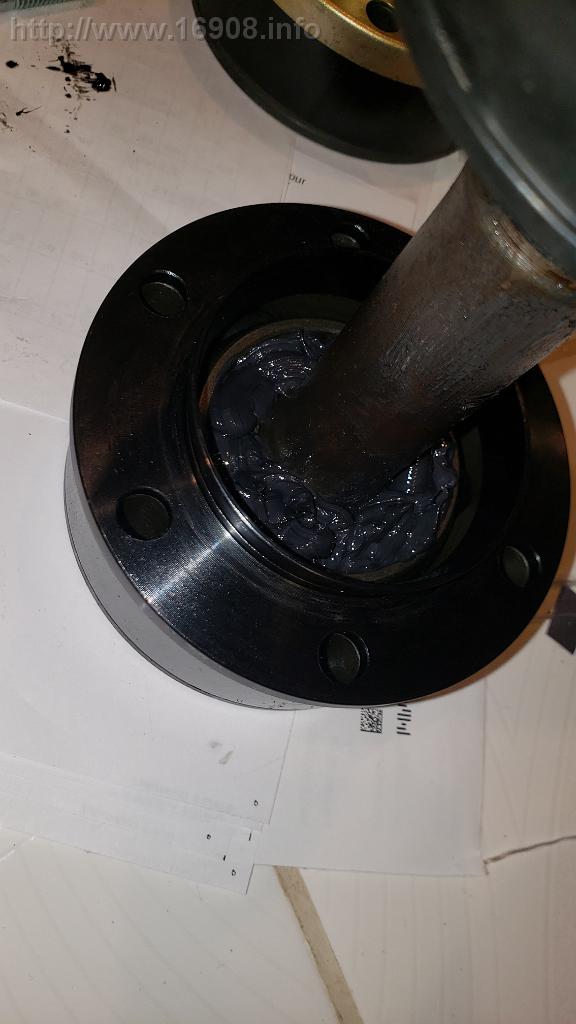
It was finally time to rebuild the axle. First, I used a wire brush to clean off all the late ’83 undercoating:

I primed the axles parts:

…and used Rustoleum Gloss Black on everything:

I painted the stock flanges separately, before abandoning the damaged flange.

I purchased many zip ties and clamp sets, and settled on a combination of everything:

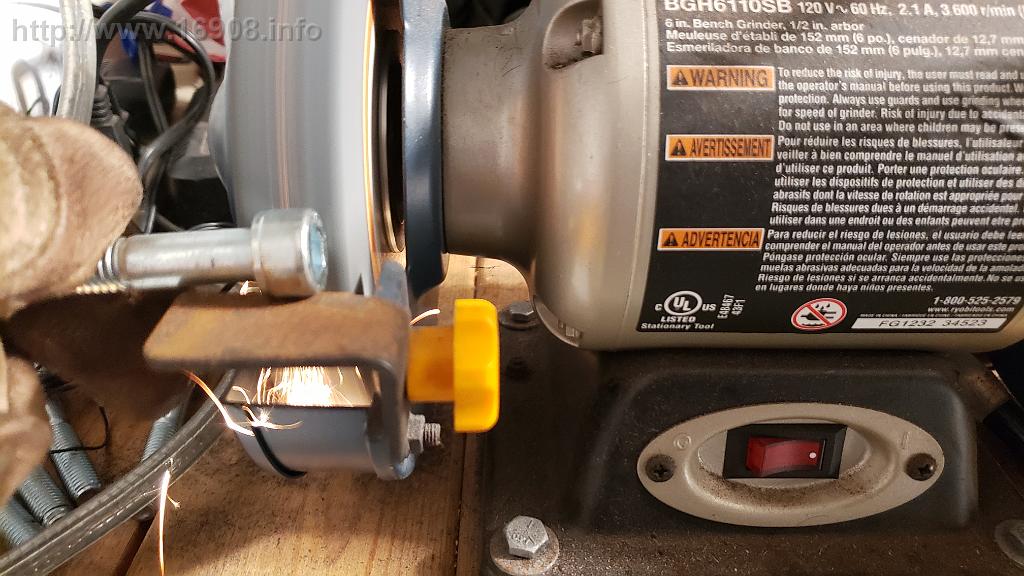
I purchased allen head bolts through DeloreanGo with another order. Later, I decided to remove, paint, and reinstall the other axle. This time I purchased bolts from McMaster-Carr to replace the stock hex bolts. They were only sold in packs of 10, and I needed 12 per axle, which meant I would still need a few stock bolts. And since the new flange is thicker steel, I would not need lock plates. To my horror, the new flange still interfered with the socket bolts! I ended up grinding down the bolts, then painting the heads:

Installed:

I probably could have spent about $15 on a CV Boot kit from a Delorean Vendor, but not being able to repair or replace my stock axle flange sent me down this rabbit hole.

Costs:

Item Purchase Date Vendor

Quantity

Cost

Shipping

Tax

Return Shipping Total
GKN Loebro 300480 Rear Inner Outer CV Axle Boot with Flange For Porsche 911 912

4/28/2022

eBay

1

37.95

0.00

3.76

12.35

12.35

For Porsche 911 Boxster CV Joint Boot OEM GKN LOEBRO 928 332 293 02

4/28/2022

eBay

1

10.59

0.00

Porsche 930 Cv Joint Chromoly Flange – Use With Mini Axle Boot AC501105

5/19/2022

eBay

1

38.95

0.00

3.02

4.05

4.05

Porsche 930 Cv Joint Chromoly Flange – Use With Large Axle Boot AC501110

5/13/2022

eBay

1

32.95

0.00

2.55

4.75

4.75

Irs Cv Boot, for 930 Cv, Off-Road Version, Sold Each, Dunebuggy & VW

5/27/2022

eBay

1

13.99

0.00

1.08

3.90

3.90

OEMTOOLS 2-1/8 in. to 3-7/16 in. Tailpipe Expander – Tool Rental

5/25/2022

AutoZone

1

40.00


0.00

Upgraded M10 Driveshaft Bolt

4/18/2022

DeloreanGo.com

12

1.50

24.99

0.00

0.00

53.09

M10 Spring Washer

4/28/2022

DeloreanGo.com

12

0.30

Stainless CV Boot Clamp Pair

4/28/2022

DeloreanGo.com

2

3.25

Porsche 930 Chromoly Single Axle Boot Flange For 86-2227 or 86-9320 CV Axle Boots 1/2″ Flange Lip – #KTK8693020

5/28/2022

Kartek.com

1

35.99

16.64


0.00

66.71

EMPI 86-2227 Porsche 930 Small Rubber CV Axle Boot For KTK8693020 Or KTK930SDBF Double Boot Flanges – #MRB862227

5/28/2022

Kartek.com

1

7.50

 
Norma 60mm To 80mm Diameter Narrow CV Joint Axle Boot Or Hose Clamps 9mm 23/64″ Wide – #HAR79

5/28/2022

Kartek.com

2

3.29

0.00

Dorman CV joint Grease

5/18/2022

Rockauto.com

2

4.78

14.98

1.57


11.13

Zinc-Plated Alloy Steel Socket Head Screw M10 x 1.5 mm Thread, 60 mm Long – Pack of 10

7/17/2022

McMaster-Carr

1

9.74

8.17

0.78


18.69

Karoka 12″ Heavy Duty Zip Ties

7/17/2022

Amazon.com

1

9.99

0.00

0.77


10.76

Total

$185.43

New Fuel Pump

The fuel pump I purchased roughly 10 years ago was working, however there are now better alternatives. The stock fuel pump setup has a very complicated baffle, pickup hose, and zinc plated steel parts. I previously removed rusted parts and had them replaced. The pickup hose can easily collapse, especially if it’s aged, or slightly twisted. Collapsed pickup hoses will cause the pump to fail, and the car to stall. In my experience, when driving for long periods of time in 90+ degree weather, the pump will start making noise. Unburned fuel returns to the tank at higher temperatures, and the temperature in the tank can quickly elevate. The pump will start moaning loudly, which is unsettling since it’s not clear if it’s about to fail. A workaround is to fill up with fresh gas, which is stored underground at around 60 degrees, and will cool down the pump. Once driving is resumed, the problem will quickly resurface – ask me how I know this!

I had previously replaced my moaning fuel pump because I thought it was about to fail, only to have the new pump behave the same way. I wanted to use one of the newer GM fuel pumps in my car, and find the needed parts to retrofit it into the fuel tank. The new pumps are meant for a Chevy Tahoe with a V8, which has enough fuel pressure for the Delorean’s K-Jetronic mechanical fuel injection. I’ve seen the full kits available from vendors, but I wanted to get a lifetime warranty on the pump from a chain auto parts store. I found a fellow Delorean owner who was selling all the parts needed, with installation instructions.

New parts, ready to go. The new pump also has an integrated fuel level sender, which I removed. My stock fuel level sender is working correctly, which I opted to keep, and eases installation. I bought some long nitrile chemical resistant gloves, but ended up not needing them because my fuel level was low, and regular nitrile gloves were sufficient:

Cover removed:

It’s hard to wiggle the fuel hoses off the hard lines, so I ended up cutting them off:

Removing the old pump and baffle setup:

Look at all that crud on the pickup screen:

Included is a flexible ring to clamp down at the top of the tank. The ring has wording on it, including “TOP.” It took me a few minutes to figure out it actually mounted upside-down:

There’s a little locator tab needed for the Chevy Tahoe setup. If you choose to keep it, you need to cut the mounting ring to allow for the tab. I opted to break the tab off. There’s a possibility that I’ve voided the warranty. If I ever use the warranty, I’ll say it broke off during removal:

All done:

I’ve got about 50 miles on the new pump so far. It’s worked flawlessly, and it’s quiet! Having done this job once, I could probably do it again in about an hour. I’ve got the broken-off tab, fuel level arm, and receipt saved if I ever need to use the warranty.

Costs:

Item Purchase Date Vendor

Quantity

Cost

Shipping

Tax

Total

Fuel Pump Installation Parts

9/30/2021

88 Miles

1

$75.00

$0.00

$0.00

$75.00

MU1777 Fuel Pump

11/15/2021

Autozone

1

$227.99

$0.00

$14.25

$242.24


Total:

$317.24

New Starter, Oil Change

While continuing to troubleshoot my car’s electrical issues, I decided to replace the starter. The car refused to start a few times earlier this year, probably due to a weak battery, and/or weak poor connections. This would give me an opportunity to clean and tighten the starter wiring, along with upgrade to a lower amperage starter. The new starter also weighs several pounds less than the stock Paris-Rhone starter. I purchased a compatible, rebuilt starter with a lifetime warranty. I would have preferred new over rebuilt, but these starters aren’t being manufactured anymore. Unfortunately, the core charge of $40 would be non-refundable, since the new starter is not the same unit as the stock Paris-Rhone starter. I also wanted to keep the stock starter for any future problems or projects.

I was able to complete at my club’s local tech session, on a car lift! I unfortunately didn’t get many pictures, since time was running short for my car’s work.

The oil filter limits access and removal of the starter. Time for an oil change, which is good because I haven’t changed the oil since 2016?!?! Anyway, the starter is relatively easy to remove. It bolts to the bellhousing with three 13mm bolts. After disconnecting the wiring, I unbolted it from the bellhousing. With some assistance, and some pinched fingers on my helper, the starter was out. Here it is with the new starter:


Pics courtesy of Tom S

The stock wiring setup has three positive cables terminating on two positive posts. The starter solenoid had two wires bundled together onto a terminal, and another wire connected with a bullet connector:

I stacked all the positive cables onto one positive post. All the solenoid wires can be connected and terminated at the small post. I was able to crimp them all together with a ring terminal:

The car started on the first try. The new starter makes a fun “WHEEE” noise.
This is my last oil filter from a 6-pack I purchased with SpecialTAuto.com in 2008. SpecialTAuto’s owner passed away in 2019. Rest in Peace, Mr. Hervey.

Current Mileage: 35,699
That’s it for the 2021 driving season. I probably won’t have the car out of the garage until 2022.

Costs:

Item Purchase Date Vendor

Quantity

Cost

Shipping

Tax

Total

Castrol 20-w50 – 1 Quart

9/24/2021

Walmart

2

$4.94

$0.00

$0.79

$10.67

Castrol 20W-50 – 5 Quarts

5/21/2018

Amazon.com

1

$18.47

$0.00

$0.82

$19.29

Bosch Oil Filter

5/9/2008

SpecialTAuto.com

1

$4.99

?

$0.00

$4.99

1991 Eagle Premier Starter

9/24/2021

O’Reilly Auto Parts

1

$91.99

$7.02

$10.56

$102.55

1991 Eagle Premier Starter – Core Charge

9/24/2021

O’Reilly Auto Parts

1

$40.00

$0.00

$0.00

$40.00

Total:

$177.50


New Alternator

My alternator has been leaking a black gooey substance, and staining my garage floor for years:

Recently, my car has had an un-diagnosed electrical gremlin, causing the car to need periodic jump starts. I also needed to replace the alternator belt, so I decided it was time to replace the alternator.

The popular alternator to retrofit into the Delorean is the GM Delco-Remy CS130, and the popular car to cross reference is a 1991-1994 Saturn. I was considering buying one of these alternators from a parts store, with a lifetime warranty. Buying an off-the-shelf CS130 usually means having to swap a serpentine pulley for the V-belt pulleys. A 1/2 inch spacer is needed behind mounting ear. Some bolts need to be changed to mount and tension it correctly. A wiring harness is also needed to plug into the alternator. A new “Saturn” CS130 was near $165, while rebuilt alternators are cheaper.

I was also interested in the “Iceberg” upgrade for the CS130, which adds more cooling fins for the casing. Check out the details here: https://alternatorparts.com/iceberg.html
I wanted to stay away from high amperage output alternators, since they sometimes fail to provide adequate amperage at idle speeds. I’ve read stories of owners having to raise idle speeds since their high-output alternators were failing to charge during city driving.

After totaling the cost of new parts-store alternator, pulley, harness, and bolts, I opted to instead buy a 120 amp alternator from DMC Midwest. Their alternator, a version of the CS130, includes a different casing which mounts easily to the Delorean’s alternator bracket without a spacer. It also includes bolts, wiring harness, the correct pully, and a new belt:

Several years ago, someone posted the parts needed for a stainless turnbuckle alternator tensioner. I added the parts to another order I was already purchasing.

The hardest part of removing the old alternator is access to bolts. Also, the AC belt needs to come off when changing the alternator & water pump belt.

I spent a few hours cleaning belt shavings off the engine:

I needed a longer M8 bolt to mount the new tensioner to the timing cover. After purchasing a stainless bolt and mounting everything, I found the tensioner is too long! I cleaned up the stock bracket, and reinstalled it:

Installed, working:

Costs:

Item Purchase Date Vendor

Quantity

Cost

Tax

Total

Notes

Alternator

8/10/2021

DMC Midwest 1

$217.67

$16.87

$234.54

PTFE-Lined Stainless Steel Ball Joint Rod End, 5/16″-24 Right-Hand Male Shank, 5/16″ Ball ID, 1-1/4″ L Thread

3/31/2015

McMaster-Carr 1

$12.14

$0.96

$13.10

unused
PTFE-Lined Stainless Steel Ball Joint Rod End, 5/16″-24 Left-Hand Male Shank, 5/16″ Ball ID, 1-1/4″ L Thread

3/31/2015

McMaster-Carr

1

$12.14

$0.96

$13.10

unused
Easy-Adjust Threaded Connecting Rod, 2″ Overall Length, 5/16″-24 Threaded Female Ends

3/31/2015

McMaster-Carr

1

$17.53

$1.38

$18.91

unused
Type 18-8 Stainless Steel Left-Hand Threaded Thin Hex Nut, 5/16″-24 Thread Size, 1/2″ Wide, 3/16″ High, Packs of 5

3/31/2015

McMaster-Carr

1

$4.20

$0.33

$4.53

unused
Stainless M8 bolt, locknut, washer

9/30/2021

Ace Hardware

1

$6.23

returned
Total:

$284.18

New Relays, Ground Bus

After suffering another cooling fan failure 2018 due to a bad relay (see my previous post) I decided to buy some new relays, genuine Bosch relays. And, they’re purple!

I also decided I’d had enough of the sloppy-looking fused jumpers in place of the fan fail relay. They’ve previously come loose, and left me without fans. I purchased the Fused Fan Fail relay from DM-eng, which restores the fan fail light functionality, adds fuses, and removes the need for the circuit breaker in the fan circuit. The fan circuit breaker has given me problems before. The aesthetic value is also great!

I also purchased the ground bus from DM-eng, which sends a separate ground wire to the relays. The stock wiring has the relays daisy-chained with questionable wire connections.

Before…
New relays
New Ground Bus
Installing the ground bus
Goodbye to these!
Much better

Costs:

ItemPurchase DateVendorQuantityCost Shipping  Tax  Total 
Fused Fan Fail relay8/11/2019dm-eng.weebly.com1$10.00 $              –   $      –   $    10.00
Front relay bank ground buss8/11/2019dm-eng.weebly.com1$84.00 $              –   $      –   $    84.00
Bosch Mini Changeover Relay8/11/2019amazon.com2$9.09 $              –   $  1.14 $    19.32
 Total  $  113.32

New Transmission Filter, New Pan Gasket, Coolant Flush

Automatic Transmission filters have not been available for many years. The only options were:

  • Find an NOS filter
  • Cut apart a used filter, replace the filter material, and weld or use aluminum tape to seal it back up
  • Don’t use a filter

…until now! One brave individual took up the cause, and found a company to reproduce them! After buying one, two years ago, I finally got around to replacing it. Draining the ATF:

I tried getting the pan off without disturbing the coolant system, but there was no wiggle room. Oh well, the car could use a coolant flush anyway.

Looks like someone used the cut, replace, and weld method on my existing filter:

There was a decent amount of material on the magnet:

Cleaning the pan:

I liked the quality of the new filters so much, I bought two extra:

New filter installed:

I’m interested in getting rid of any ATF leaks, so I bought the silicone transmission pan gasket offered at DPI:

The bolts I had for the transmission pan started to spin while torqueing them. The new gasket is thicker than the previous one. After some panic, purchasing and installing longer bolts solved the problem.

Time to refill the trans:

Bleeding the coolant, and looking for leaks! Ready to be back on the road after 5 months of winter!

It still leaks ATF. It will always leak ATF:

Costs:

Item Purchase Date Vendor

Qty

Unit Cost

Cost

Shipping

Tax

Total

Automatic Transmission Filter

9/15/2015

eBay

1

$ 46.99

$ 46.99

$ 3.74

$ –

$ 50.73

Automatic Transmission Filter

10/30/2015

eBay

2

$ 46.99

$ 93.98

$ 7.48

$ –

$ 101.46

1 Gallon Castrol Dex/Merc ATF

4/18/2018

Adavance Auto

1

$ 21.99

$ 21.99

$ –

$ 1.76

$ 23.75

Silicone Transmission Pan Gasket

3/4/2018

DeloreanIndustries.com

1

$ 24.50

$ 24.50

$ –

$ –

$ 24.50

7mm1.00 x 20mm Zinc Class 8.8 Hex Cap Screw

4/6/2018

Menards

10

$ 0.49

$ 4.90

$ –

$ 0.42

$ 5.32

Prestone 50/50 Coolant

4/18/2018

Walmart

1

$ 8.88

$ 8.88

$ –

$ 0.71

$ 9.59

Total

$ 215.35

One Piece Clear Evaporator Drain

The stock evaporator drain is very prone to clogging with debris. The location makes it also very difficult to clear the clog. It starts in the passenger side of the car, between the evaporator box, and the underbody. It’s a small gap, around 1 inch:
Drain 30 Drain 20

There’s a reducing 90 degree elbow, connected to a short hose that drains into the passenger side front wheel well, right onto the frame:

I previously vacuumed out my cabin air intake, and put a screen over it to keep debris out: https://16908.info/?p=1562

However, my AC drain clogged. I didn’t find this out until a good amount of water built up in my passenger side carpet.

The recommended way to clear the clog is to run some weed-wacker cutting line into the hose, and poke around to free the obstruction. Some people have had luck using a vacuum connected to the drain hose.

I found the hose was loose, and easily pulled off. I’m not sure it was even connected, and getting it reconnected was going to be very difficult with the AC dryer in the way:
Drain 10

The stock elbow can be cut with a thin saw blade, or gently heated and pried off. The saw method could possibly damage the box or nearby wiring. I opted to use the heat gun, and screwdriver to pry it off. Once I got it off, more water drained onto the cabin floor, and some out onto the ground:
Drain 45

Here’s the reducing elbow, all clogged up:
Drain 35Drain 40

I’ve seen mods where spark plug boots, or coil cover boots are used to make an easily detachable piece to drain water. I decided against any kind elbow, or connection in favor of one single piece of tubing.

I had a length of Chemical-Resistant Clear Tygon tubing left over from building a brake fluid pressure bleeder:
Drain 50

I then boiled some water with a kettle, and held it over the steam for a few seconds. Then I shoved a scissors into the tubing, and opened the scissors to stretch the tubing. After a few tries, I was able to finally get the tubing around a 13mm socket:
Drain 55

I also used the steam to work the tubing into curve. The stock elbow is a hard 90 degrees, so this gentle curve should reduce clogging. Here’s the old drain, and the new one:
Drain 60

The tubing has a 1/16″ wall thickness, and is very rigid. The inner diameter is 5/16″ and appears larger than the stock elbow:
Drain 90

Now I worked the tubing into the hole in the underbody, and got it out into the wheel well:
Drain 65

After some twisting, I got it into position, and onto the evaporator drain:
Drain 61

Blowing air through the tube was easy, which confirmed there were no kinks. Now I angled it down, below, and away from the frame. A zip tie secured it:
Drain 70

Whenever I vacuum my interior, I’ll also attach it to the drain hose to suck out any debris which may have found its way into the hose. Hopefully this will keep the drain clog free, and my carpet dry.

To summarize, here’s the benefits of this mod:

  • Clear tubing allows a clog to be seen
  • longer tubing allows water to drain away from the frame, reducing frame rust
  • Eliminates 90 degree elbow, reducing clogs
  • Larger internal diameter tubing reduces possibility of clogs
  • One piece can’t become disconnected in the wheel well
  • Easier to vacuum or snake out debris
  • No need to cut or modify the underbody

Tools:

  • Heat Gun
  • Long flat blade screw driver
  • Scissors
  • 13mm socket
  • Tea Kettle

Costs:

Item Vendor

Quantity

Unit Cost

Cost

Chemical-Resistant Clear Tygon Tubing 5/16″ ID, 7/16″ OD, 1/16″ Wall Thickness, 5 ft. Length McMaster-Carr

1

$ 11.75

On Hand

White LED Door Lights

I previously had installed Red and Amber LEDS. One of my door light lenses was cracked, which needed to be replaced. I’ve seen some custom door light colors, and decided to switch them all to white to match my undercarriage LED lighting, and my interior LED lighting.

My current door LED Lights:
DoorLight (5) DoorLight (3) DoorLight (2) DoorLight (1)
New Cool White LED bulbs. I like the shallow depth, and how they won’t be up against the lens:
DoorLight (6)

I had some scrap plastic that was thick enough for the lenses:
DoorLight (8)

Cutting a lens out:
DoorLight (9)DoorLight (10)

I painted the inside of the lights white, so the lights won’t look black or gray inside, and to reflect more light.
DoorLight (7)DoorLight (18)

I then sanded the lens to give it a translucent finish. My prototype looks good:
DoorLight (11)DoorLight (16)DoorLight (14)DoorLight (12)

Cutting more lenses:
DoorLight (19)

Almost done:
DoorLight (20)

Done:
DoorLight (21)

I found some of the stock incandescent bulbs, and they were drawing .24 amps. The LED door lights I was using were drawing .03 amps. My new Cool White LEDS draw .01 amps. I’m happy with my amperage savings.

Supplies/Tools:
Plastic for Lenses
Masking Tape
Marker
Rotary Tool with cutting disk and sander
LEDs
200 Grit Sandpaper
White paint
Small paint brush

Costs:

Item Vendor Quantity

Unit Cost

Cost

Shipping

Tax

Total

(8) COOL WHITE 4SMD LED WEDGE LIGHT BULBS T10 eBay

1

$ 8.99

$ 8.99

$ –

$ –

$ 8.99

Footwell Lighting

I’ve seen footwell lighting in several cars, and decided it was something I wanted. I bought some LED strip lights, and made a wiring harness. I used purple wire to match the car’s lighting wire color, and black for the grounds.

Footwell (1)

My harness gets power from the glove box light. I also made the harness fit in between the stock wiring, and the glove box light switch, so I didn’t have to cut the car’s harness. My harness can be removed without any issues. The LED strip lights draw less than 1 amp, and the reduced amperage from my interior LED lights insure that I’m in no danger of blowing a fuse, or melting wire.

Footwell (3)Footwell (2)

I needed a new drivers light switch since one was missing. It came with a 3-pronged piece that makes it easy to connect the car’s door lights, and the female connection on my driver’s side footwell lights.

Footwell (5)Footwell (8)

The LED strips are simply glued with contact adhesive to the backs of the kneepads. There are two sections of strip lights on the harness, one for each footwell, and they are grounded separately at each door light switch. They work independently, depending on which door is open.
I was able to install the lighting while I had the interior torn apart a few years ago:

Footwell (7) Footwell (4)

I think they look great at night.

Footwell (10) Footwell (9) Footwell (11)

Costs:

Item Vendor

Quantity

Unit Cost

Cost

Tax

Total

5Meter 300LEDs 3528 SMD Pure White LED Strip eBay

1

$ 5.57

$ 5.57

$ –

$ 5.57

Door Switch (too many parts to list) DMC Midwest

1

$ 15.14

$ 15.14

$ 1.17

$ 15.14

Purple Primary Wire on Hand  


Black Primary Wire On Hand  


Female wiring connector On Hand  


Contact Adhesive On Hand  


Total

$ 20.71

Latch Maintenance, Modification

I previously had adjusted my latches, performed the “wedgectomy,” and lubricated them generously with white lithium grease:

https://16908.info/?p=2422

Once again, the latches jammed. Removing the top door panel, and removing the latch rods with your bare hands while trapped in the car isn’t fun. I then found this post on DMCTalk:

http://dmctalk.org/showthread.php?12682-door-latch-adjustment-problem&p=182992&viewfull=1#post182992

…which basically means my lithium grease and any other previously used lubricants could have gummed up the latches. So once again, I decided to remove all the latches. I cleaned and degreased them with brake cleaner, my air compressor with a blow gun, and dozens of paper towels. Before re-installing them, I chose to change the “lock linkages” in each door to “lock linkage.” I eliminated the lock linkage on the front of each door. Having two latches means they must be in sync for both opening and unlocking. One lock obviously means there is nothing to sync, which is much easier to setup and maintain. Some people have successfully disconnected their front locks, so the door only locks on the rear latches. The only danger is you might drive over a bump, and the lock might engage. Once engaged, and with no way to unlock the front latch, this will really make getting out of the car a challenge. So I came up with this modification:

LockUnlock

This is the latch, and the arm, that moves back and forth between lock and unlock. Simply drill a small hole in the latch, and wrap some wire around the arm and the latch to secure it. The wire won’t interfere with the latch.
DSC_0029
The reverse side of the latch. You can see the wire doesn’t interfere
DSC_0033

Presto! The latch should never lock, but can easily be converted back to a locking latch.

You can now remove the lock rod that goes to the forward latch. I had to cut and retained half of my lock rod since it is needed for my aftermarket door lock actuators:
DSC_0028 (2)  DSC_0028 (4)

This time around, I lubricated the latches with WD-40. Once reinstalled, I then performed the Door Lock and Latch Adjustment process. After that, comes testing everything! Test the exterior door handles, interior door handles, exterior locks, interior locks, and in my case, remote locks and remote door launchers. Be sure to test it with the door’s plastic membrane in place to see if it interferes with anything.

In my case, everything is working correctly. Time to reinstall the door panels again. Hopefully they’ll stay installed for many years to come.