Glass Polish

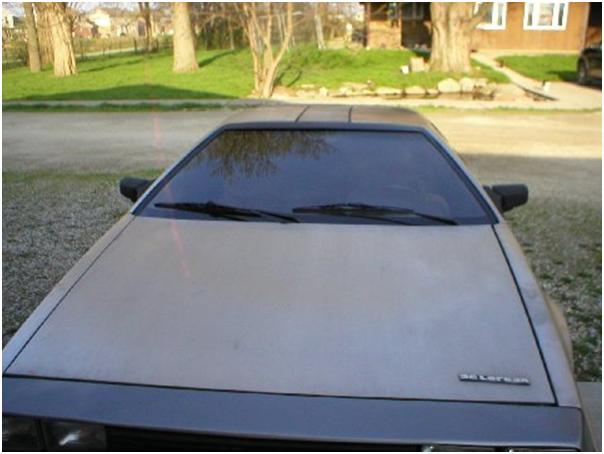
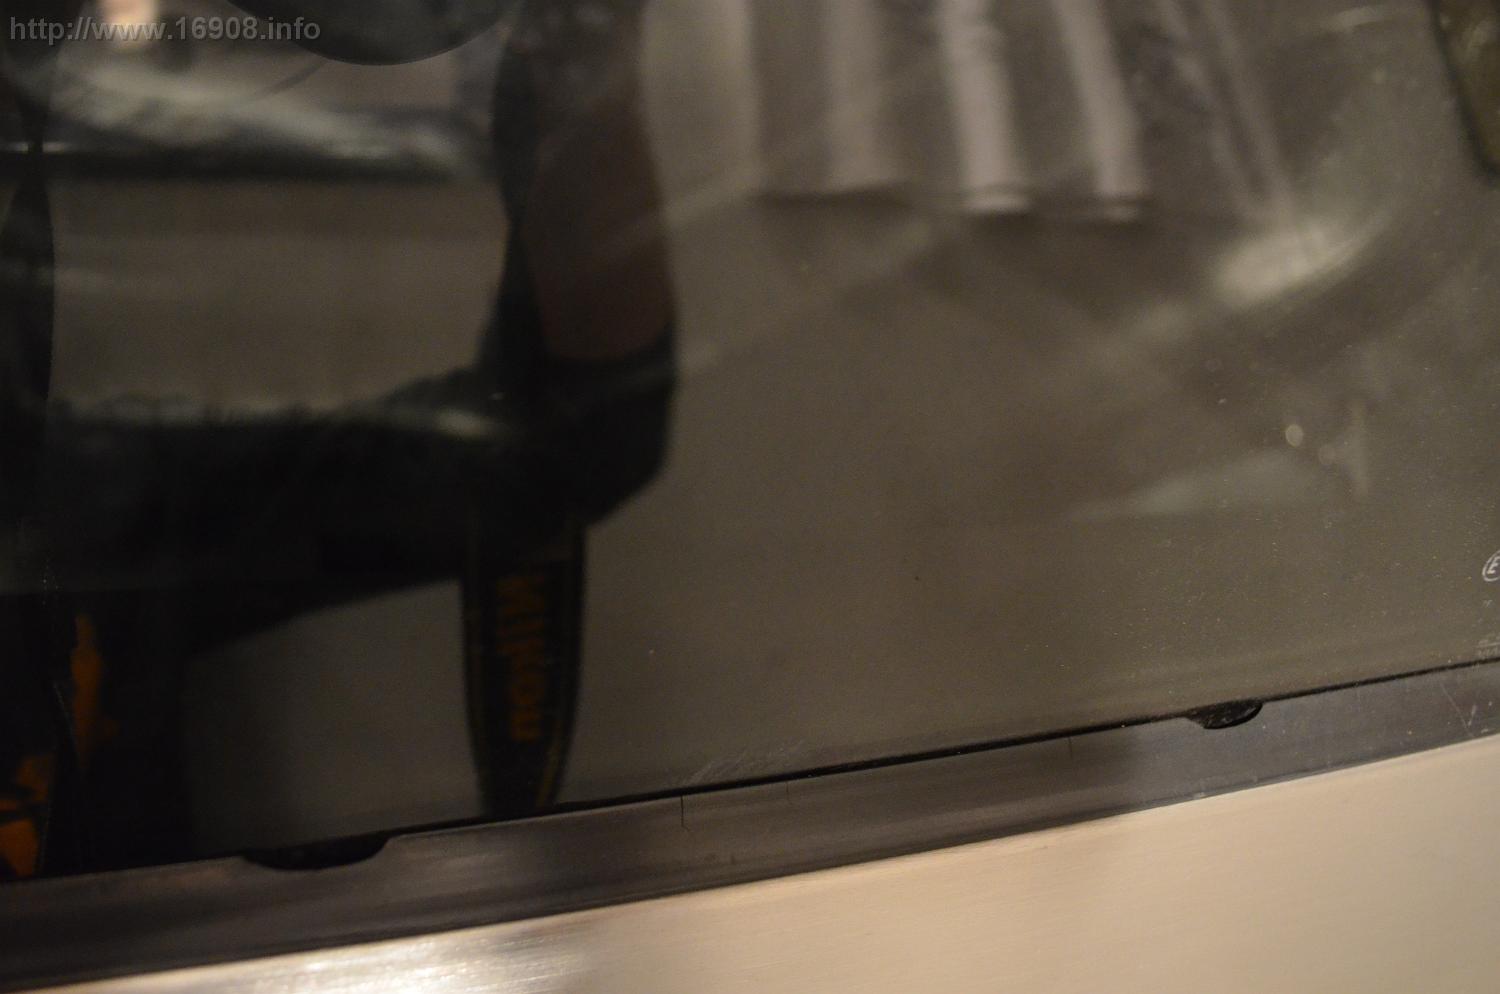
The car has had water spots on the glass ever since I purchased it.

Polish 10

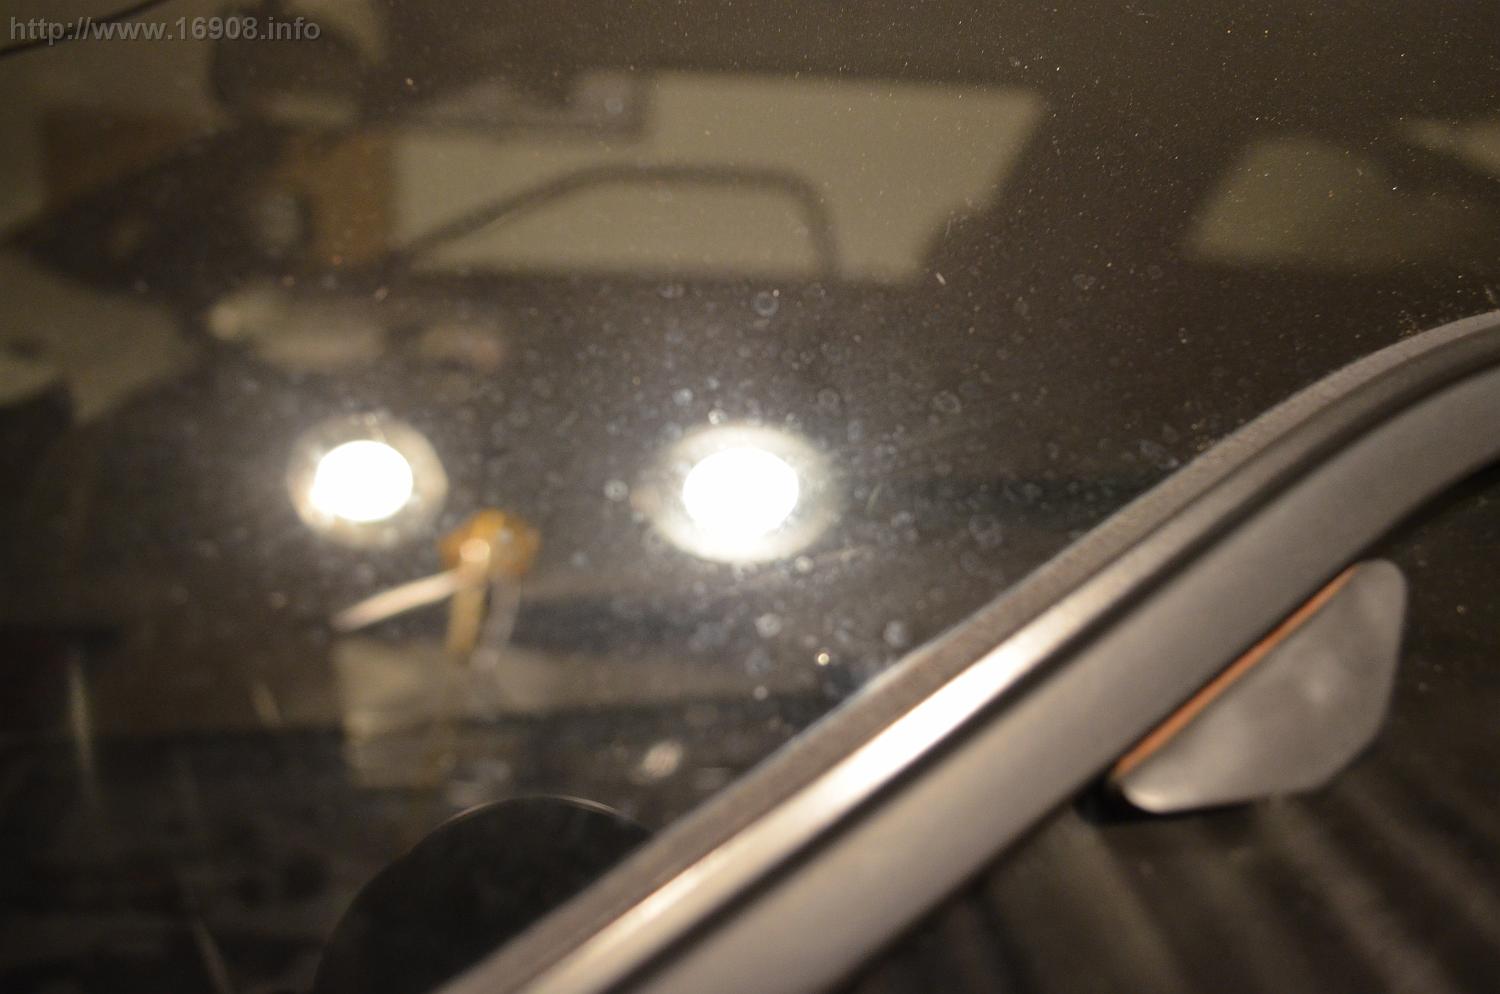
At some point in its life, it spent time in the state of Georgia, and apparently acid rain is a big problem there. The water spots are so bad in some areas, that you can catch your fingernail on them. In addition to the water spots, my glass seemed to have a haze on it. I’ve tried several options so far:

  • Newsprint
  • Vinegar
  • “Invisible Glass” cleaner
  • RainX Foaming glass cleaner
  • 0000 Steel Wool

All have had little to no effect on removing these water spots. Now I’ve finally purchased a felt polishing wheel, and some cerium oxide.

The felt polishing wheel is very dense and strong. I opted to use an electric corded drill, since any battery powered drill would probably be drained after several minutes of polishing. I cleaned the windows, and mixed some cerium oxide with distilled water in a plastic container. I taped off the window trim, and brushed on some water and cerium oxide mixture. I soaked the felt polishing wheel in my mixture, and started polishing.
Polish 21 Polish 20

I made sure to apply even pressure, and keep moving the pad around the glass. The goal was to polish all the area of the glass evenly for the same amount of time. I was thrilled to see the water spots being removed!
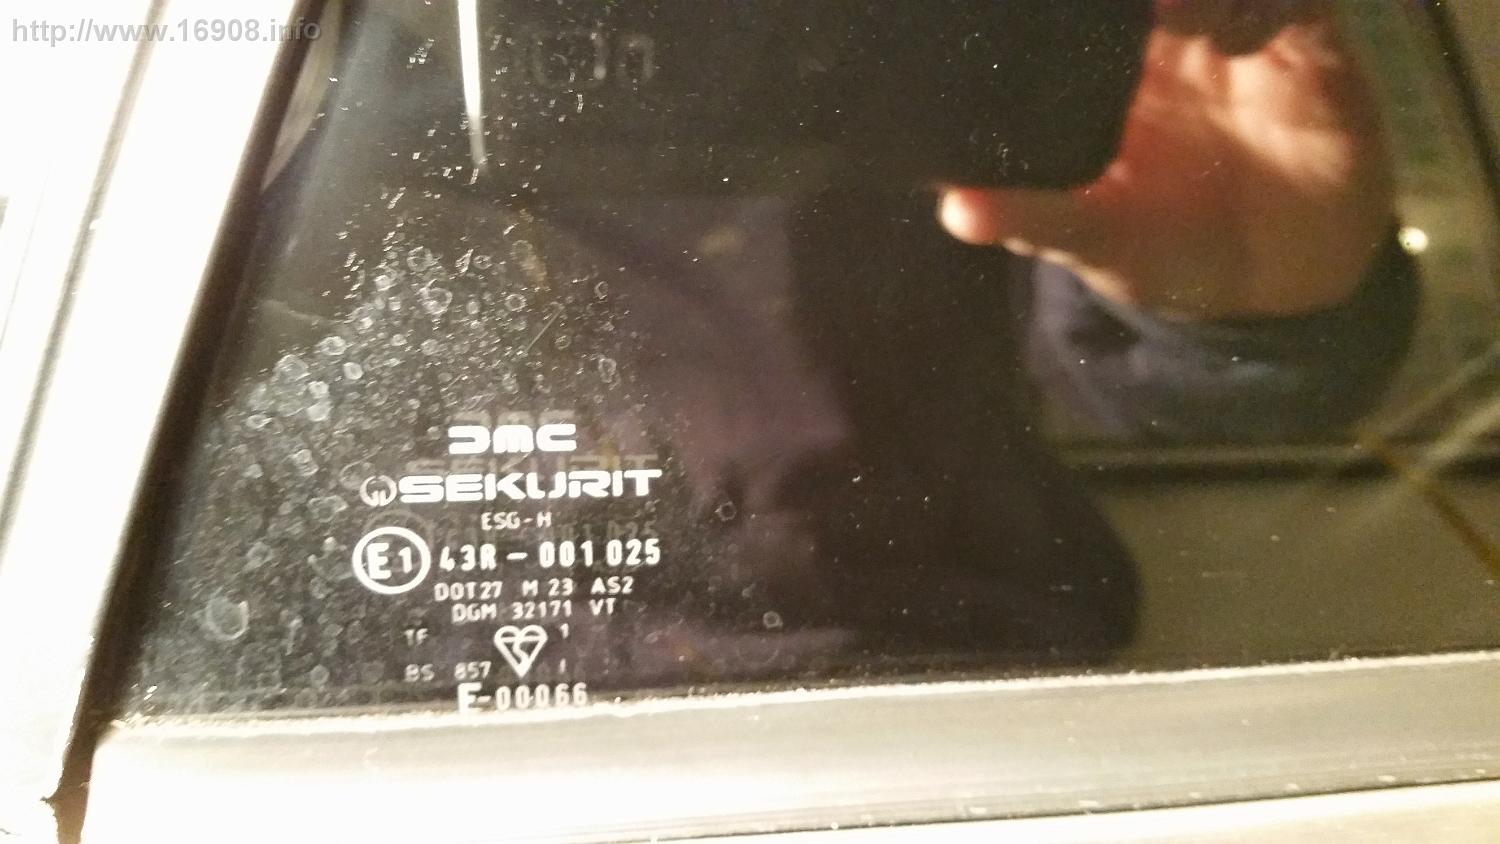
I later taped off the DMC SEKURIT labels on the glass, and used a rotary tool with a small felt pad to polish the small areas around the labels. I’m not going to attempt polishing inside the labels, so unfortunately it will never look 100% polished.
Polish 40 Polish 41

The left side window seal was looking ratty, so I replaced it:
Polish 30 Polish31

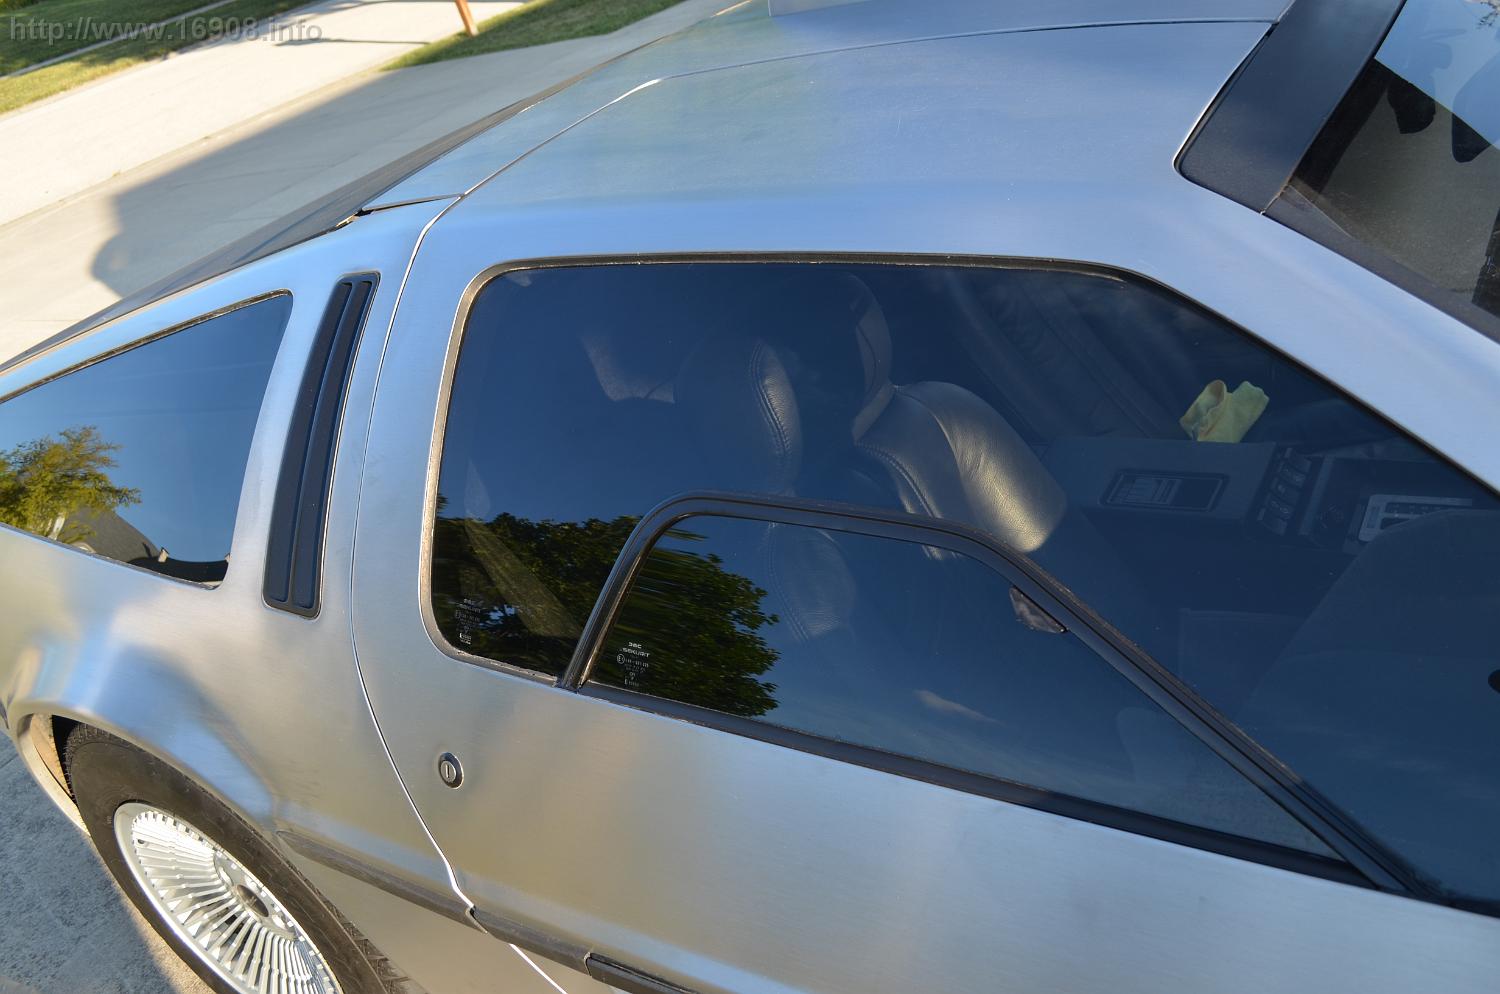
I’m happy to finally have the spots and haze gone, and my glass now has a great shine to it!

Polish 50

The cerium oxide packet that comes with the kit is 8 ounces, and I probably only used two ounces total.

Tools:

Plastic food container to mix the polish
Electric Drill (corded preferred)
Cerium Oxide
Felt polishing wheel
Tape
Rotary tool
Polishing bits for rotary tool
water (distilled preferred)
foam brush
vinegar
microfiber cloth

Costs:

Item Vendor

Quantity

Unit Cost

Cost

Shipping

Tax

Total

Gordon Glass Cerium Oxide – 8 Oz with 3″ Felt Polishing Wheel Amazon.com

1

$ 29.95

$ 29.95

$ 5.15

$ –

$ 35.10

Left Window Wipe Seal DMC Midwest

1

$ 36.11

$ 36.11

$ 13.72

$ 2.80

$ 52.63


Total

$ 87.73

Seat Repair

My driver’s seat was needing repair. I previously had the bottoms repaired

https://16908.info/?p=1221

and had built new seatbacks:

https://16908.info/?p=2330

At some point in the car’s life, the cabin was exposed to elements, and most of the metal on the seat rusted.

Seat 10 Seat 12Seat 25

The thin wires on the seatback rusted through, and the burlap had deteriorated. The seat back kept popping off, and the foam was pushing through because the foam didn’t have any support. All this was leaving crud all over my interior carpet:

Seat 15Seat 16

Finally, the neck area of the seat cover wasn’t secured properly.

I decided to tackle these jobs myself this time, with a complete disassemble and refurbish.

Seat covers came off. I found the seat cover ribs weren’t even in their slots, rather clipped onto the seat cover with hog rings. Even worse, it looks like some of the car’s original, deteriorated seat covers were still attached:

Seat 20 Seat 21 Seat 22

The foam came out. I washed the foam, and after several rinses, the wash water finally came clean. This will help remove any “old” smell that the seat was holding.

Seat 30 Seat 31 Seat 40 Seat 45

I painted the seat frames with rustoleum gloss black paint. (Sorry, no pictures)

I rebuilt the seatback with coat hanger wires (hah!) and new burlap. Very strong.

Seat 50 Seat 80

I felt the driver seat bottom needed more support, and the leather was still bunching up after the seat’s previous rebuilt. I decided to add some seat foam. The picture shows two pieces, but I only used one.

Seat 51 Seat 52 Seat 53 Seat 54

I put the seat cover back on with new hog rings, and was able to properly secure the “neck” area with many zip ties. Zip ties also were used to attach the ribs to the frame.

Seat 55 Seat 56 Seat 81 Seat 61Seat 60

New screws replaced the rusted ones on the trim. A broken screw was stuck in the frame, which I forgot to remove before I recovered the seat. Luckily I was able to get it out without taking the cover off again. I even sanded stone scuff marks off the reclining lever. I then coated it with some spare SEM Landau Black Color Coat I had leftover from my previous interior work.

Seat 76 Seat 77

It still isn’t perfect, but it looks, feels, and works a lot better.

seat 100 seat 1001 Seat 101

Costs:

Item Vendor

Quantity

Unit Cost

Cost

Tax

Total

14″ Zip Ties 10 Pack Home Depot

1

$ 1.99

$ 1.99

$ 0.15

$ 2.14

8″ Zip Ties 100 Pack Harbor Freight

1

$ 3.99

$ 3.99

$ 0.33

$ 4.32

Washers Ace Hardware

6

$ 0.39

$ 2.34

$ –

$ 2.34

1 Yard Burlap JoAnn Fabrics

1

$ 1.99

$ 1.99

$ 0.16

$ 2.15

2″ X 15″ X 17″ High Density Foam JoAnn Fabrics

1

$ 7.99

$ 7.99

$ 0.67

$ 8.66

Hog Ring Pliers with 200 Hog Rings eBay

1

$ 15.98

$ 15.98

$ –

$ 15.98

Trim Screws Ace Hardware

4

$ 0.31

$ 1.24

$ 0.10

$ 1.34


Total

$ 36.94

Back on Track!

The owner sent me a few emails. He received the new evaporator, and was installing it. He’s been working hard to get everything diagnosed and working before Saturday morning. Once he charges the AC, he’ll start reassembling everything. He’s got some touch up painting to do, so we’ll probably end up doing some of the last cosmetic stuff at the DMC (Midwest) Open House.

Weather for Saturday looks great! It’s rained here the past couple of days, but should be in the 70s for the weekend! Perfect weather to drive the D J

I’m so excited. It’s been over ten years, and now it’s down to less than 48 hours!

Delays

Since finishing refurbishing the car coincides with the DMC (Midwest) Open House, the plan was the owner would deliver the car to me when he came up to attend the event. On Monday, April 23rd I got an email from the owner:

I got the new evaporator all right and started to put it in.

However I slipped with a screwdriver and stuck a nice hole in it so I now have to redisassemble the dash again and order another evaporator.


This basically killed my chances of the car being done this weekend, thus I would not buy it yet. His email said to give him a call, so we talked for about 15 or 20 minutes. He doesn’t want to try to repair the puncture – he wants to use a brand new part that won’t fail. I can certainly respect this. He was upset that he wasn’t going to make it on time, and this was the first time he was going to be late on one of his projects. He sounded very tired, and frustrated. He now has to take apart the dash again, which is very labor and time intensive. I was disappointed, but as I told him, “I’ve waited over ten years, so I can wait a few more weeks.”


The good news is that he plans to still bring the car to the DMC Midwest Open house. He wants me to go over the car, and I can test drive it and even help out if there is some work to be done. I do plan to learn how to service this car myself, so this is a big opportunity. I’m still looking forward to Saturday J

Refurbish Details

I’ve compiled a list of all the items that the owner has repaired or replaced:

mostly new fuel system, new fuel pump
new brake system
new rear brake hoses
new tires
fresh powdercoated wheels
CD player panasonic 3034 I believe with mp3 and remote input
new kicker 4×10 speakers in rear
new front speakers
refurbished dash, binnacle
New leather seats, A posts, and knee pads
clean carpets
new relays and fuses
New remote door launchers
new window motors
the upper half of the motor has been rebuilt
looks like a new torque converter
new front and rear main seals
good refurbished motor mounts
replaced fan blower motor
new otterstat switch
new oil pressure regulator
fixed the oil pressure sensor cable so the light works
fixed the seat belt light
fixed the tranny dip stick leak
new air compressor, air conditioner
replace the dryer and probably the orfice tube

new headliners
new weatherstrip
refurbished front and rear fascias
New glove box
most bulbs replaced
replaced faded side marker lights
undercarriage on this car is clean no signs of significant rust (some rust on bolts and a few chips in undercarriage epoxy that will be cleaned up before the sale.
idle control valve
change door locks
seat belt on passenger side
weatherstrip to go on passenger side
rear view mirror
fix drivers mirror
detail black trim parts
replace door struts
Fixed the rear storage compartment
fixed two clips on the front grill
The knee pad stud was replaced
The shifter plate was repaired (no longer avail so it had to be fixed)
I replaced the right angle drive and have the instrument cluster back in
replaced the right angle drive so that all works.
rear storage compartment cover


Refurbish Pictures

The owner sent me these pictures on March 27th, however these pictures could be up to several months old. They are in “no particular order.”


Newly powder coated wheels


Check out those new seat covers!


Notice the multiple DeLoreans in the shop


Again, two DeLoreans