Alignment

With the new rear adjustable lower links, I could see the camber was way off on the rear tires. I already knew the alignment was off from my last visit to Just Tires. I scheduled another day off, and took my car back. With the new links, I knew I’d get everything straight. I brought along my offset wrench and my 11/16ths torque adapter for those pesky trailing arm bolts (pesky because the auto transmission is in the way).

Same manager, same technician. They let me hang out and watch everything. I told the tech about how I replaced the lower links myself, and the TABs. I let him know the torque specs for the TABs. When he went to loosen the TABs, he said “Oh, this is a 12 point head…” I let him know that my wrench would probably work best, so he used it. He ended up removing 2 shims on each TAB. When it came time to torque the TAB, he said he probably had a torque adapter he could use. Then he couldn’t find one, so he used mine.

Adjusting the lower links:

A really nice 1970s Chevelle showed up for an alignment. The owner and I talked for awhile about our cars. He said this shop was recommended to him.

I’m very pleased. My invoice shows I got a discount on labor!

Supplies Used:
19mm Offset Wrench
11/16ths Torque Adapter
Workshop Manual Section K (Rear Suspension)

Costs
4 Wheel Alignment: $60.00 @ Just Tires – Wheaton, IL (After $39.95 Labor Discount)

Trailing Arm Bolts replaced!

The stock Trailing Arm Bolts (or TABs) are prone to bending, and eventually breaking over time. The solution is to replace them with Toby TABs made from Inconel 718 from DeLorean Parts Northwest. Here’s some of the history behind their development.

This is a nickle-based super-alloy. “Inconel 718 also has a very high fracture toughness, which means that it is very difficult to initiate and propagate a crack.  It’s virtually corrosion proof, non-magnetic, and is used in the aerospace industry whenever a failure is absolutely not acceptable (engine mounts, landing gear, and wing attachments, to name a few).”

DMCNews.com has some information (with pictures) about TABs here.

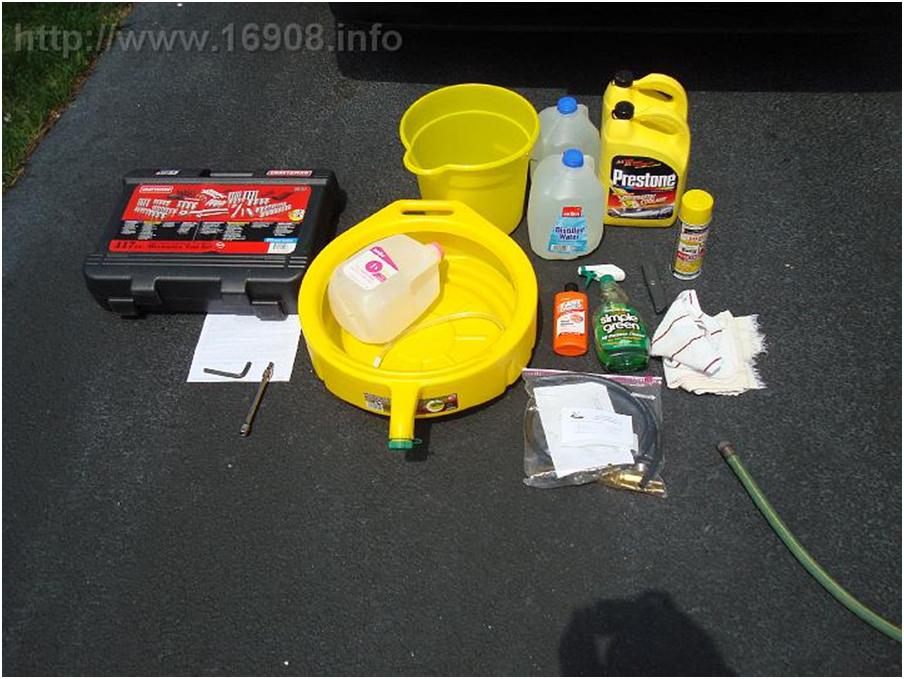
Let’s get started. Supplies used:

  • Ratchet and socket set
  • 13mm combination wrench
  • 3/8th drive 11/16th Torque Adapter
  • 3/8th drive Torque Wrench
  • 19mm offset wrench
  • Crescent Wrench
  • Anti-seize lubricant
  • Silicone lubricant
  • Jack stands
  • Low profile jack
  • Another jack
  • Car ramps
  • Wheel chokes
  • Utility Light
  • Workshop Manual – Section K (Rear Suspension)
  • Reciprocating saw (if necessary)

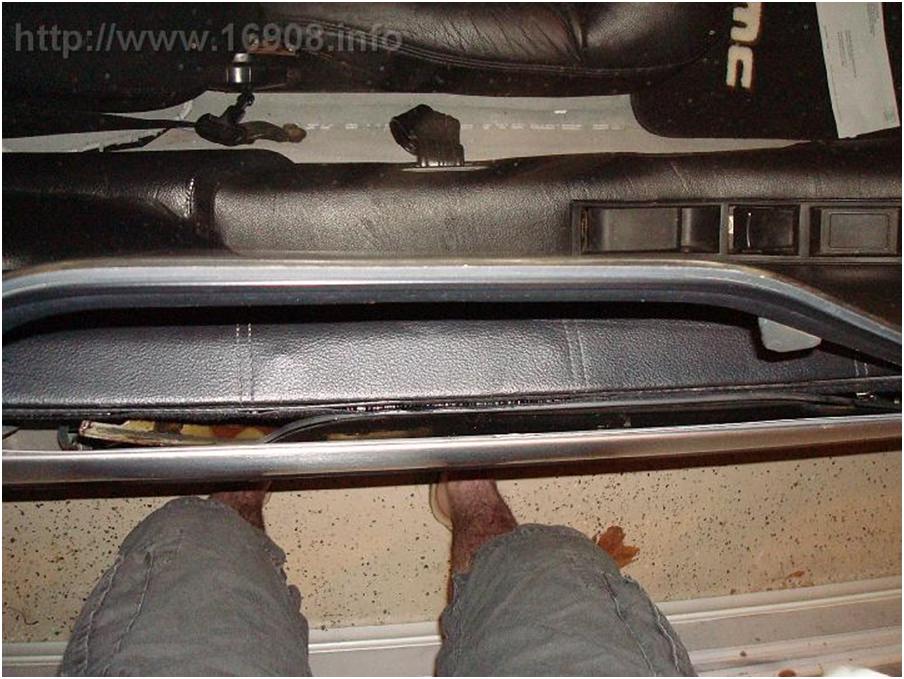
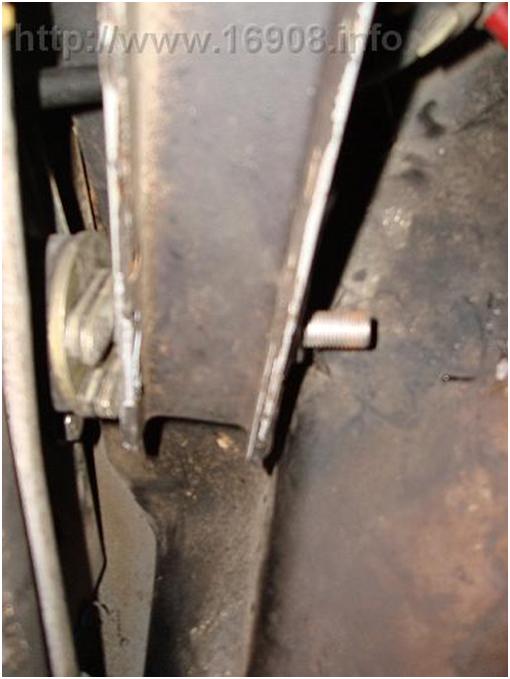
This process of replacing the bolts is relatively easy if you have a manual transmission. I took the following picture from under a lift. Here’s what that area of the frame looks like on a manual car:

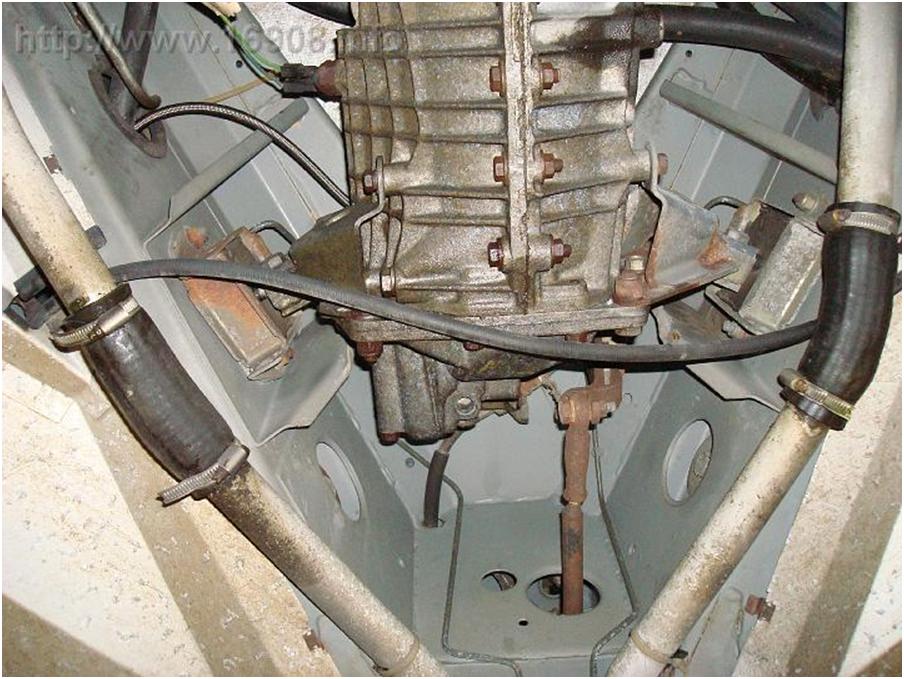
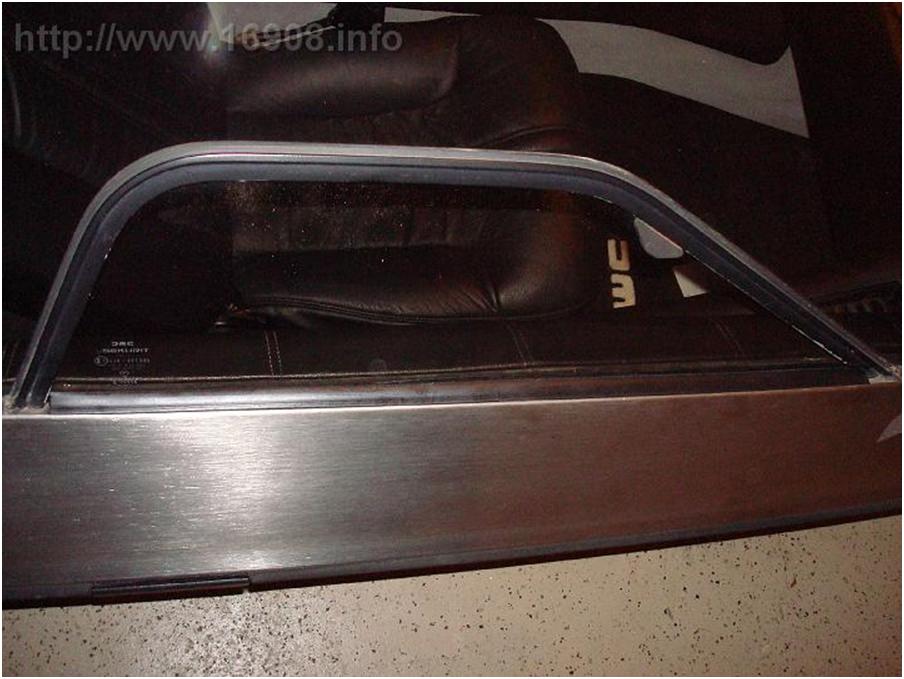
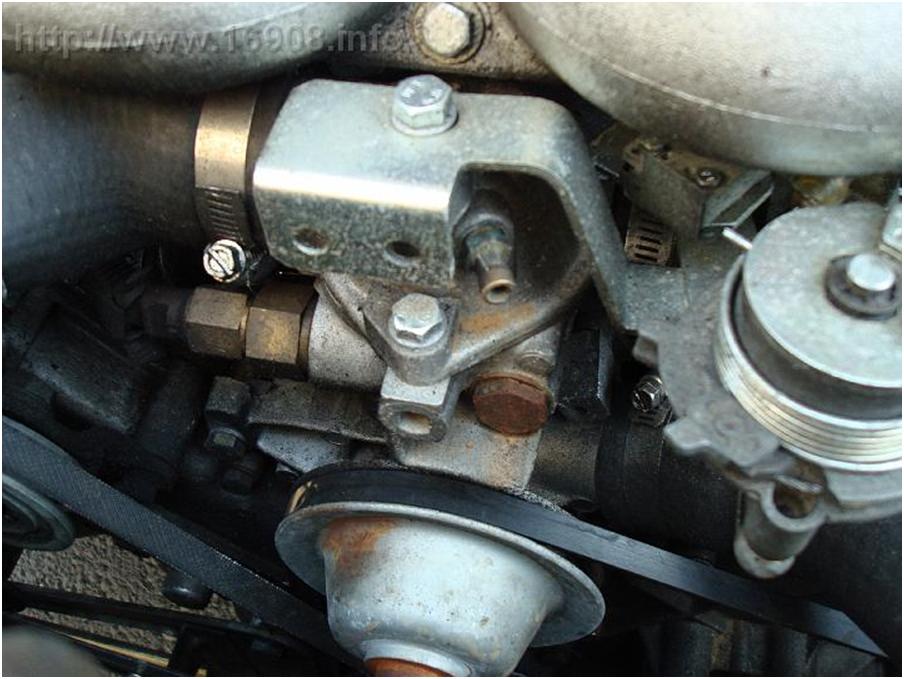
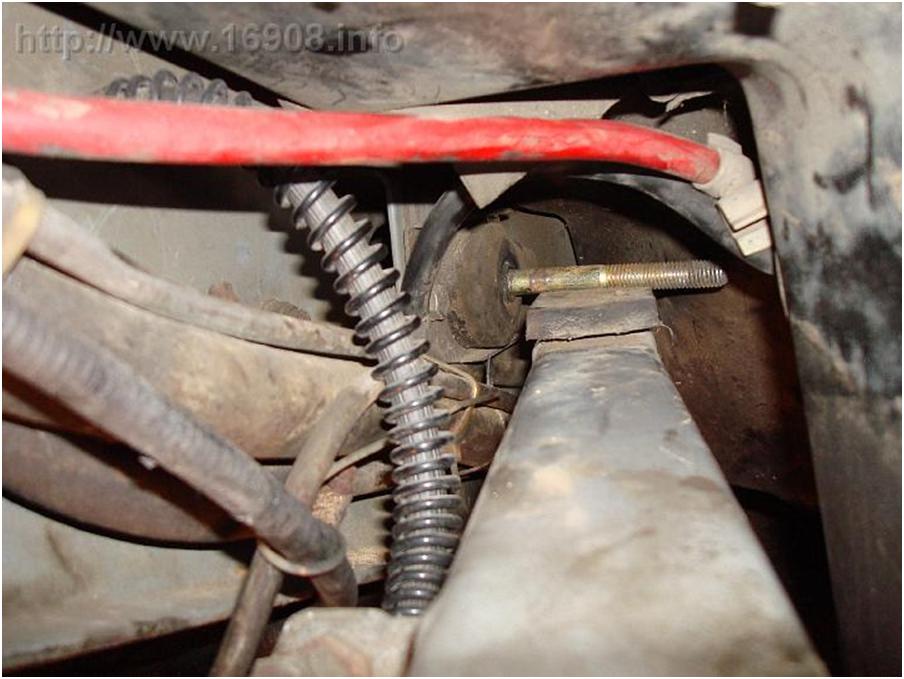
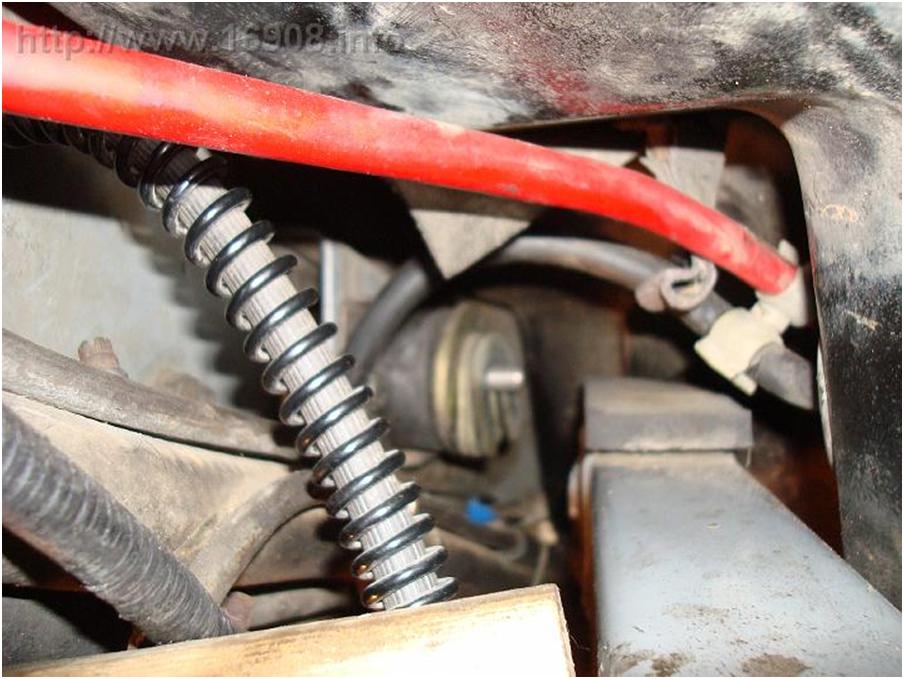
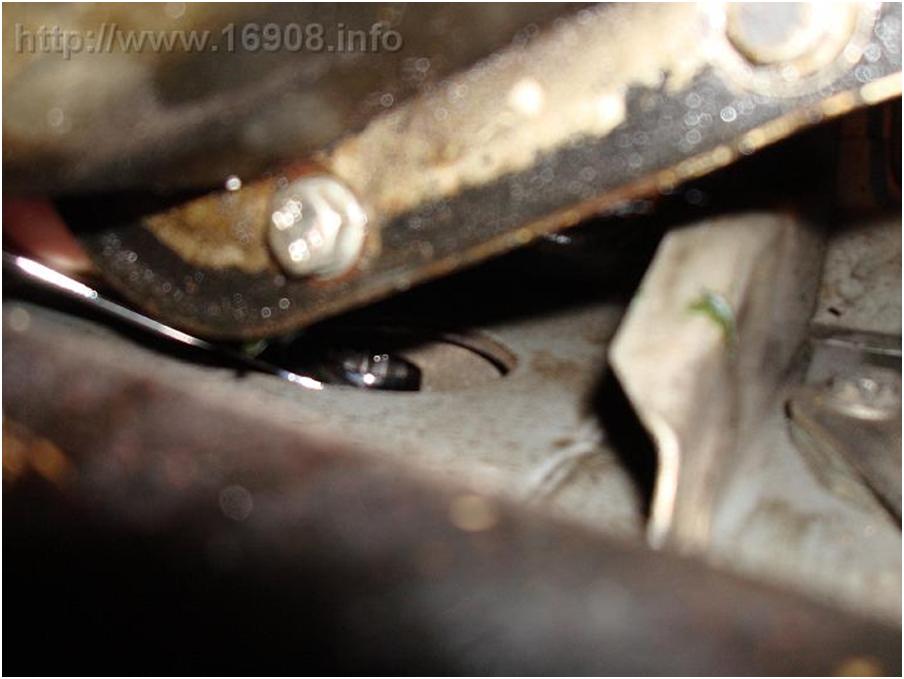
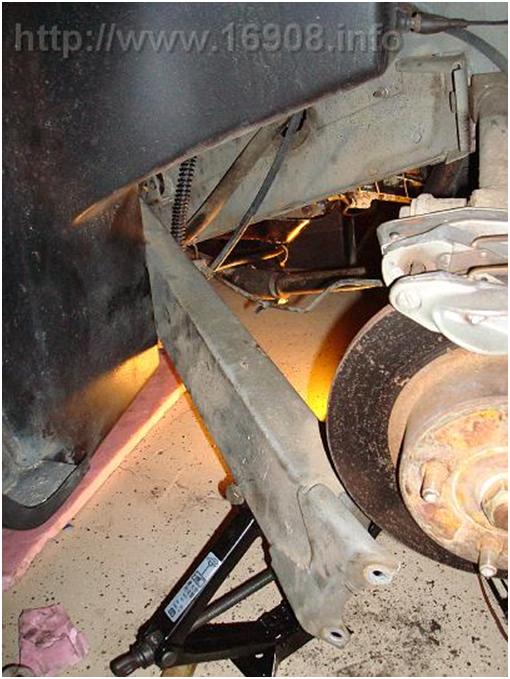
Nice and clean, eh? Alright, here’s the best picture I could get of the same area on my car:

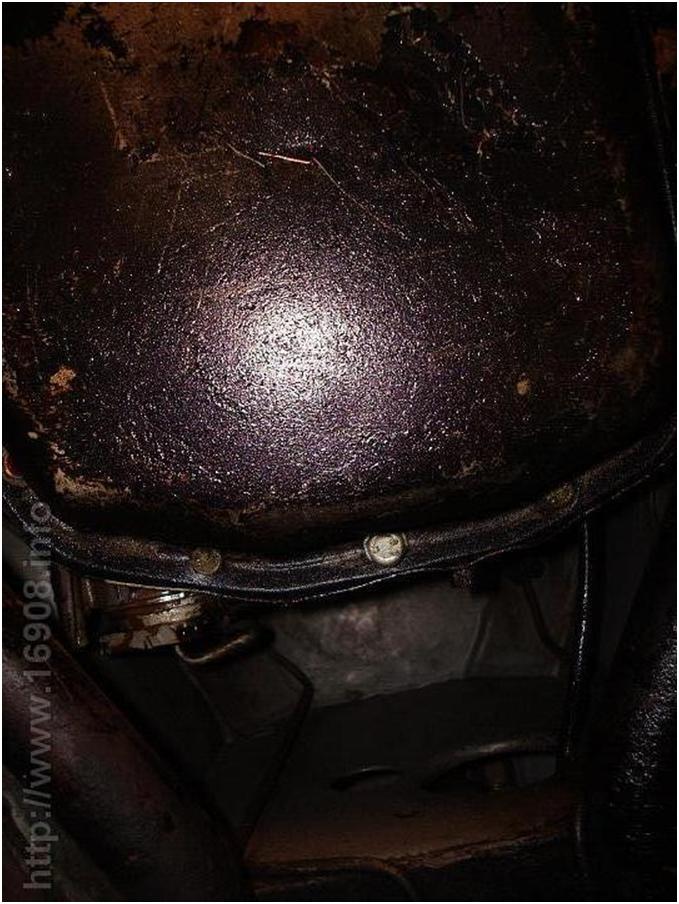
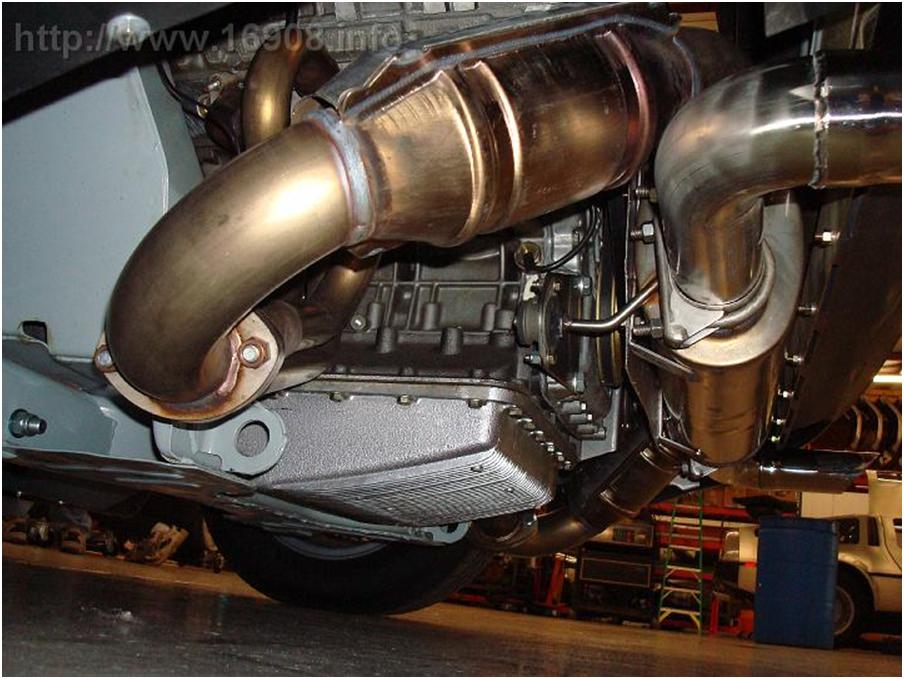
You can see the big ol’ honkin’ automatic transmission almost touches the coolant pipes, and you don’t have access to the nice holes in the frame where the heads of the bolts are located. Argh. Alright, after reading probably every TAB thread on the DML and DMCTalk, I’ve figured out:

  • It’s easier to replace the TABs on an automatic car when the transmission is out of the car, or has been lowered out of the way
  • You need to remove the trailing arm from the hub carrier on the driver’s side to maneuver the bolt out.
  • If a bolt is really bent, you need a reciprocating metal saw to cut it apart for removal.
  • It’s way easier to do this with a lift or a mechanics pit
  • You need a good offset wrench to hold the heads of the bolts. If you know a good welder, get a cheap wrench, cut it up, and weld a spacer in it.


I don’t have a lift, or a mechanics pit. I have a single car garage, with barely enough room to work. I don’t have a creeper. I can’t get the car higher than 15 inches at the frame with my jack. Maybe worst of all, I don’t have anyone to help me with this job.

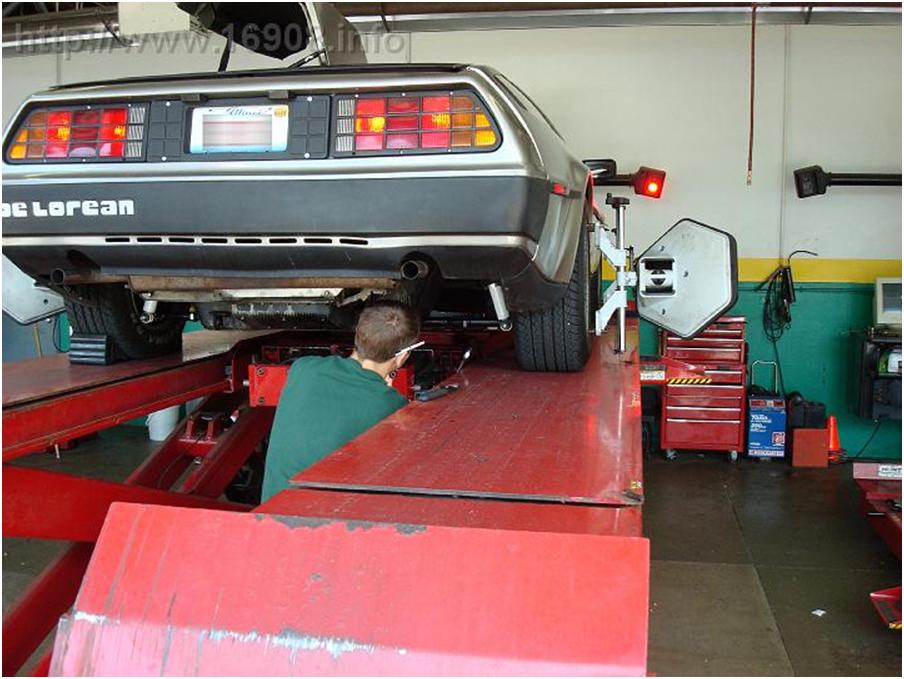
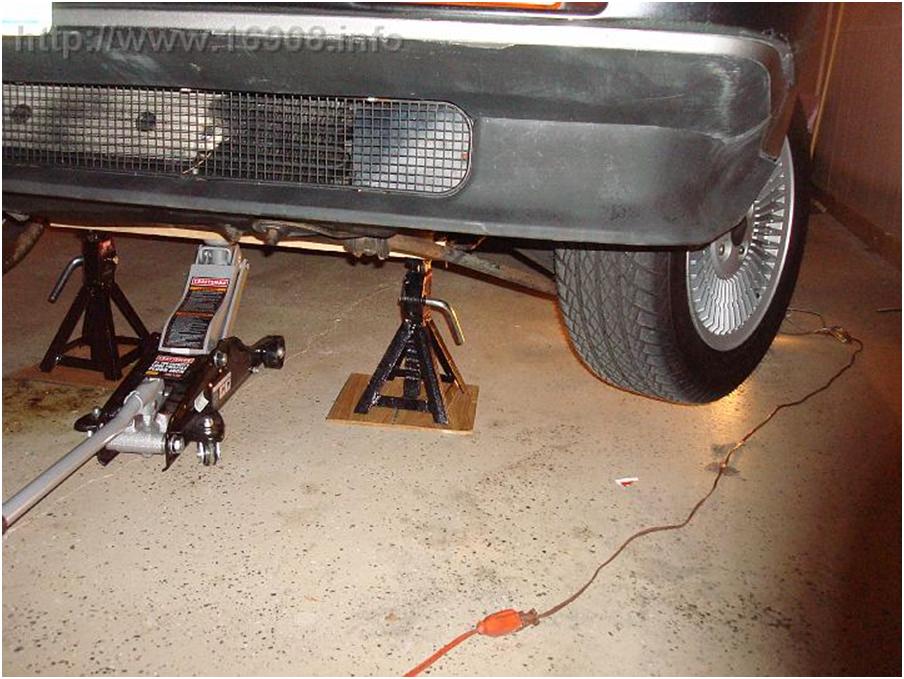
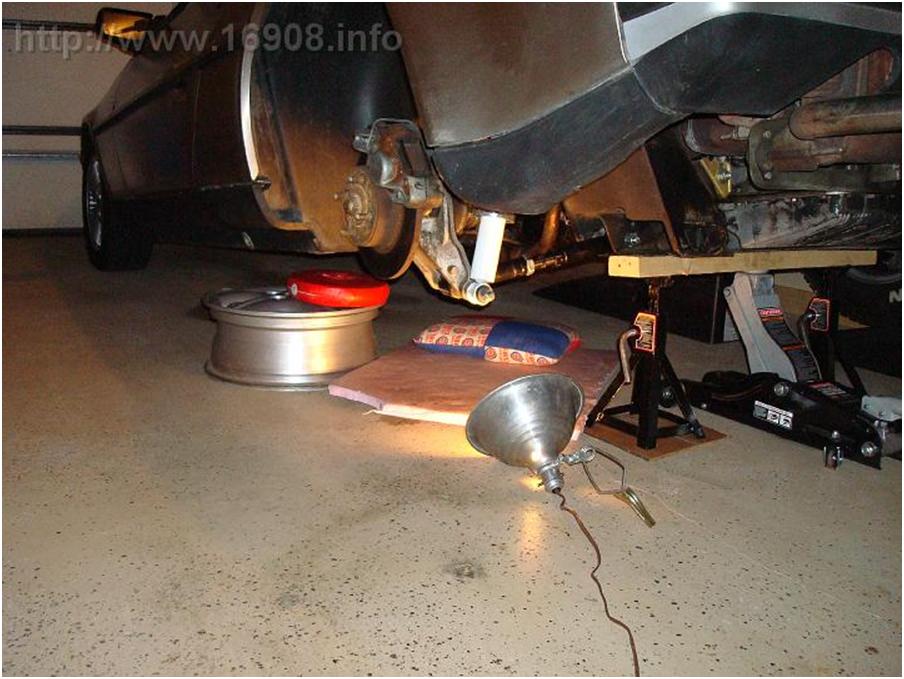
Here I go. Jack up the car using the proper procedures, put it on jack stands, and leave the jack in place. Choked the wheels with new wheel chokes. I also used a ramp and 10 lb weights on the driver’s side under the underbody, and an alloy wheel and 10 lb weights on the passenger side under the underbody. There’s about a half inch gap between the underbody and the weights. If the car should fall, this assorted stuff will support it. It gets in the way a lot, but I’m not taking chances… I’m very afraid of the car falling on me. Also notice my foam insulation that I lay on.


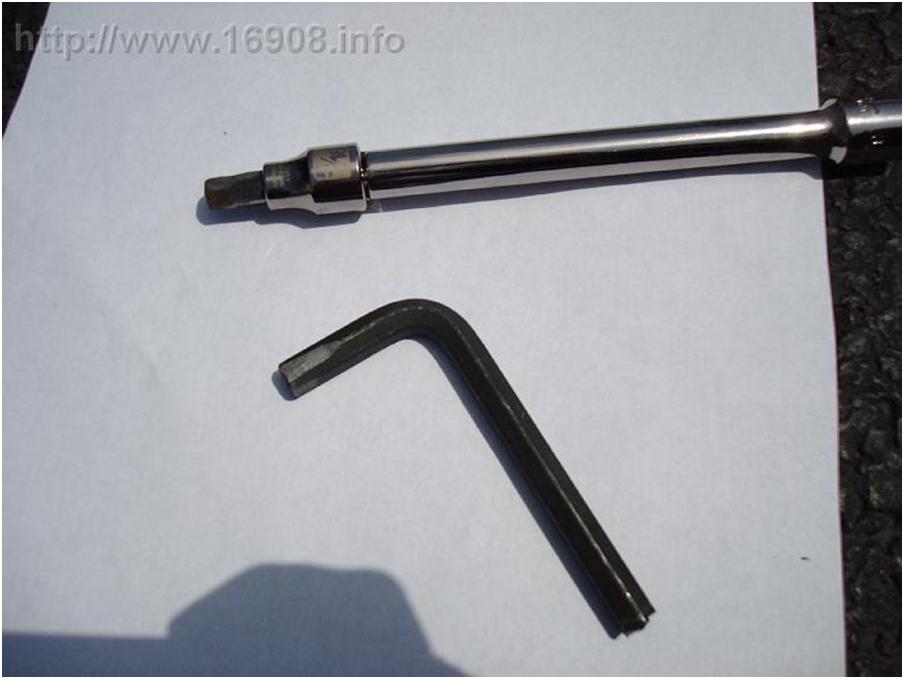
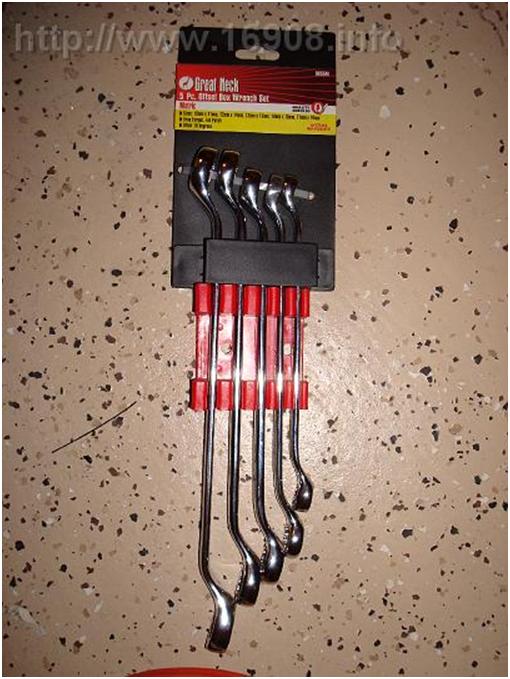
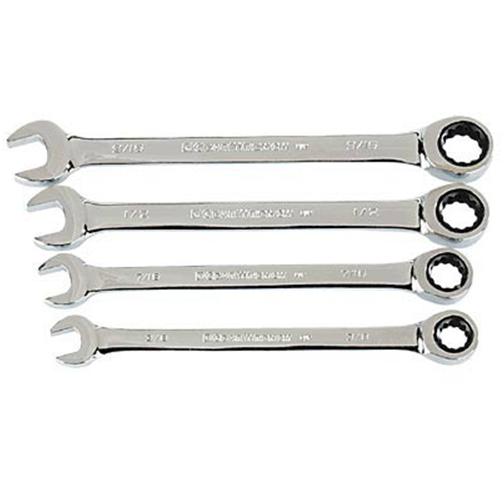
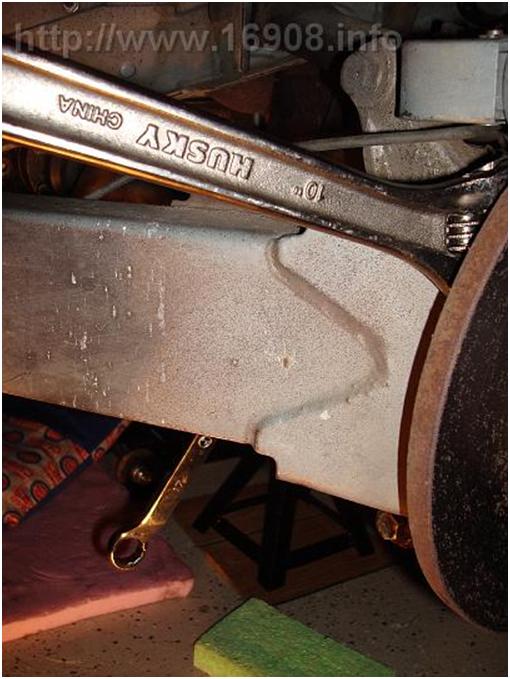
I got a set of metric offset wrenches from AutoZone for this next part:

I used the offset wrench to hold the head of the bolt, while removing the nut. I struggled to remove the bolt from the trailing arm. Finally I used a flat screwdriver to push on the threads of the bolt. Once it was out of the trailing arm, I pushed the bolt back into position, with the trailing arm below the bolt. I started removing the plate that holds the bushing in place:


After I struggled with the reinforcing plate bolts for a few hours, I finally got it off! The bolt is free! Here’s what all this stuff looks like:

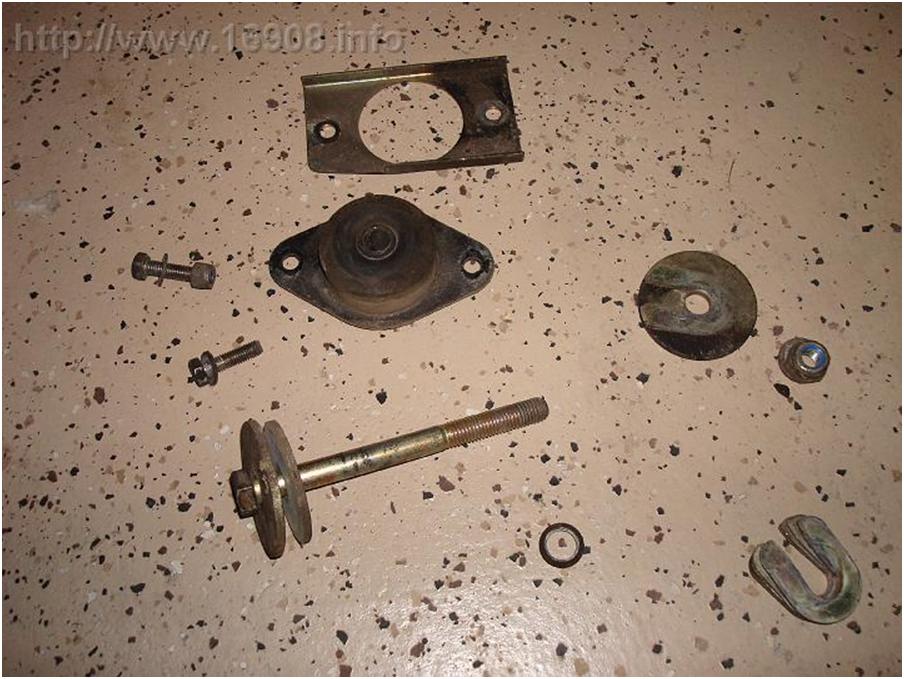
I lost a jam nut, but found it a few days later. Which brings me to:

Helpful Tip #1: Tape the ends of the recessed are of the frame. The jam nuts will fall and roll out unless you’ve got something to catch them. The tape will catch them.

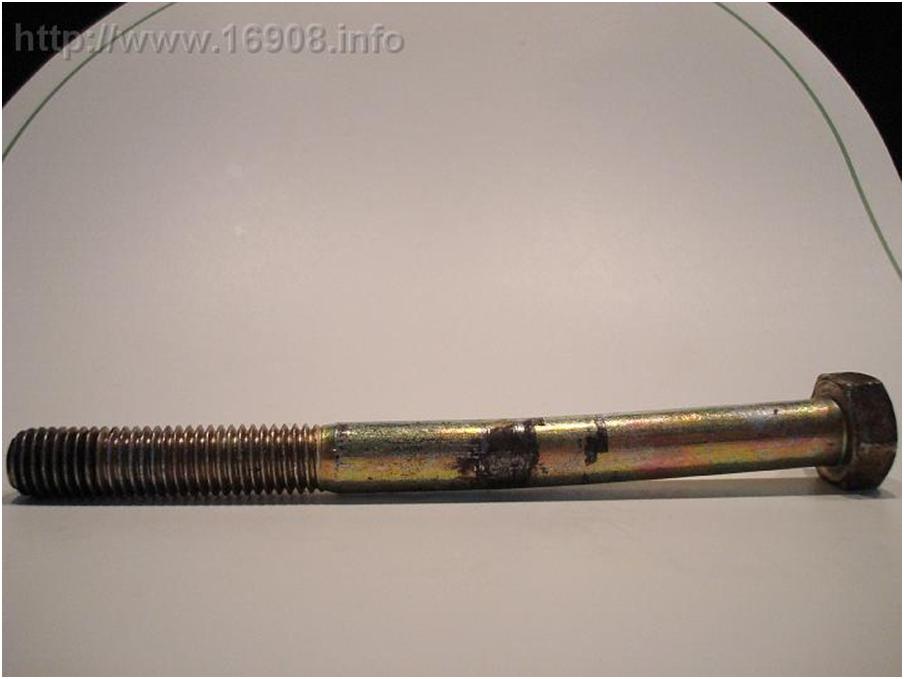
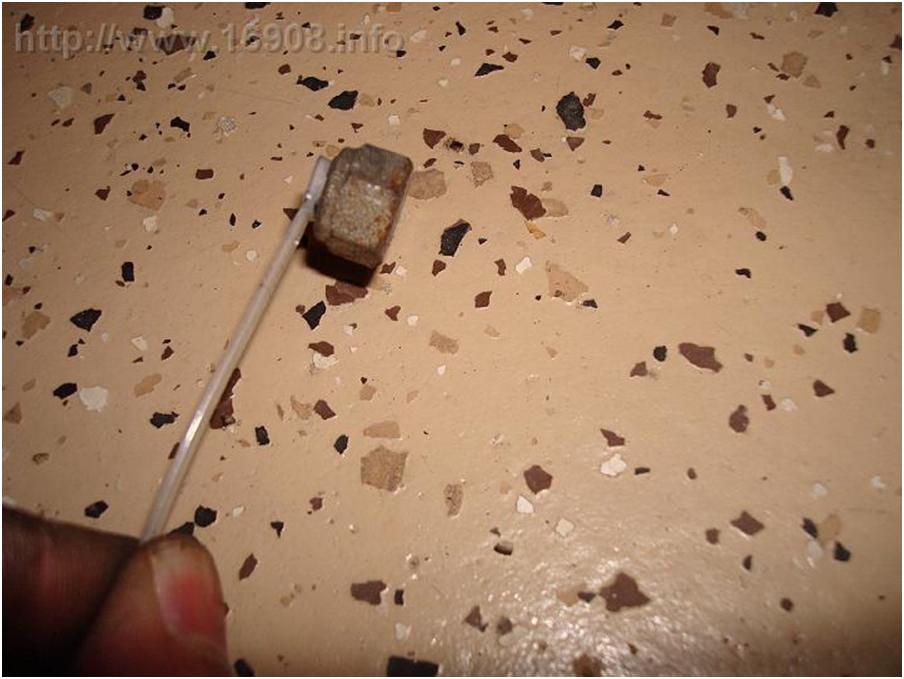
Here’s the moment of truth. Take a close look! All my effort was not in vain! The stock TAB is bent!!!

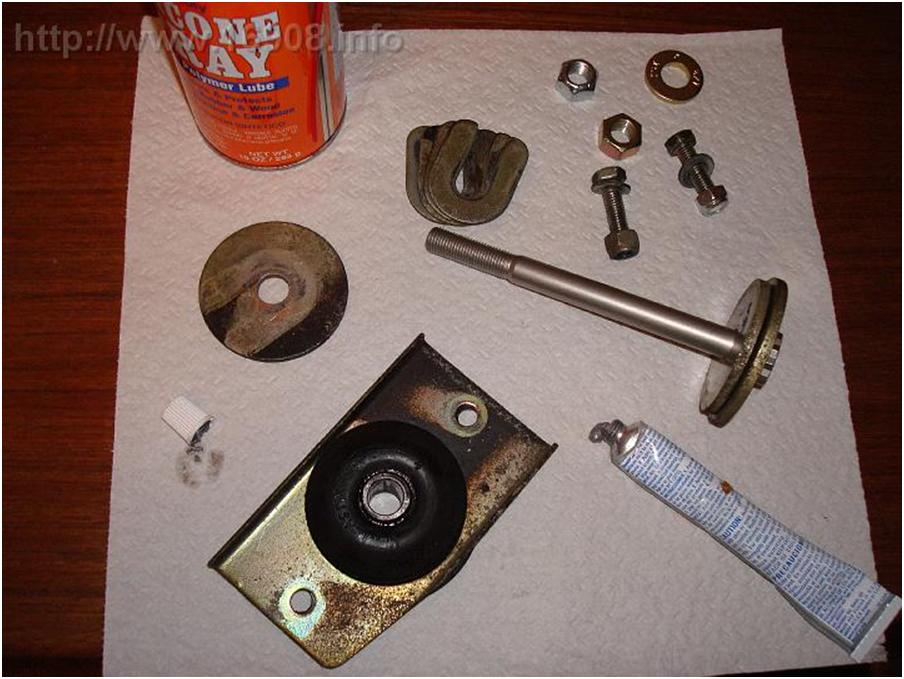
I cleaned the parts, used some silicone lubricant to “treat” the bushing, and some anti-seize on the bolt. Here are all the pieces cleaned, ready for assembly:

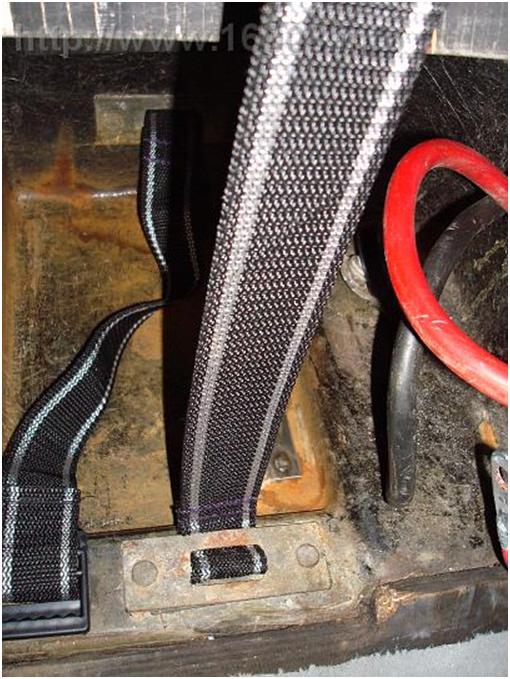
Now, I thought of a way I could hold the jam nuts in place, in such a difficult, small area.

Helpful Tip #2: Hammer the end of a small wire tie into the lock nut: The wire tie is small enough, and flexible enough to fit into the recessed area of the frame. Once the bolt catches the nut, rip the wire tie out.


Helpful Tip #3: Don’t use a closed end combination wrench on the 13mm nuts. You won’t be able to get the wrench off once the bolt is in. Use an open end combination wrench.

Once I got the retaining plate mounted, I struggled to reinsert the bolt into the trailing arm. The mess of cables and hoses on the driver’s side makes everything more difficult:

I realized the trailing arm was in a position that made this task impossible. So I figured out…

Helpful Tip #4: Jack up the hub carrier about ¼ to ½ inch for bolt removal and reinsertion.

Once the trailing arm was positioned better, the bolt slid in easily:

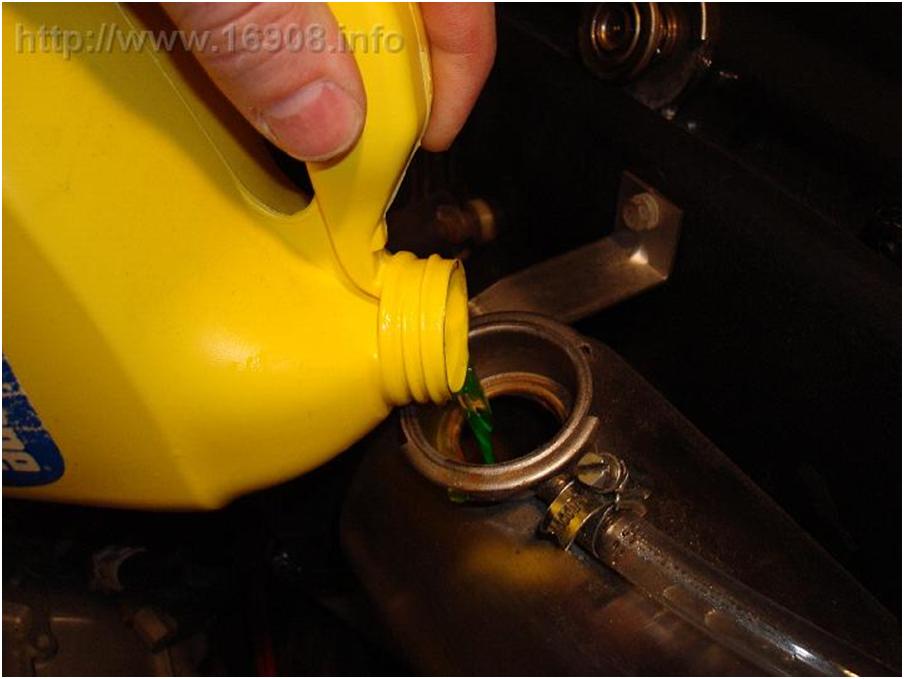
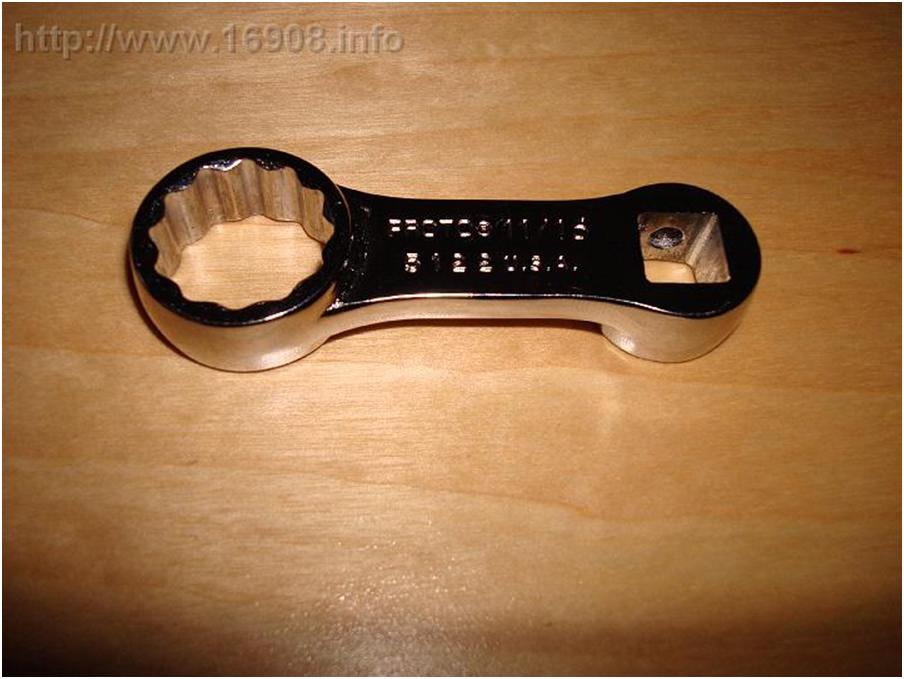
The threaded ends on Toby TABs are tapered down to 18mm. The space is too tight to fit a ratchet and socket. I found an 11/16ths is a good match for 18mm, so I purchased an 11/16ths torque adapter specifically for this job:

I used it with a ratchet to snug up the bolt

Helpful Tip #5: Use a 18mm Ratcheting Combination Wrench for this job:

I should have bought one, but I made due with the constant turning of the torque adapter. My arms are tired…

Holding the head of the bolt with the offset 19mm wrench:

Tightening the nut with the ratchet and torque adapter:

You need to torque the bolts with the weight of the car on the suspension. Supposedly the best results are attained on a level surface. As I said, I don’t have a lift, or pit, so I’ll settle for ramps. Once the nut was snug, I reattached the wheel, lowered the car, and backed it up my ramps. I torque the nut to 53 FT/Lbs with my new 3/8 drive torque wrench:


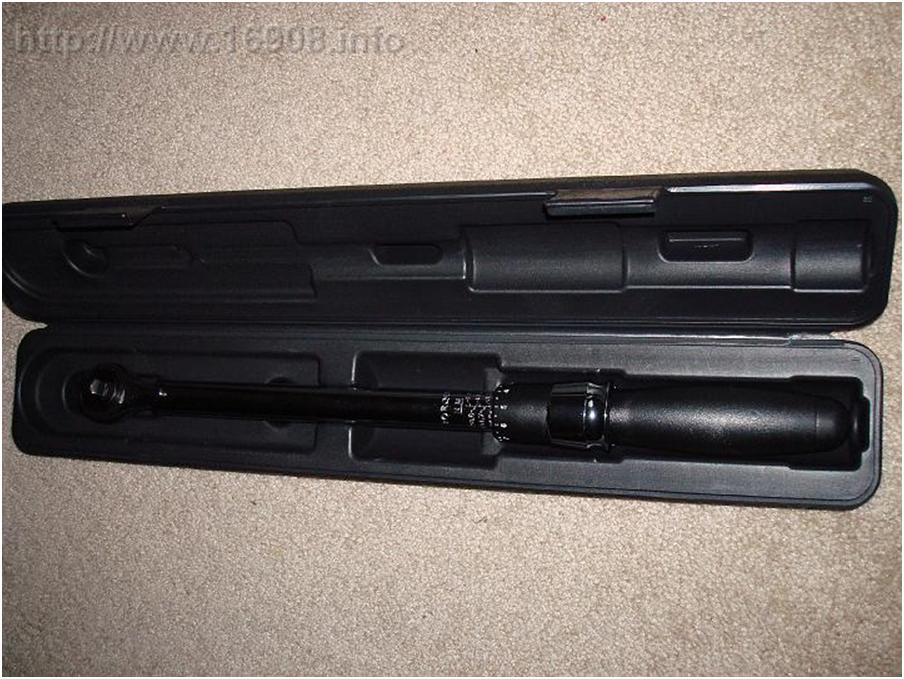
I used the torque adapter positioned perpendicular to the wrench (so to not affect the torque setting). The wrench is a little over 16 inches long, so it was short enough to work with under the car. The passenger side is now done!

Onto the dreaded driver’s side trailing arm….

It’s different for the driver’s side process, because you have to detach the trailing arm from the hub carrier to maneuver the bolt out and back in. I wanted to prove this wasn’t necessary, but I found it is…

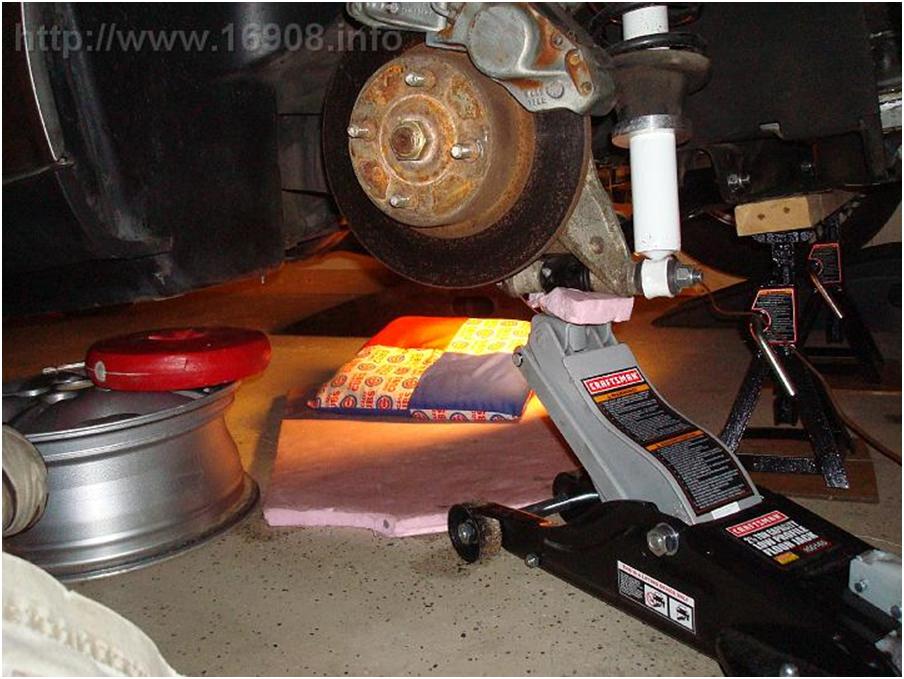
Supporting the hub carrier for bolt removal (got brave, and used my low profile jack):

Removing the trailing arm from the hub. First time separated since assembly in Ireland?

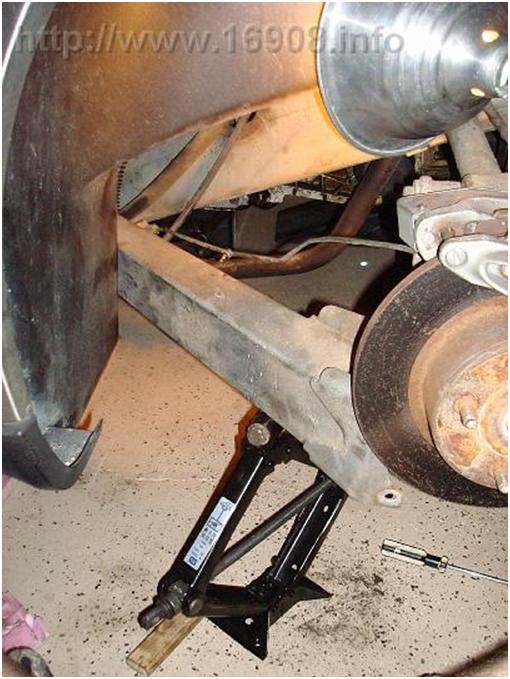
I made sure to be careful with the hard brake line. It will flex, but make sure it doesn’t cause a bend in one location. I was worried the trailing arm would have the weight of a steel beam, and come crashing down. I was relieved to find it’s not very heavy. To get the bolt out, I had to pull the arm away from the hub carrier, and then lower it below the carrier. I put my low profile jack back in place. I borrowed a scissor jack from another car to support the trailing arm, and lower it slowly:

I got the bolt out! The bolt wasn’t as bent as the passenger side bolts, but still slightly bent.

Some cable towards the narrow end of the trailing arm will support the arm:

Now I put the new bolt in, started a few threads on each bushing plate bolt, leaving it all loose. I then pulled the hub carrier back, and put the trailing arm back in position. Bolt the trailing arm back up to the hub carrier, and snug up the bushing plate bolts. Finally, snug up the TAB nut.

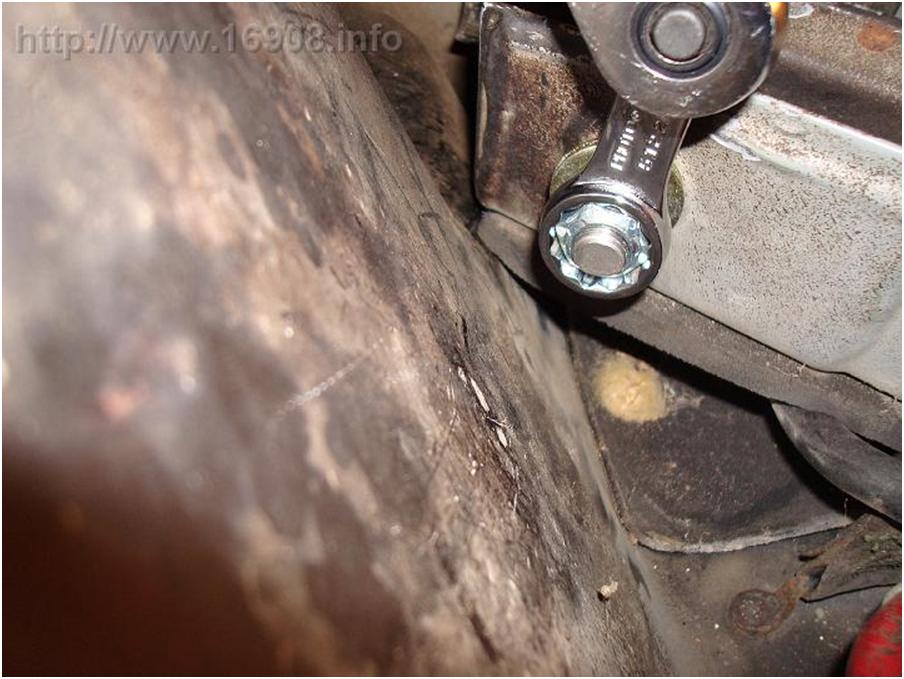
One last picture before final torqueing:
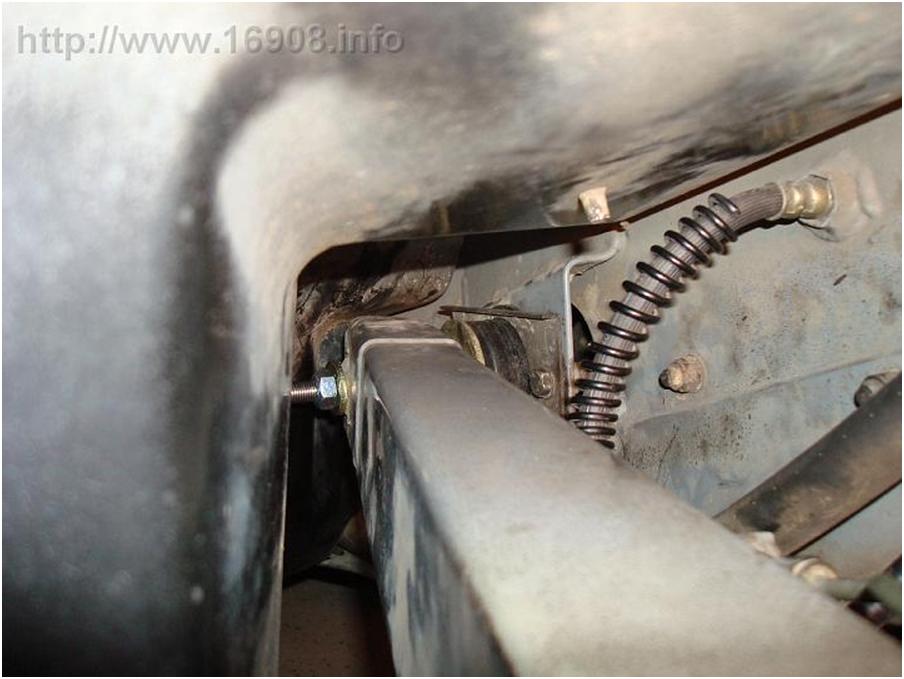
Beautiful, eh?

I reattached the wheel, lowered the car, backed up my ramps, torque the nut to 53 FT/Lbs, and the job was done! I don’t want to do this job again anytime soon…

Time elapsed: 10 days. Mainly because I didn’t know what I was doing. There was a lot of trial and error, and scheduling conflicts. I almost gave up right away, figuring I’d have DMC (Midwest) do this job for me. But I persevered, and continued to accomplish one task at a time. I learned a lot, and I’m pretty damn proud I did this all by myself. I could probably get the job done in a day or two knowing what I know now.

Since I had such a hard time figuring this all out, I felt brave and made two videos. The first is on the bolts themselves, and the second is on bolt replacement with the automatic transmission. Hopefully I didn’t make any mistakes, but please point them out if I did.

Video 1

Video 2

I’m gonna go degrease my hands for the umpteenth time

Costs:

K1000DP – Toby TAB Custom Trailing Arm Bolt Kit from DeLorean Parts Northwest – $74.95 plus $4.60 shipping
Proto 5122 Torque Adapter 11/16′ 3/8′ Drive: $15.75 plus $4.98 shipping at Drillspot.com
13mm Combination Wrench: $4.88 plus tax at Menards
Double Box End Offset Wrench Set: 15.99 plus tax at AutoZone.
Husky 3/8 Drive Torque Wrench: $68.96 plus tax @ The Home Depot

$3 Battery Strap

My battery strap was missing the buckle to connect the two straps.

PJ Grady sells a kit for $48.50. I didn’t even investigate NOS. I decided to modify a battery box strap for use in my car. FYI, here’s how to use the stock strap.

I removed the strap mounts from the body. They are bolted to the underbody with 10mm bolts, with the nuts in front of the rear right wheel, and under the car.

I bought this strap kit from Menards. It is one continuous strap meant to wrap around a battery box.

I cut the strap into two pieces. My mom sewed the ends together, to attach them to the mounts. Thanks mom! New straps mounted, old straps cut off:

Oops. I looped the strap on the wrong side of the mount. Oh well, not perfect, but it works:

All done:


Costs:

NOCO Battery Box Strap Kit, Part No. HM001CS: $2.99 @ Menards
Sewing: Free!

New Bolts

I bought some new bolts and washers for my airbox, since the old bolts were kinda chewed up. I only had one of the three washers for the bolts, and that washer was too small. I splurged and bought chrome washers. I couldn’t find the bolts I needed in stainless, and the regular ones were shinier anyway.

I also bought a bolt and a locking nut for the trim that was coming off the body:

Blogging about bolts? Not that exciting, but I want to document all my work, and what it costs.

Costs:
(3) Chrome Washer: $1.29 each @ Ace Hardware
(2) 10mm bolt: $0.55 each @ Ace Hardware
10mm bolt: $0.60 @ Ace Hardware
M5 Bolt: $0.60 @ Ace Hardware
(2) Washer: $0.19 each @ Ace Hardware
M5 Lock Nut: $0.40 @ Ace Hardware

Alignment Check

I took the day off, and took my car to Just Tires. A buddy of mine has a friend who works there, and my buddy trusts them with all of his cars. They also have the DeLorean in their alignment system, so I figured it was worth a try. I got to drive the car onto the alignment rack, and hang out in the work area and watch them check everything. I told the tech about how the car was lowered, and the camber would most likely be off. If it was off by too much, I’d have to buys some adjustable lower control arms. I brought along my alignment shims, and the torque specifications.

The results were the camber is off by about 2 degrees. The tech advised me not to do the alignment now, since I should get the adjustable lower control arms, and the car will need to be aligned again. The bad news is, these control arms will cost me a few hundred dollars. The good news is, my alignment check was free.

So which control arms should I buy?
Delorean Motor Center: $325 plus refundable $200 core charge
Mid-State: $210

More on that at a later date. For now, I don’t want to drive my car until I can correct the camber. I should have done this over the winter.

Costs:
Alignment Check: Free! @ Just Tires – Wheaton, IL

New Drop Window Seal

The seal for the passenger side window glass was missing. Another reason I avoid driving in the rain.


I found something called the Window Drop Glass Seal on specialtauto.com, but got sent a piece or felt with adhesive. Guess I should have called on that one.

So I bought the piece I needed from DMC (Midwest). I found the metal support from the previous seal still installed. Once I got that removed, installation was easy. I ended up using the felt on the driver’s side

All better.

Costs:
Window Drop Glass Seal @ Specialtauto.com: $9.95 plus shipping
Seal Pwr Wdo Wipe RH @ DMC (Midwest): $28.89 plus tax

Lubricating the lower Speedometer Cable

I read the instructions for this task, purchased the products, and went for it. This would be one of the easier tasks I attempted.


Supplies Pictured:

Cable Lubricant
Plastic bag
Brake Cleaner
Orange Hand Cleaner
Simple Green Cleaner
Paper Towels
Old Newspaper (oooh, $1.99 milk…)
Utility Light

Supplies Not pictured:
Low profile floor jack
Jack Stands
2X4 Wood
Zip ties
Wire cutter
Armor All

Ok, I jacked up the car using the proper procedures, and turned the wheels to the right:

And access the cable behind the driver’s side front wheel. I unscrewed the knurled coupler, but the cable was also zip tied to the brake line. I used a wire cutter to free the cable:

I followed the cable into the rubber grommet, into the body, and unscrewed it from the lamda counter:

The cable was free, so I took it into my work area (kitchen). I removed the cable from its sheathing, and wiped it clean with paper towels.

I sprayed brake cleaner down the sheathing, and it spurted into my eye. So I read the label on the can, and flushed my eye with water for 10 minutes.

Next I reinserted the cable, and moved it around to free any gunk. I was supposed to drain it into my plastic bag for collection, but I ended up draining it into my sink. Oh well.

I removed the cable once more, dried it off, and reinserted it, this time using several drops of cable lubricant. I cleaned off the sheathing with simple green, and used some Armor All on it.

Then I simply reconnected it. I also used some new wire ties to keep it close to the brake line. I drove the car tonight, and the speedometer needle seems to be steadier at a constant speed, but still vibrates while accelerating. Oh well, at least I’m lengthening its life.

Costs:
Cable Lubricant on eBay: $5.49
Brake Cleaner from Advance Auto Parts: $3.44

Spring Tech Session, AC belt change

The Delorean Midwest Connection had their spring tech event at DMC (Midwest) May 3rd. I drove up in the morning, in the rain. I hardly ever drive in the rain, but this was necessary. I got to put the car on a lift, and check out everything underneath the car. I got to see a hand built car from DMC (Houston) which was flawless, and made me very jealous. I saw Rich W’s Buick Grand National powered DeLorean. I also bought some parts I had my eye on for awhile.

The shop is fascinating to me. I would have stayed all day if I didn’t have a Kentucky Derby Party in the afternoon.

On the way to the event, I stopped by the defunct Meadowdale Raceway for a photo op. It’s been several years since I first explored this place.

Here’s what the silo looked like in 2002 when I photographed it. Original paint job still there:

Here’s the hand built car at DMC (Midwest:). It was stunning:

Clean everything, upgraded exhaust:

Rich W’s Buick GN engine:

I didn’t take any pics of my car since the other cars put my car to shame. I should have taken some pics under my car.

I also learned how to change an AC belt. The belt my car was currently running was an original “concours” belt that Ken K took off his car last time I saw him. It was leaving belt shavings all over my engine. I had a spare I bought awhile back, so after it was installed, I bought a new spare from NAPA.

Costs:
AC Belt – 9530 Gates Green Stripe: $11.95 plus shipping @ SpecialTAuto.com
NAPA 9530 Belt: 20.28 plus $1.57 tax at NAPA

Coolant Flush (failure), Coolant Self Bleeder Installation

I wanted to flush the coolant after I saw my coolant had an orange tinge to it. I read the instructions many times, and purchased the Coolant Self Bleeder Kit. I felt I could do this. I would document everything in hopes of writing a good how-to guide.

The night before, I prepped the engine block drains with some PB Blaster. I thought that would help. *Thought*. The next morning, I attempted to perform the procedure in my parent’s driveway, which has a slant, rather than jack up the rear end of the car:


It also has easy access to a garden hose. I assembled my supplies:

Supplies Pictured:
Toolkit
Printed instructions
drain plug removal tool
New Yellow drain pan (I chose yellow so to identify it with Prestone, and keep it separate from my oil drain pan)
New Yellow bucket
empty 1 gallon jug (for fluid disposal)
Coolant Self Bleeder Kit
Orange Hand cleaner
Simple Grean Cleaner
(2) Gallon Distilled Water
PB Blaster
Rags
Garden hose

Not Pictured:

Large funnel

The engine block drains are the same stupid plugs as the oil drain plug with the 8mm square hole in it. I replaced my stock oil drain plug with a normal one. My oil drain plug removal tool was a 8mm hex key that I ground into a square with a dremel. The engine block coolant drains are a b1tch to access, so I ground the other end of the hex key into a square, cut the end off, and put it into a socket:

I thought it would work. *Thought*. So I went to work, draining the system. Laying on the ground, on my back, trying to get the lower radiator hose off is quite difficult. My hose is kinda hardened, and stiff. It should probably be replaced, but I didn’t have a replacement on hand. Next time I try this, I might replace it with a silicon hose. I had to use force to get the hose off, but still be gentle with the plastic radiator tank. Why oh why doesn’t the radiator have a drain petcock?

I finally got it off, and drained what I could:

Yuck.

So there aren’t too many pictures from here on out. Why? Well when it came time to get the block drains out, I failed. I couldn’t get much leverage while laying on the ground, and my homemade tool was akward to use, and not very solid. I managed to wedge my hunk of hex key in one of the drain plugs at one point. I tried for awhile, but eventually gave up. Also, my neck hurt from laying on the ground, while struggling with things under the car. I think I need a creeper. Or a lift.

I previously tried to bleed my coolant at the water pump, and managed to spill coolant on the pump. The pump squeaked for awhile. Worst yet, I don’t think I bled the system enough. I made it a point to order the bleeder kit. So next I installed the coolant self bleeder. Time to remove the throttle shield:

Ok. Now I remove the brass bleeder screw in the center of the picture:

And I’ll just skip right to the finish:

My self bleeder kit also includes a petcock to be spliced into the upper radiator hose. This makes bleeding the radiator easier than pulling the hose off the plastic tank, and getting hit in the face with coolant:

Alright, now lets mix some coolant. I decided to mix my own, instead of buying the premixed stuff. Coolant costs over $10 a gallon, and distilled water is less than $1. Why pay over $10 for 50% water? I purposely wanted to use distilled water.

“Distilled or deionized water is preferable to tap water for use in automotive cooling systems. The minerals and ions typically found in tap water can be corrosive to internal engine components, and can cause a more rapid depletion of the anti-corrosion additives found in most antifreeze formulations.”
Wikipedia (Yes, I know Wikipedia is not a terribly reliable source)

So I poured some coolant in, and it overflowed. The system is supposed to hold 3 gallons, and I couldn’t get 2 gallons in. I then poured some in the large hose connected to the water pump, but couldn’t add much more. Great. So I collected my old coolant, only spilled a little on the ground, and it amounted to about a gallon. So basically I tried for several hours to flush my coolant, only to replace about a gallon. At least I got the bleeder kit installed.

For the next time I try this, I’m ordering the 8mm square tool from snap-on, Stock#: PMM408A.

Costs:
Wings-B-Cool Cooling System Self-Bleeder Kit from Delorean Parts Northwest: $29.95 plus $7:00 shipping
(2) 1 Gallon Prestone Antifreeze from Wal-Mart: $10.97 each
12 Quart Bucket (Yellow) from Wal-Mart: $1.50
5 Gallon Drain Pan (Yellow) from Advance Auto Parts: $7.97
(2) 1 Gallon Distilled Water from Meijer: $0.68 each

New coolant hose

As I mentioned in a previous post, I noticed a very small coolant leak coming from the host from my coolant bottle. The hose clamp was corroded, so I ordered a new hose with clamps. This was my first venture with cooling system maintenance. I asked someone how tight should the hose clamps be – to paraphrase, they replied “it’s hard to say, you have to have a feel for it.”

So I didn’t want to drain the whole cooling system. It’s still March, and freezing cold out. I’ll do it later this year. I bought a small pump so I could empty the tank. I bought one new hose online, and received three:

Bonus! Thank you. Got my pump:

My problematic hose and clamp:

Old hose left, new hose right. Not quite the same…

New hose installed:

Add some new coolant:

Why is my old coolant brown?

All done! Haven’t seen the hose leak yet.

Supplies:

Prestone 50/50: On Hand
Water hose large to water bottle tank: $9.95 @ SpecialTAuto.com
Fluid Transfer Pump: $4.99 @ Autozone