- New carpet
- More sound insulation
- New dash
- Dye interior pieces
- LED Binnacle lights
- Footwell Lights
- More to come!


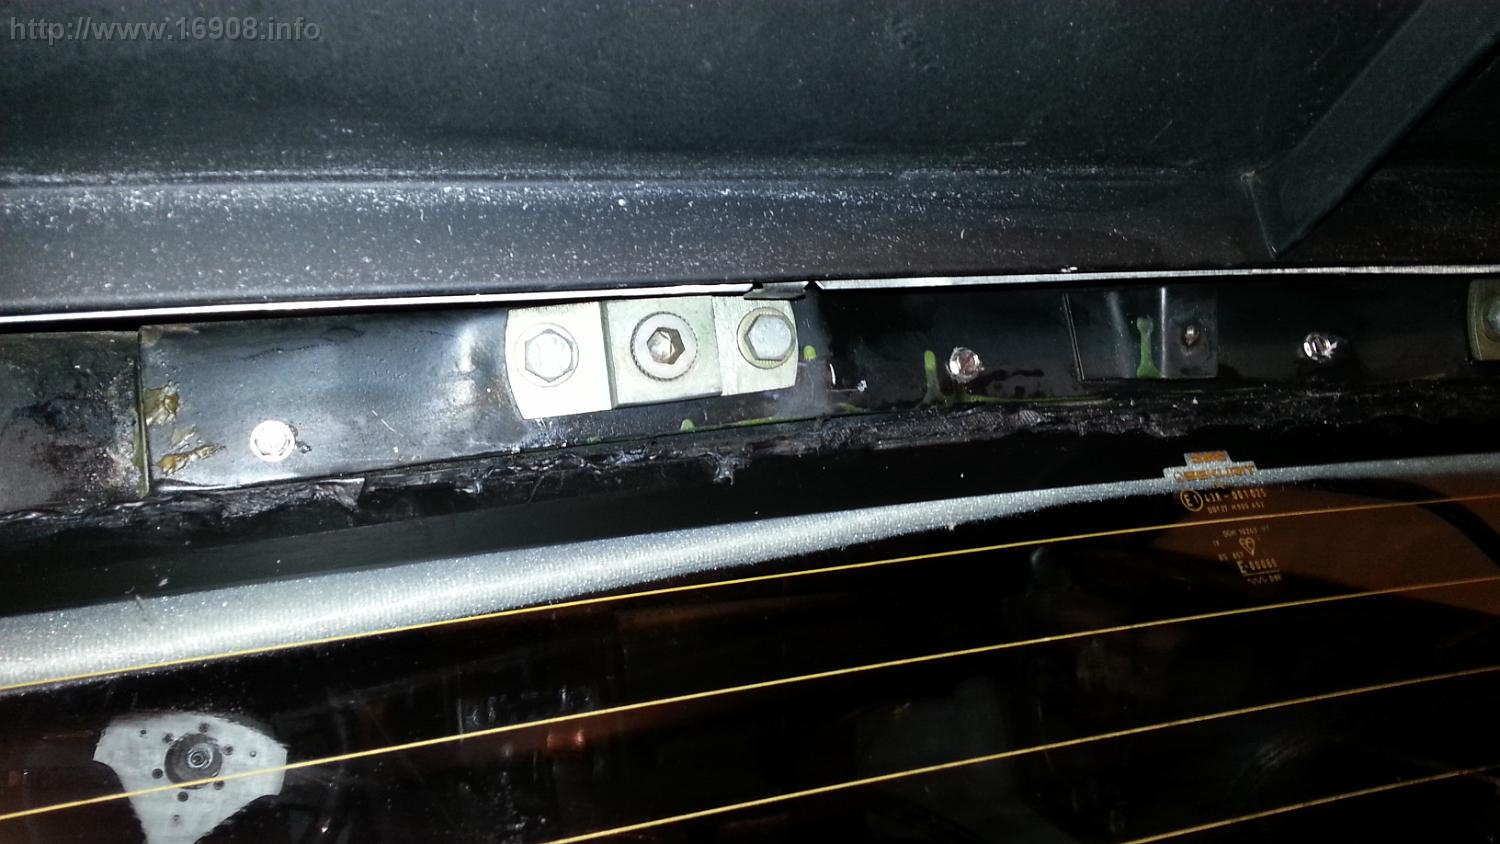
The steel roof structure that holds the torsion bars is glued to the top of the fiberglass. This is prone to separating over time, and distorting due to the forces of the torsion bars. After removing the “rear screen upper finisher” you can see the steel roof structure covering the fiberglass above the rear window:

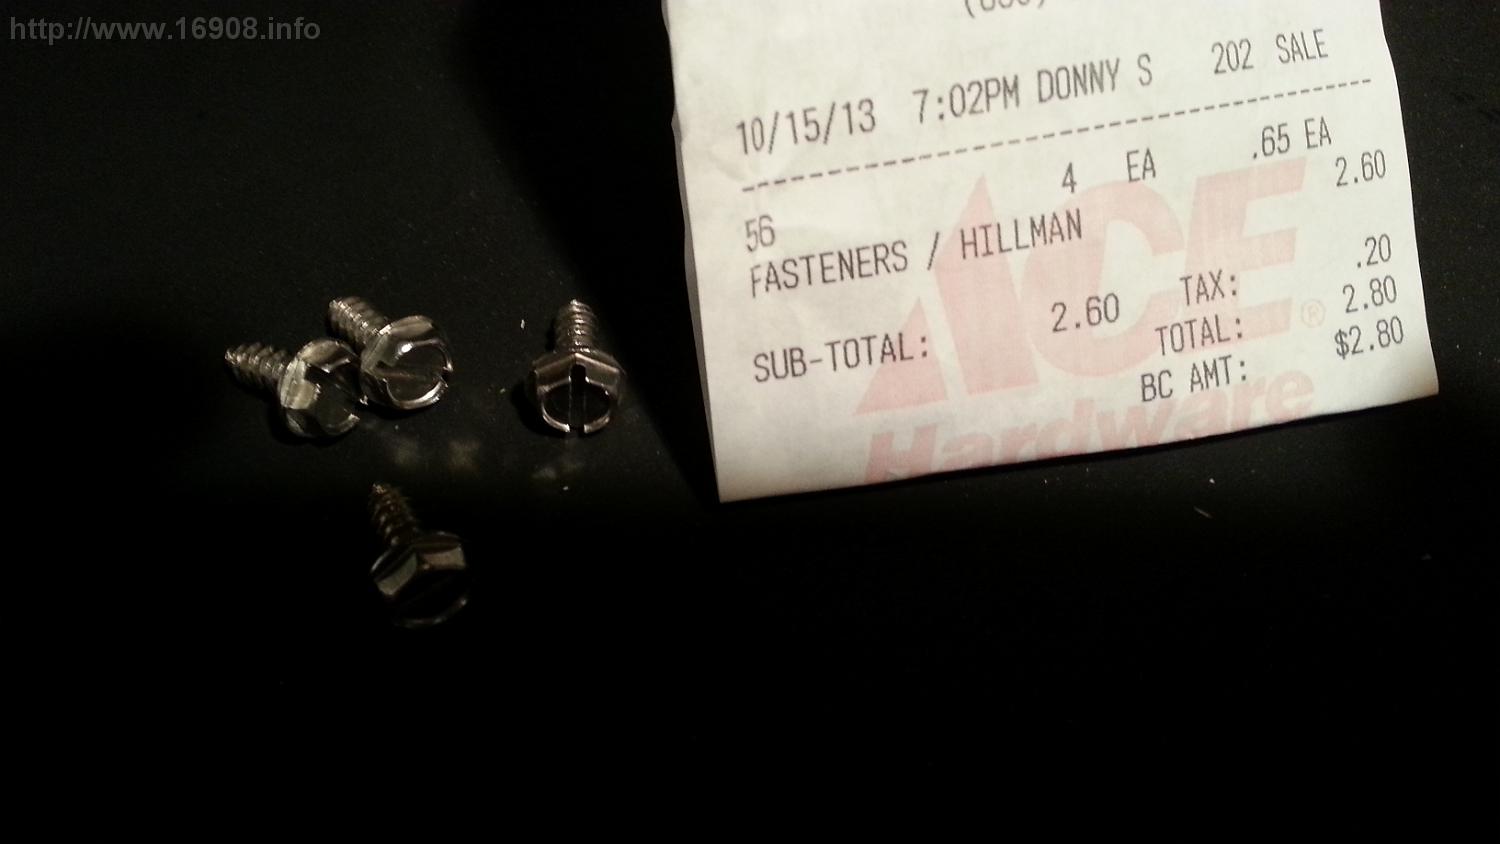
There are a few ways to secure this, and I chose a simple method. I secured the roof structure to the fiberglass on the back of the car, above the rear window with some stainless sheet metal screws.
Drilling:

I also covered the screws in RTV sealant, before screwing them in, to keep water out. That’s probably overkill, but it was on hand and took a minute.

Costs:
(4) Stainless Sheet Metal Screws: $2.80 @ Ace Hardware
I came across instructions on the internet for performing a “wedgectomy” on the locks, which involves grinding off a plastic wedge from the door latches. With the wedge in place, the doors can’t be locked while open. Trying to lock them while open will put force on the linkages, possibly throwing them out of adjustment. A latch without a wedge can be safely locked while they’re open.
Since I have remote lock/unlock, there’s always a chance I might bump the lock button while the doors are open. My door panels were currently off due to maintenance and repair. My latch and lock linkages also needed adjusting, so I decided to perform the wedgectomy.


Removing each latch is not easy! I spent a few hours reorienting and finally removing them from the doors. I took many pictures of the linkages so I could put everything back together correctly. Once the latches are out, performing the wedgectomy is fairly easy with a rotary tool and a burr grinding bit. I also got the chance to clean all the latches, and lube them up with lithium grease. Sorry, I didn’t get any pictures of the actual wedge, or it’s removal. Reinstallation is even more difficult due to adjusting the linkages.
After I reinstalled all the cleaned and updated latches, testing was successful!
Costs:
Lithium Grease: $3.99
Ever since I bought 16908, the driver’s side mirror has been wobbly. Someone previously took the bottom cover off the mirror, and tried repairing it. They didn’t, and the plastic cover was lost.
I was able to disassemble it, bend the compression washers, and stiffen up the mirror. I also cut a new piece of plastic to cover the inside of the mirror, and used RTV to secure it.

The passenger side mirror has never been able to move on its vertical axis. Luckily the electrical connections were dirty, after just needed to be scuffed up to restore power to the motor.
My driver’s side convex mirror glass position needed to be corrected. I removed it, and reattached it with some 3M molding tape.

For the first time since I’ve owned the car, I have two perfectly working side mirrors!
Costs:
| Item | Vendor |
Cost |
Tax |
Total |
| Molding Tape | Advance Auto Parts |
$ 6.99 |
$ 0.58 |
$ 7.57 |
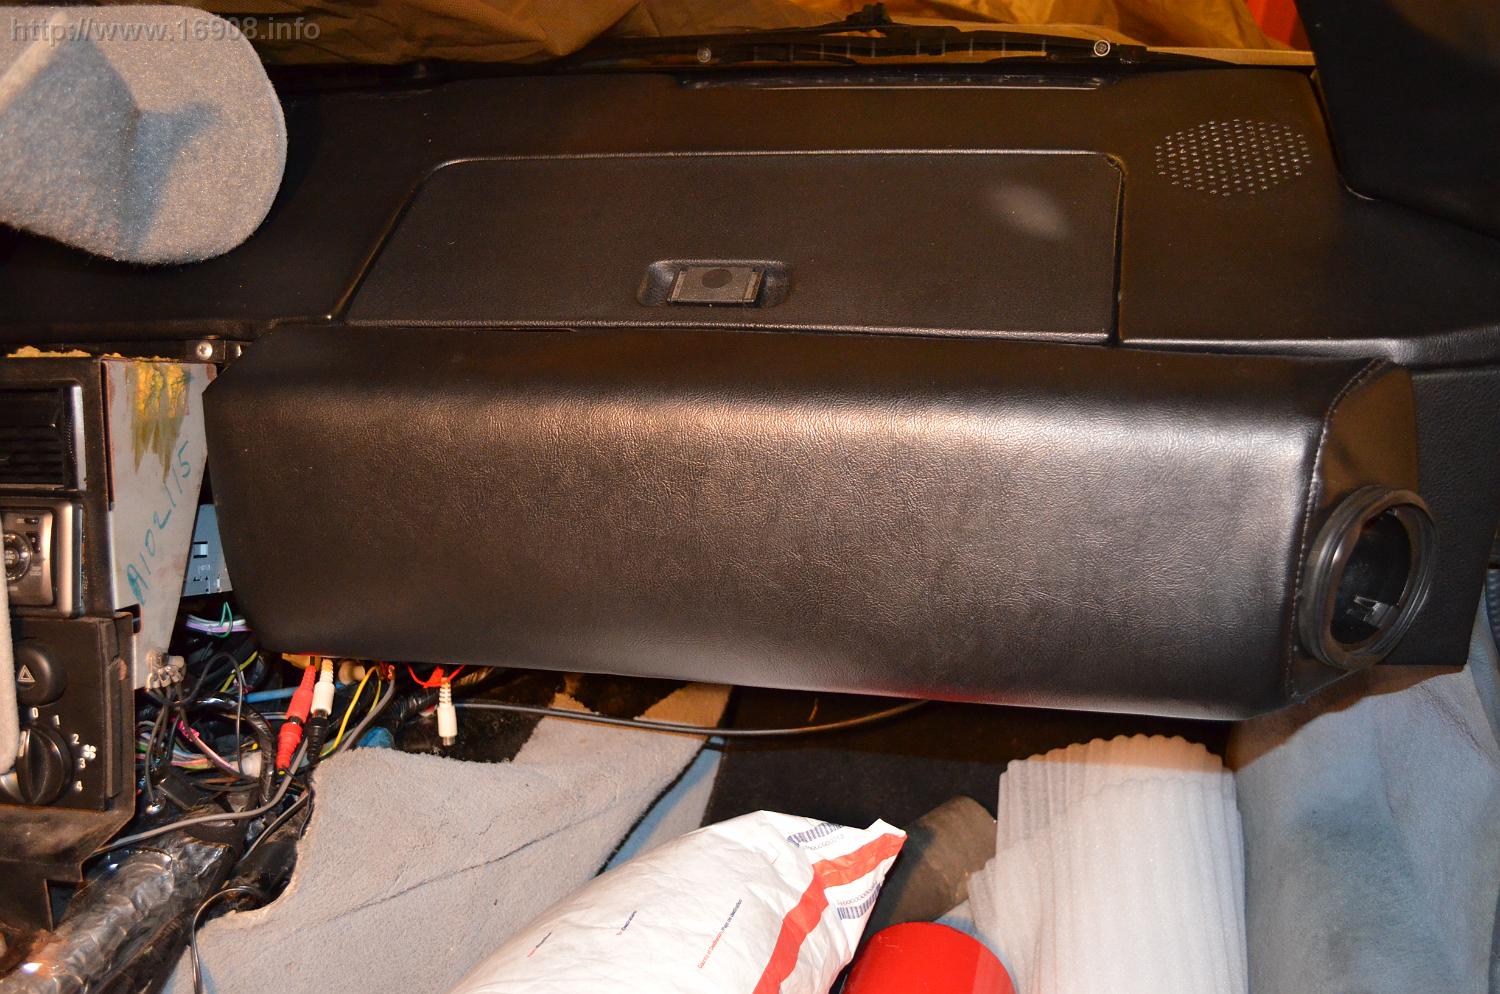
My previous owner had the passenger side kneepad recovered. However, the wrong vinyl was used, and the recover job didn’t turn out very well. I’ve grown to dislike the kneepad over the years, so I located a used kneepad in good condition:
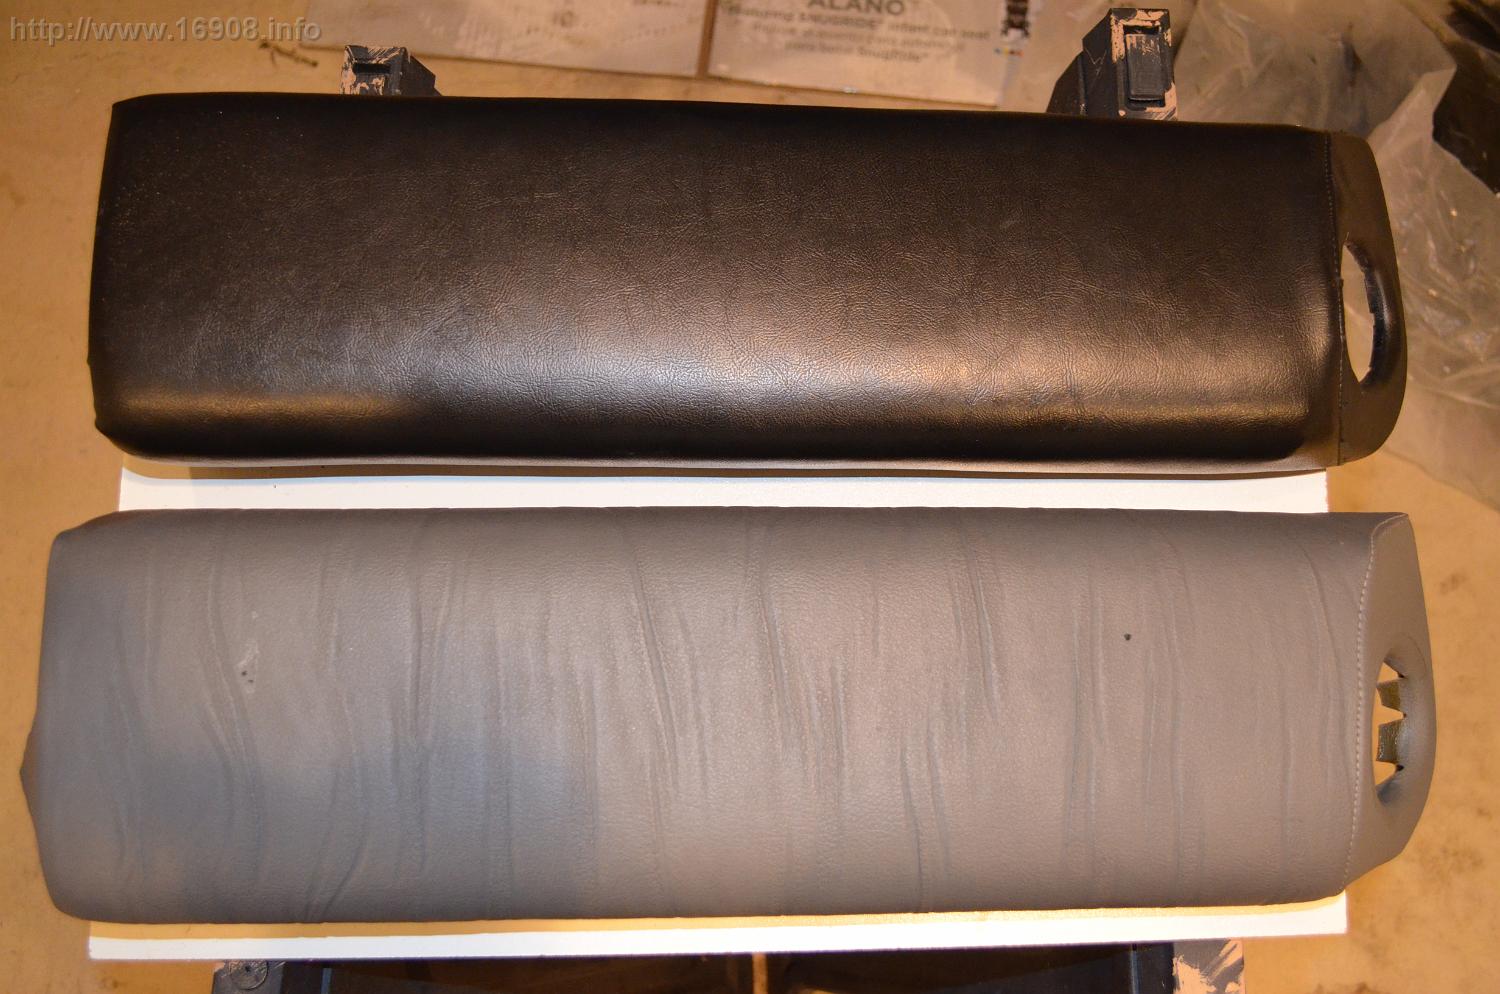


It has the right pebble texture, and the ripples in the vinyl. It’s a little worn and sun-faded, but I planned to re-dye it anyway since it needs to be black.
My other kneepads were loose, and they had to come out when I replaced my steering column. I also gave them a good cleaning before re-dying them. It turns out, they were disgustingly filthy! Lots of dirt, possibly from when the car was abandoned many years ago.
Dying the kneepads and door panels:

Passenger kneepad dyed:

I think they turned out well:


I plan to sell the recovered kneepad, and “recover” some money. With these kneepads, now I feel I need to recover or replace the dash, binnacle, and A-pillars.
| Item | Vendor |
Cost |
| Used Passenger Side Kneepad |
$ 90.00 |
|
| SEM Landau Black Color Coat | Summit Racing |
$ 9.95 |
|
Total: |
$ 99.95 |
My seatbacks were broken. The vinyl was torn, scuffed, worn, ripped, patched, and disintegrating. Even the staples for the material were rusted. I decided to try and make some new ones.


Tools Used:
Jig Saw
Sharpie Marker
Dremel or Rotary Tool
Drill, drill bits, countersink
Disposable Paint Brush
Rivet Tool
Scissors
Razor blade
Heat Gun
Supplies:
Vinyl
Hardboard
Contact Adhesive
Rivets
I drilled out the rivets on my old seatbacks, and reclaimed the brackets. I marked the position of all the holes with an old seatback. After drilling the holes, I riveted on the brackets. I then spread on some contact adhesive and let it tack up. Then I warmed up the vinyl with my heat gun, stretched it and attached it to the board. Finally, some trimming with a scissors and razor.

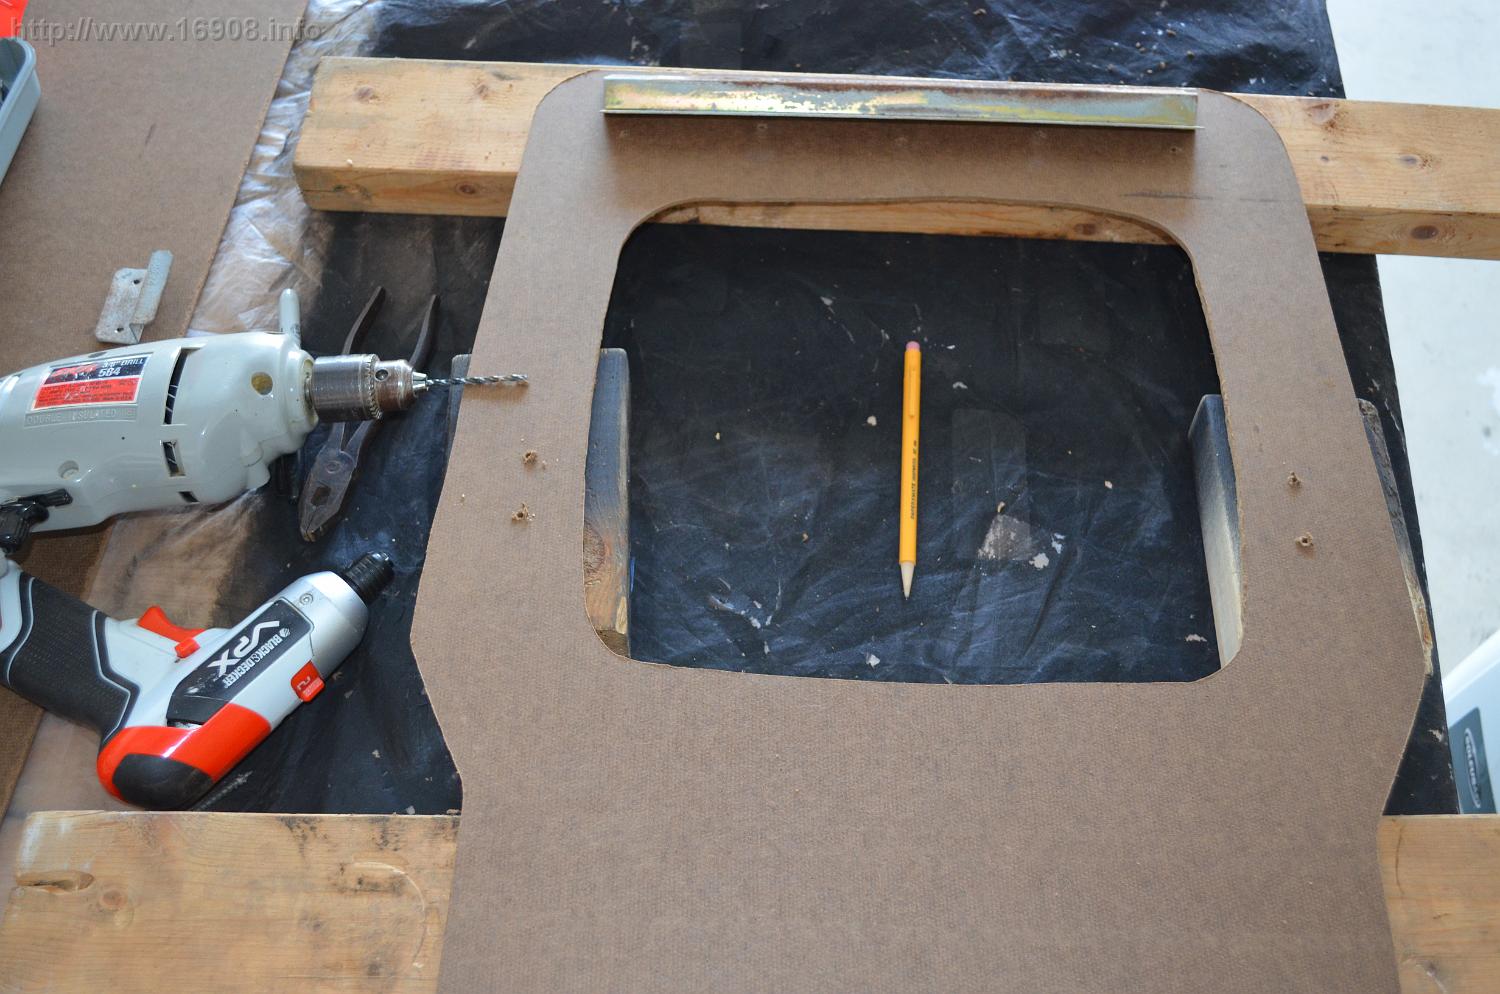

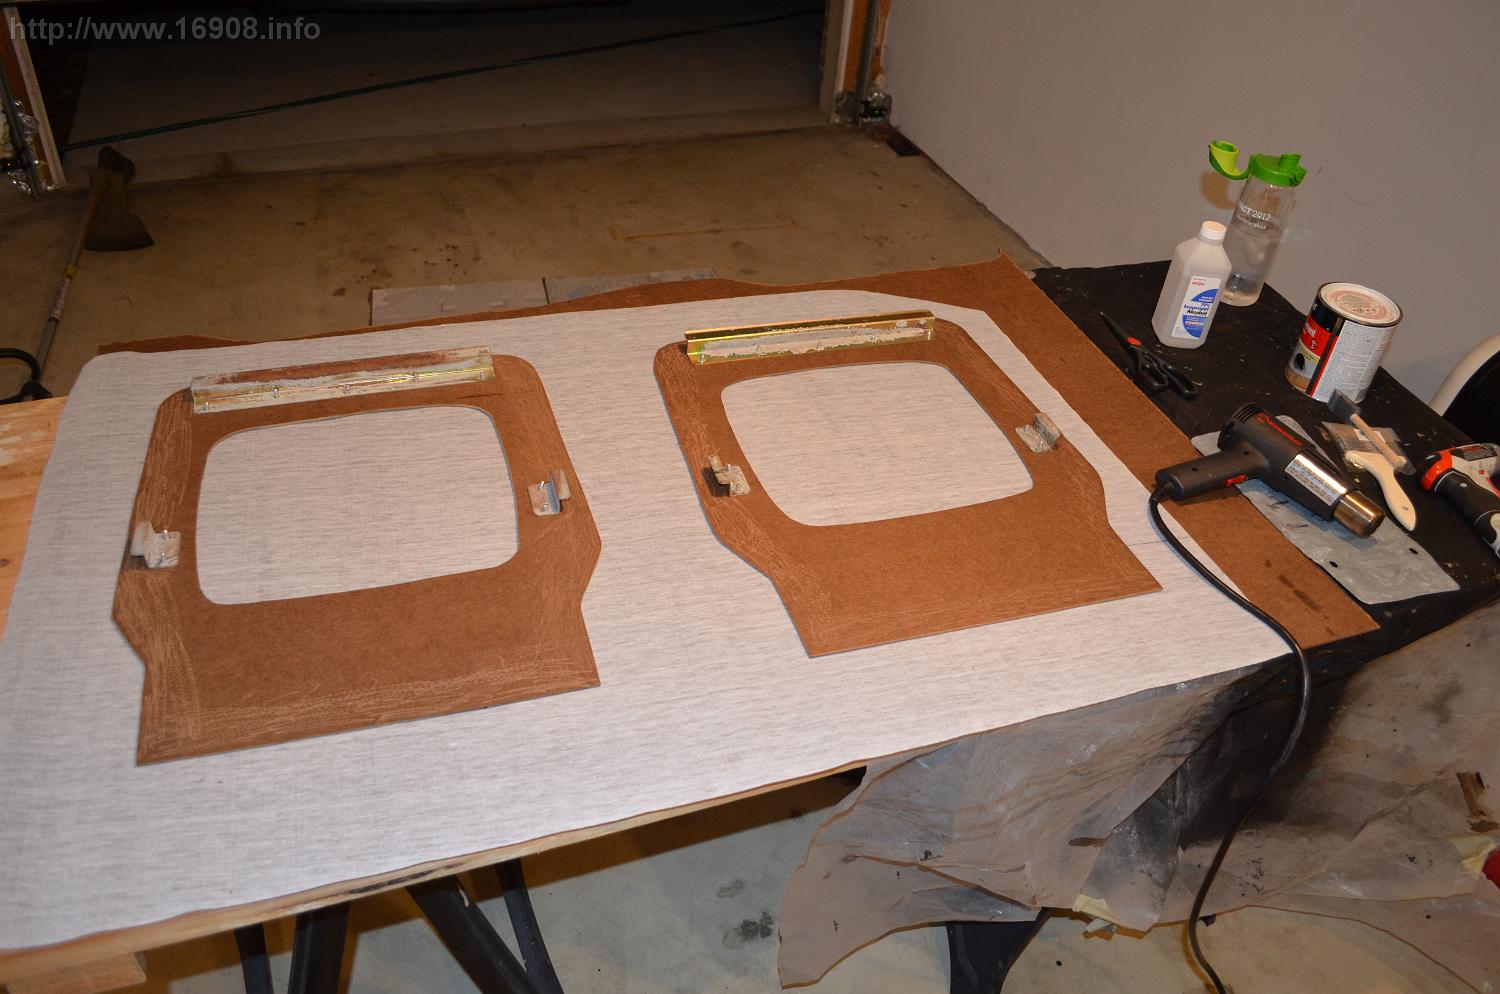

Marking the holes for the screws was the hardest part:
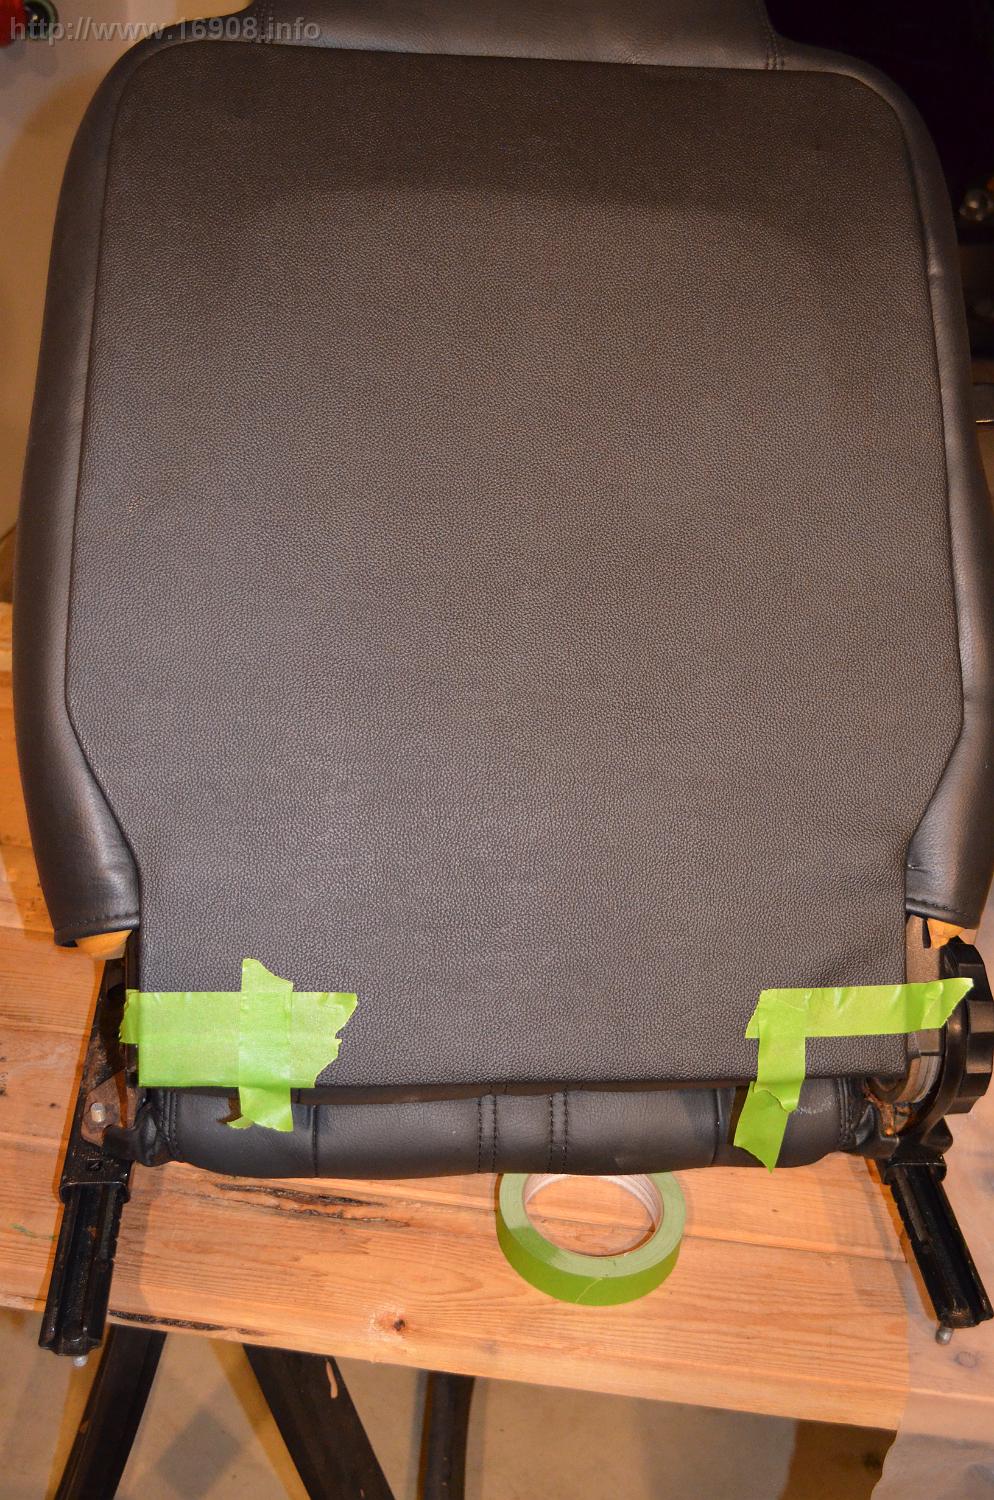
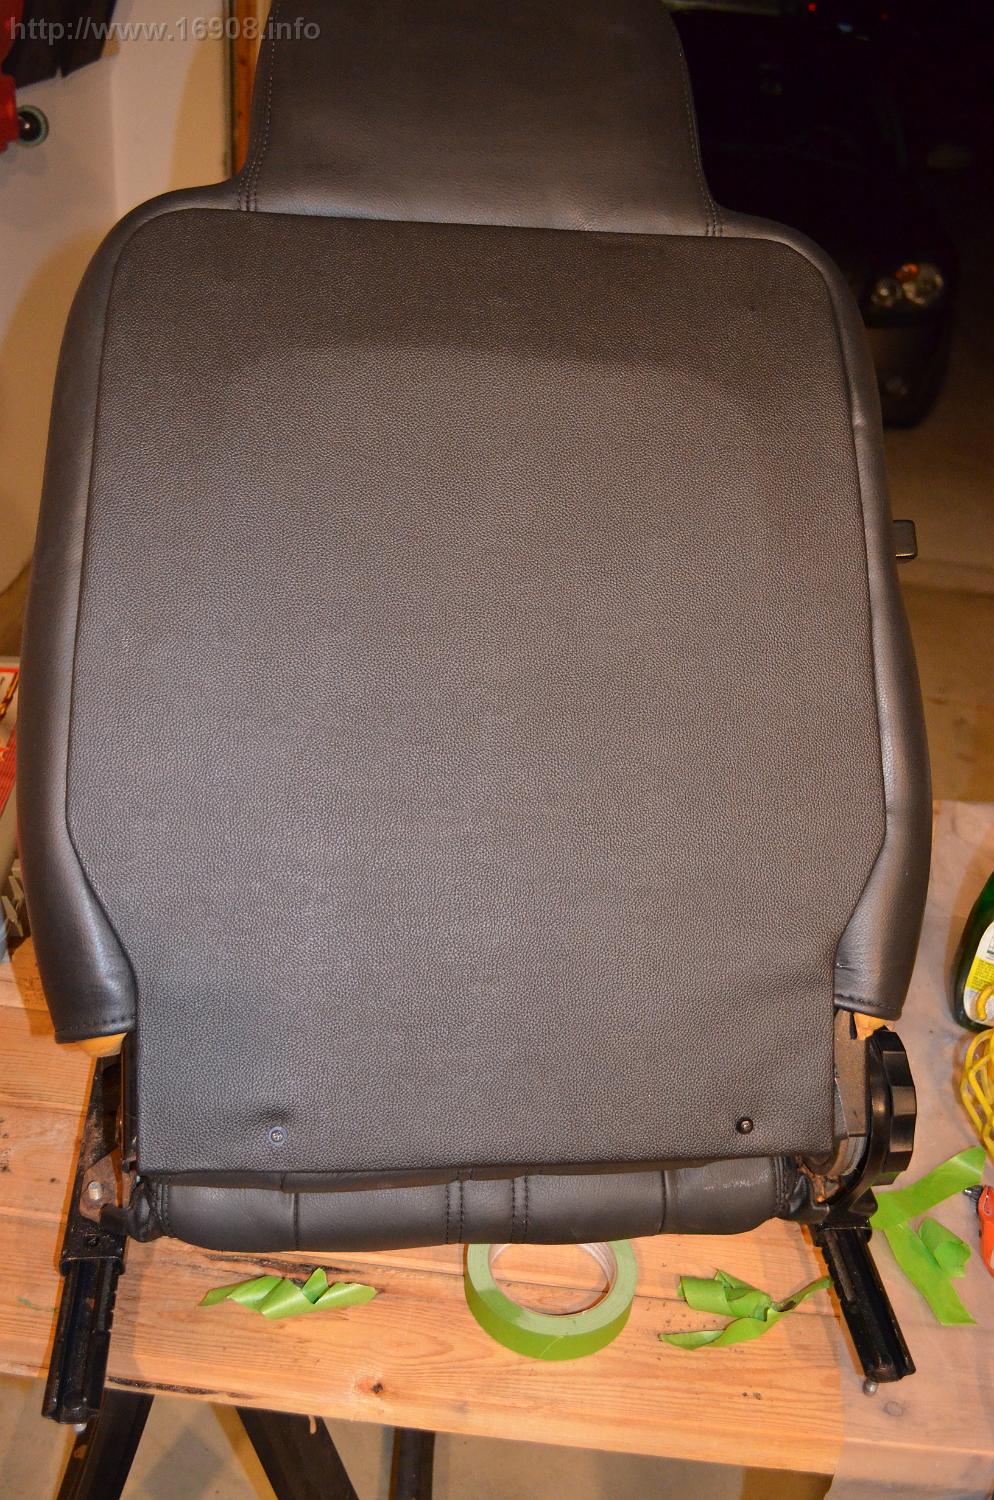
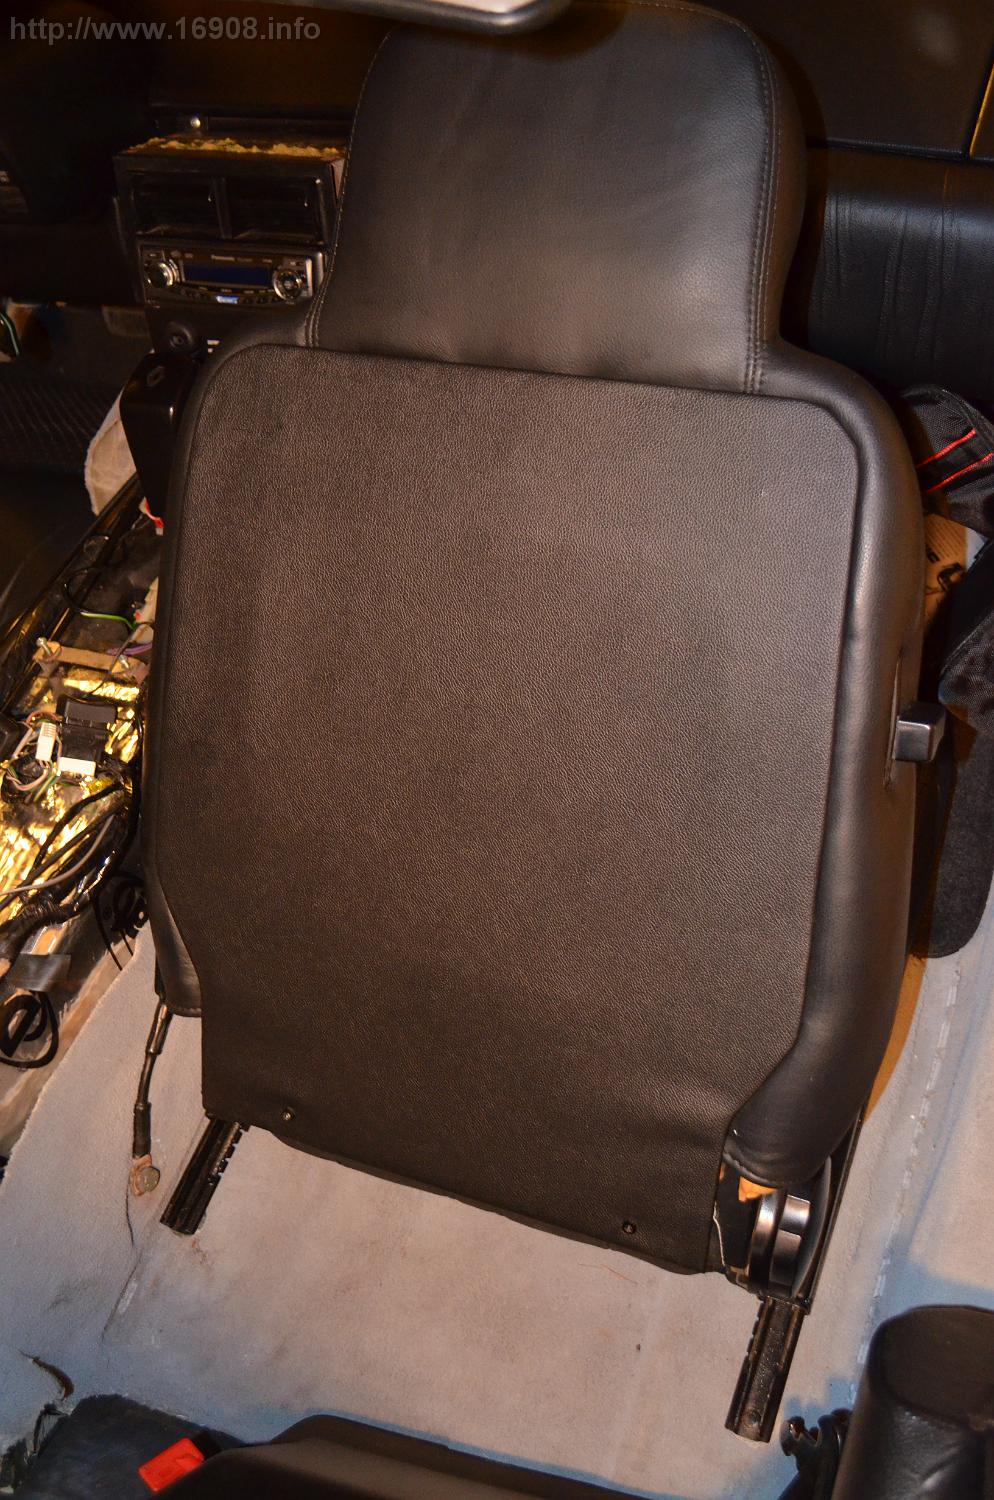
The passenger side came out great!. Unfortunately the driver’s side is sub-par, and will need to be recovered at some point. For now, it’s still a huge improvement.
Costs:
|
Item |
Vendor |
Cost |
Tax |
Total |
|
Dap Weldwood Contact Cement |
Home Depot |
On Hand |
||
|
Disposable Paint Brush |
Home Depot |
On Hand |
||
|
Black Shang Vinyl |
Hancock Fabrics |
$ 9.49 |
$ 0.59 |
$ 10.08 |
|
4′ X 4′ Hardboard |
Menards |
$ 4.79 |
$ 0.41 |
$ 5.20 |
|
Rivets |
Home Depot |
$ 5.24 |
$ 0.43 |
$ 5.67 |
|
4 Screws, 4 Nylon Washers |
Ace Hardware |
$ 2.12 |
$ 0.16 |
$ 2.28 |
|
Total: |
$ 23.23 |
|||
For as long as I’ve owned my car, the steering wheel has been a little shaky at high speeds. When this occurs, the common cause is that the steering column bushing is worn and needs to be replaced. So I bought myself a bushing, and found some replacement instructions:
http://support.delorean.com/KB/a71/play-or-movement-in-the-steering-column.aspx
http://www.deloreanreborn.com/index.php?itemid=122
I decided I would remove the column while replacing the bushing, instead of using the “cut-and-cram” replacement method. I already had my knee pads removed since I’ve been re-dying some interior pieces. When I finally pulled the column out, a piece of it remained in the firewall… which is not supposed to happen:


The steering column is collapsible in the event of a front end collision, so the column won’t impale the driver. There’s an inner column, made of two pieces where one fits over the other loosely. Then there’s an outer mesh jacket (or cage) that surrounds everything. The mesh provides some strength and stability, but crushes together in the event of an accident. A quick look at some parts diagrams confirmed the column was not complete. The mesh had been broken and removed by a previous owner. Broken mesh is a common problem, and can usually can be tack welded back together. The previous owner probably didn’t have the means, or just didn’t care.
New steering columns are around $260. Looking to save some money, I emailed a few guys that deal with used Delorean parts, and located a used steering column for a decent price. I was able to transfer the keyed ignition, turn signals, horn, and steering wheel to the new column. Old column (top), new(er) column (bottom):

Here’s the steering wheel lock on the ignition, and the hole in the column where they go together:

Delorean steering columns are adjustable in height, and telescope in and out. The common problem is once the height is raised, they sink lower over time. My steering column has this problem. Being 6′ 3″ in height, my legs take up a lot of room, and my steering wheel is always hitting my knees. I also found these great instructions on how to remedy the issue:
http://dmctalk.org/showthread.php?5733&p=102148&viewfull=1#post102148
After I disassembled everything, I cleaned off all the grease and gunk, and roughed up the metal pieces with 60 grit sandpaper:

I also installed the new bushing. The old one (left) didn’t look too bad:

I used a jewelers screwdriver to force the two together. The screwdriver has a nice taper to it, which pulled the column and shaft into the sweet spot:

I stripped the threads of the M8 bolt that connects to the shaft, so I bought a new stainless bolt and lock nut:

I also needed a new M14 nut to hold the steering wheel in place, which wasn’t included with my new column. My previous column didn’t have it either since I crossed the threads once, then re-threaded them to larger threads: https://16908.info/?p=1124
Oh yeah, and I broke my low-profile Harbor Freight creeper:

I got everything put back together, and I’m happy to report, the column is sitting very high, and is firmly locked in place! I can finally see the top of my speedometer! My test drive with the car at high speeds seemed very smooth!

| Item | Vendor | Cost |
Tax |
Total |
| Steering Column Bushing | DMC Midwest |
$ 15.95 |
$ 1.24 |
$ 17.19 |
| Steering Column (Used) |
$ 130.00 |
$ – |
$ 130.00 |
|
| M14 1.5 Fine Thread Nut | Ace Hardware |
$ 3.20 |
$ 0.24 |
$ 3.44 |
| Stainless M8 Bolt | Ace Hardware |
$ 2.20 |
$ 0.17 |
$ 2.37 |
| Stainless M8 Lock Nut | Ace Hardware |
$ 1.10 |
$ 0.08 |
$ 1.18 |
|
$ 154.17 |
I could see through the door gaps that when my passenger door was open, my driver’s door lights were lit. That’s not supposed to happen, the door lights should operate independently. After reviewing the wiring schematics, I traced the problem to a bad diode.
After some troubleshooting, I found the red diode was bad:

Hey, is there something wrong with my steering column?
The door lights now work correctly.
Costs:
| Item | Vendor |
Cost |
Tax |
Total |
| Diode | DMC Midwest |
$ 8.91 |
$ 0.69 |
$ 9.60 |
My negative battery cable was very stiff, and the insulation was cracked. I don’t like the Delorean’s claw-like battery connections either. I’ve also seen the frame connection end of the cable come apart. With vendors charging big $$$ for new cables, I set out to find a cheap alternative. Here’s what I found:

(not the actual car)
A junkyard third generation Firebird had nice cables. Heck, there was a positive cable that wrapped around most of the engine compartment! It measures in over six feet! These long, thick gauge cables aren’t found on today’s cars.


The negative cable also has another smaller cable leading into the battery connection. I might utilize this someday for stereo equipment, or my fuel pump. For now, its wrapped in electrical tape, and strapped down, away from the positive terminal.
I like the GM style battery connections better, and the frame connection has a nice crimp on it:

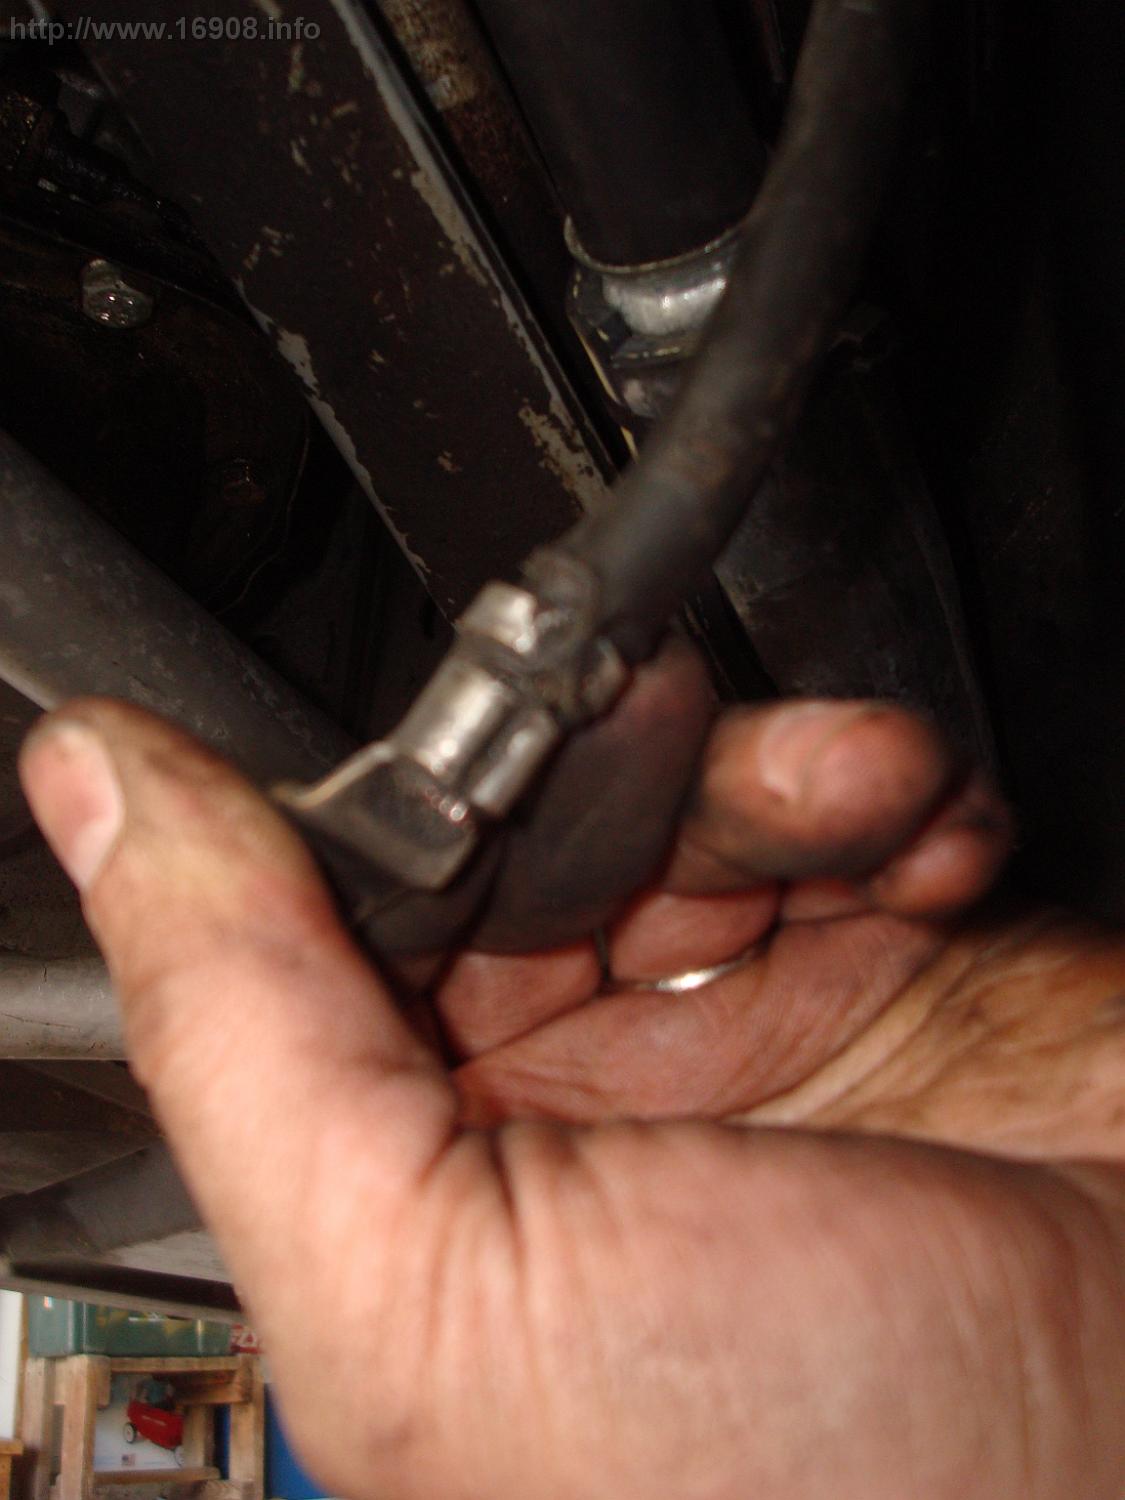
I ended up cutting the Delorean cable to remove it. I’m willing to bet a lot of electrical problem arise from these poorly made connections. Again, this is why vendors are pushing sales of their expensive cables.


…and with minimal effort, I was easily able to twist the connection off. Look, it made contact with less than 1/4 of the copper bundle. The rest is corroded:

Connected to the frame.

Someday I might cut off the red positive battery connection on the long cable, crimp on some terminals, and run it from the frame to the engine. For now, this will probably improve the grounding of the car.
Costs:
| Battery Cable (short) |
Aurora Auto Parts |
$ 5.00 |
| Battery Cable (long) |
$ 10.00 |
|
| Salvage Yard Admission Fee |
$ 2.00 |
|
| EPA |
$ 1.00 |
|
|
$ 18.00 |
My car club held their spring tech session on Saturday, April 28th. The weather was great, and we had eight Deloreans attend. I assisted with oil changes, and a Mode Switch Rebuild. I also had purchased some items from DMC Midwest, and Dave S was nice enough to bring them.
We didn’t get a good group photo, but here is one with four Deloreans. Mine is second from the right:

My old battery is about six or seven years old, and seemed to be getting weaker. With a long distance trip planned for the future, I wanted to get it replaced now. Dave told me about how Interstate Batteries get swapped after they’ve been on the shelf for a while. This one looks to be manufactured in March, 2013!

Another owner was having trouble with his battery, and it wasn’t holding a charge. I gave him my old battery.
Costs:
| Item | Vendor |
Cost |
Tax |
Total |
| MT78 Interstate Battery | DMC Midwest |
$ 125.95 |
$ 9.76 |
$ 135.71 |