I decided to enter my car as an exhibit at a local Halloween themed event. It was time to build a time machine “costume” for the car. This is in no way meant to be screen accurate. Here’s my goals:
- 100% removable, and non-destructive. No drilling or cutting the stainless, fascias, fiberglass underbody, or the wiring harness. No removing the rear windows.
- Exterior only. Sorry, no time circuits. No flux capacitor.
- Keep the costs around $100
- Have fun!
Let’s get started.
Base & Vents
First, I had to remove the sunshade, or the louvers. I had been wanting to repair a crack in it, and re-paint it. Maybe this will jumpstart that project. Remove, bag, and tag the bolts:


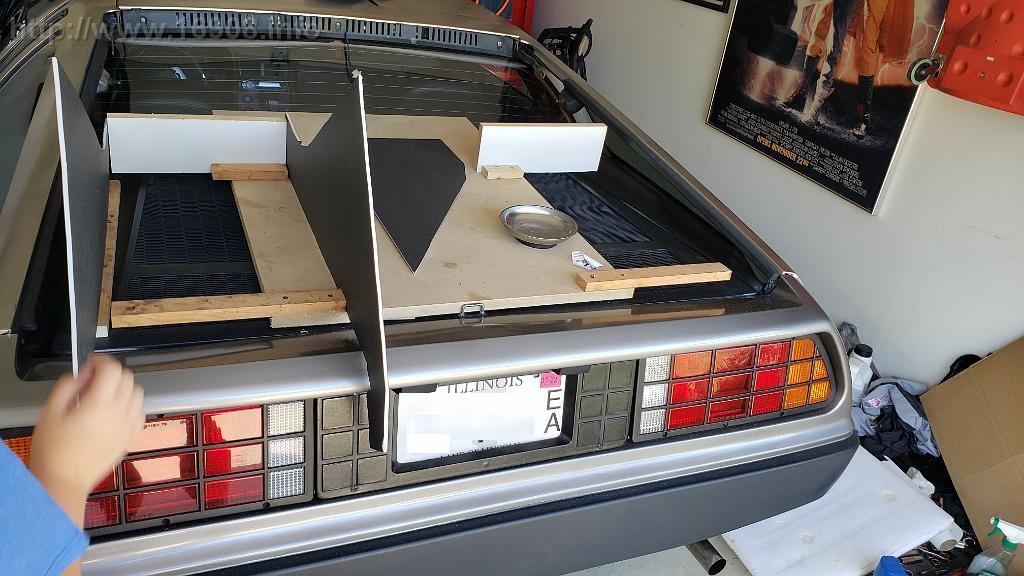
I bought an ½ inch sheet of MDF several years ago for a subwoofer project that never happened. I couldn’t find the receipt, so the 2021 price is listed below. The base only sits on the engine cover, it is not fastened down. This is intended for display only, and not for driving.
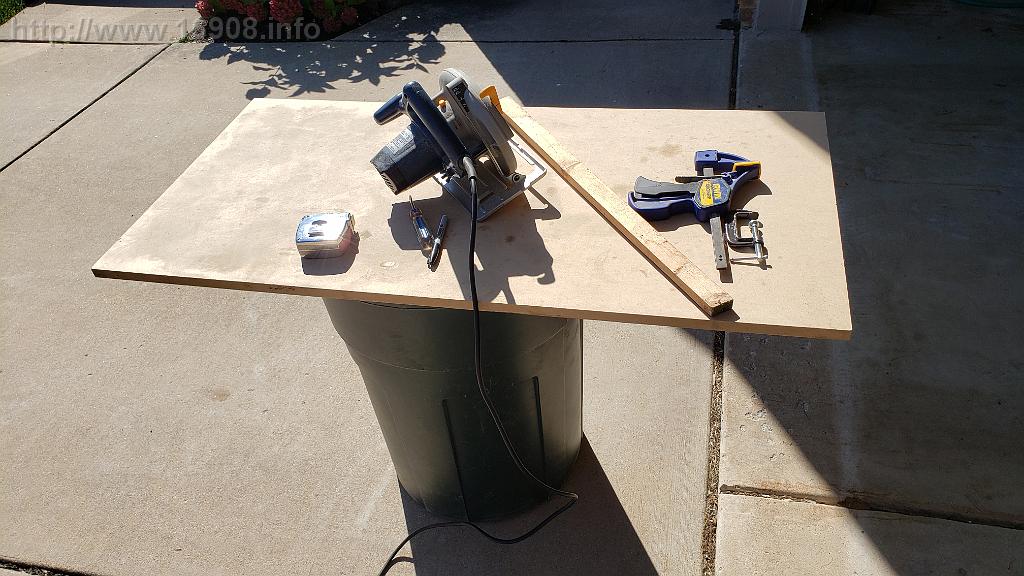
I use a thin piece or carpet, or mat I purchased for $1 or $2 to protect my engine cover. I used some other scrap wood to start building the base of the vents.
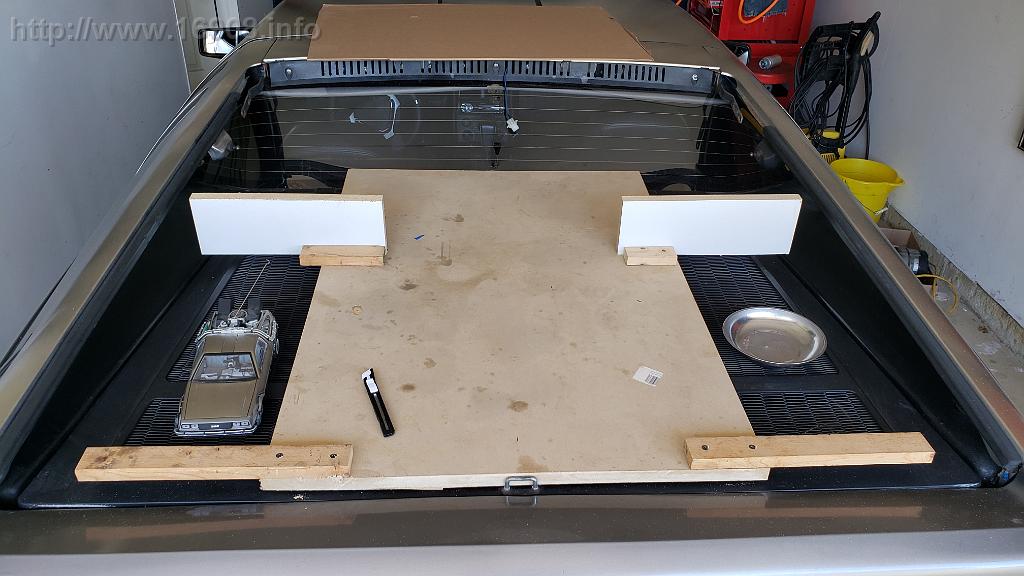
I could have used wood or metal to make the vents, but I opted to use foam core for ease and low cost. Five sheets cost me a total of $5! With a lot of measuring, I began to create the vents:

I used carpet tacks to hold them together, then silicone to glue them. It didn’t work well, but the price was right:


I first used a tube of silicone that was several years old. It wouldn’t set up, and turned into an oily, gooey mess. After wiping most of it away, I used a new tube:

Finally, I tried to make them water resistant with some black undercoating. This, unfortunately, made the foam core wrinkle. Oh well:


Mr. Fusion
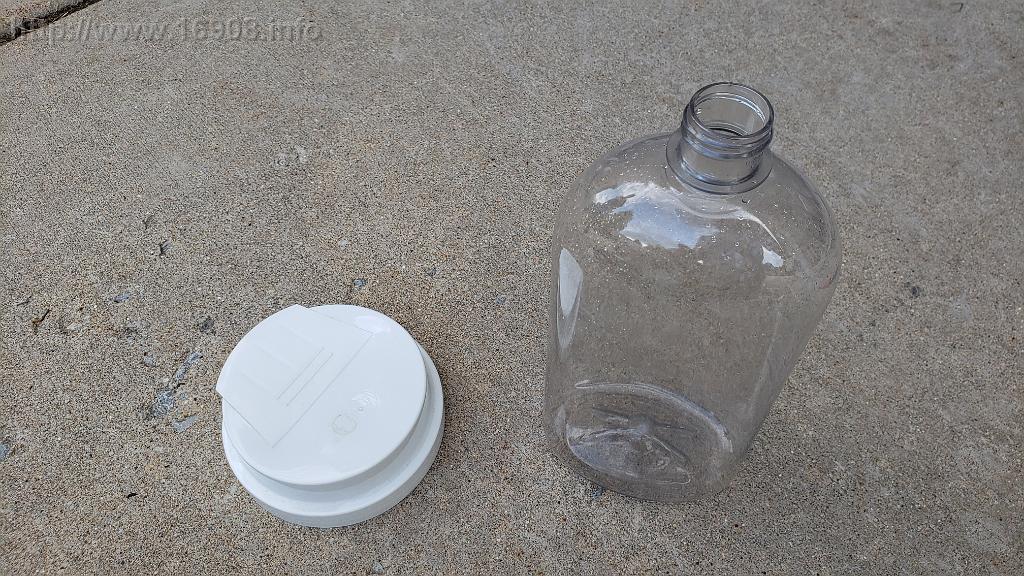
After some searching, I found I already had the perfect plastic containers to make the Home Energy Reactor:

After removing the label on the hand sanitizer, cleaning of the label residue with Goo Gone, and cutting it apart:
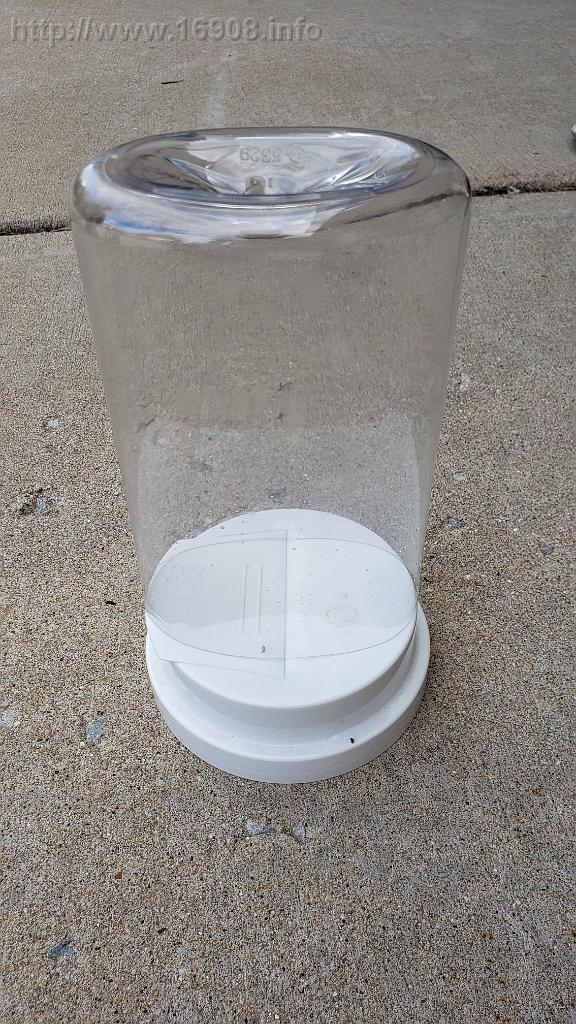
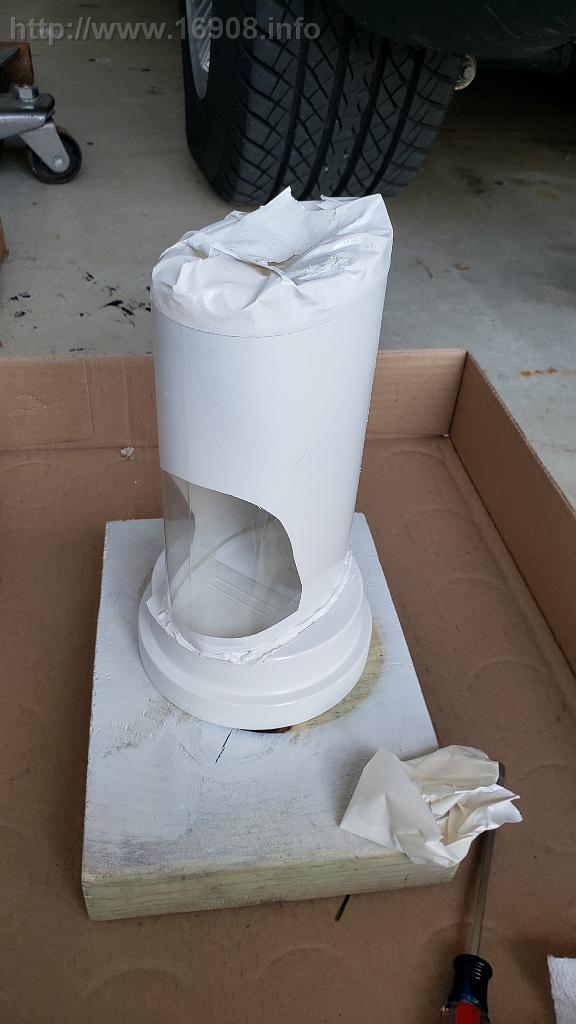
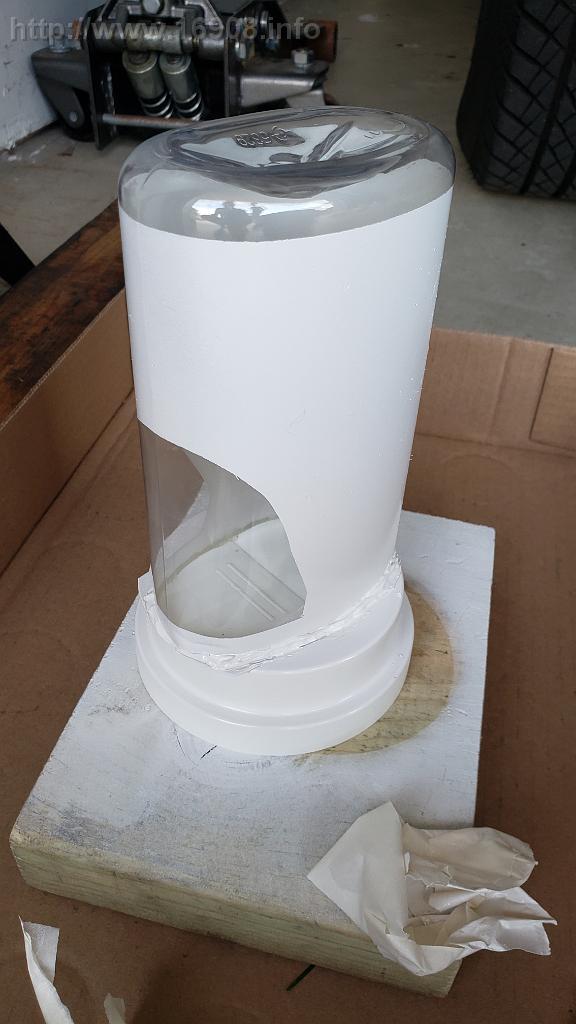
Hot glue it together, tape off the window area, and paint:


I found the logo online, and printed it on some clear labels:
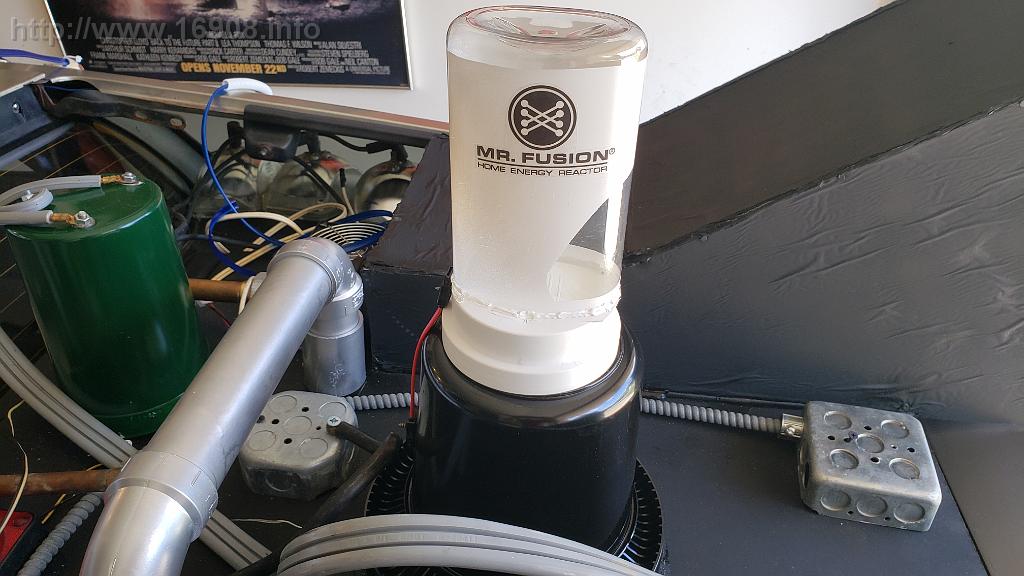
Costs: $0!
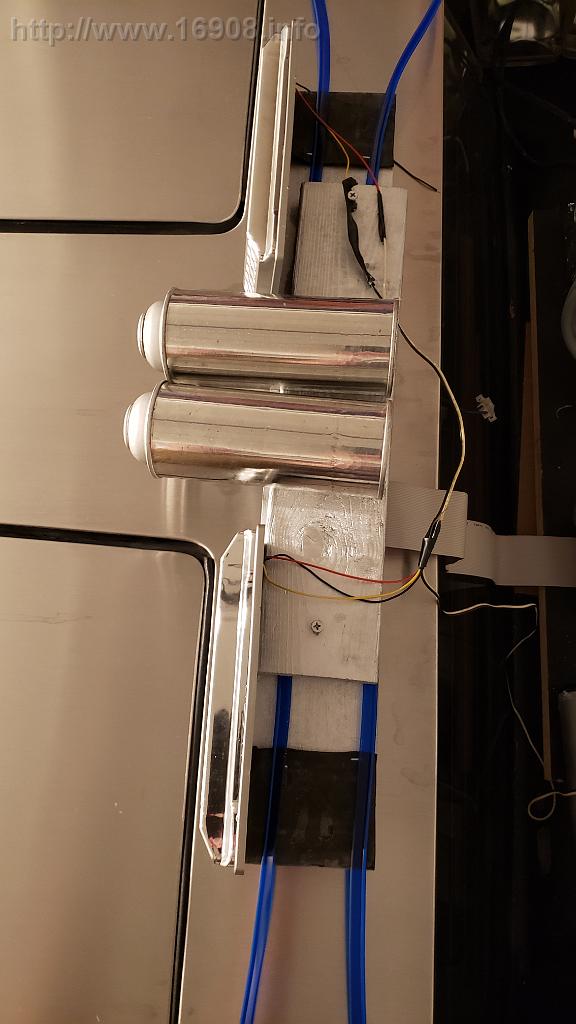
Reactor
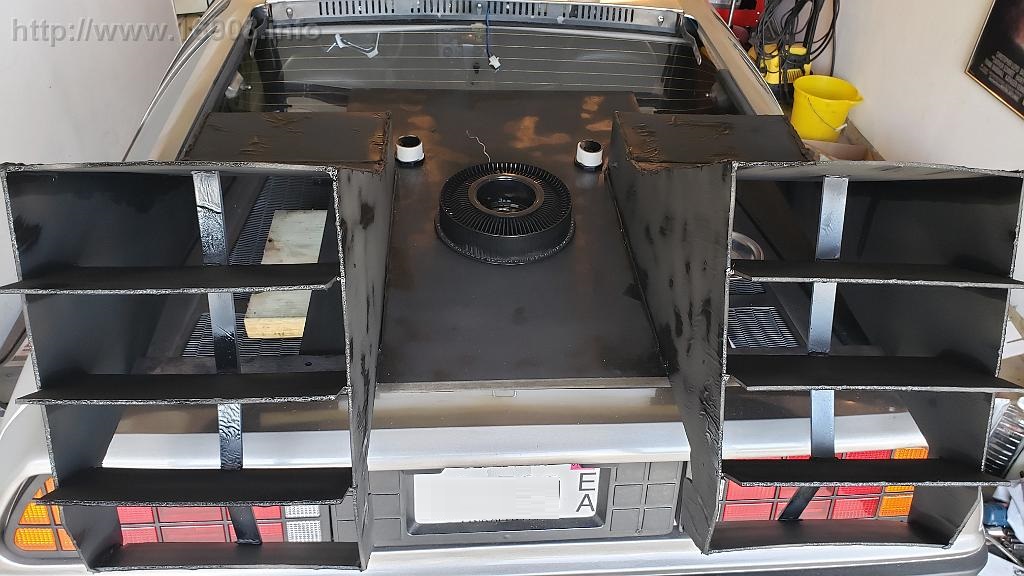
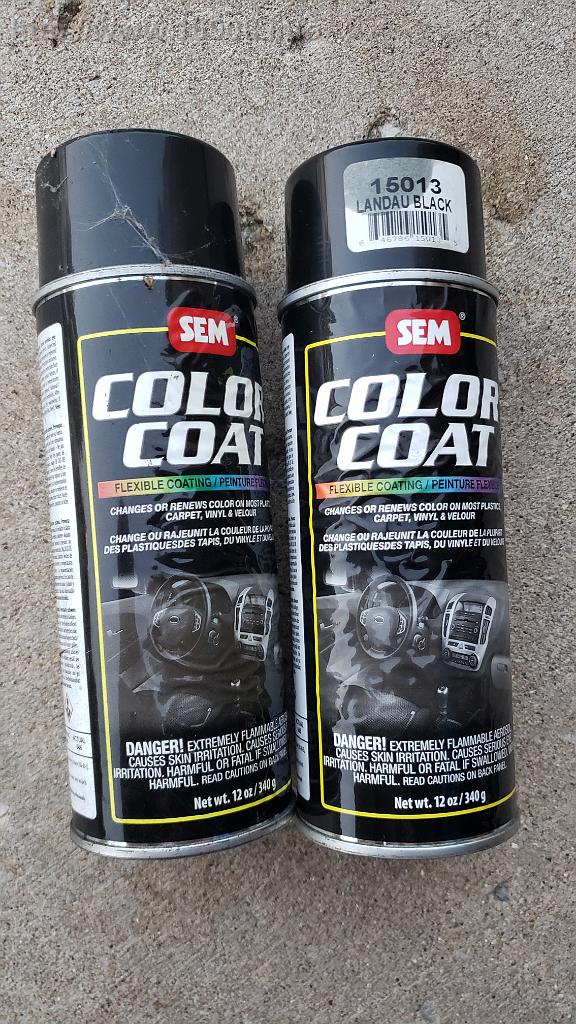
I found a slide carousel for $2, and a plastic container for $1. I painted them black:


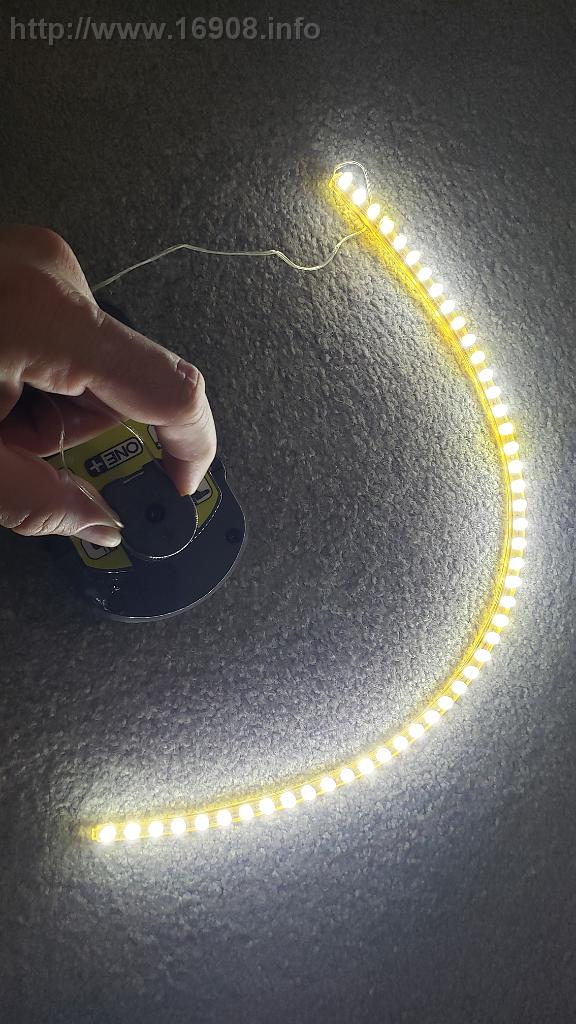
I had an unused 18 inch flexible LED strip. I bought it several years ago on eBay, but I can’t find the order… maybe $4? The reactor will now glow:
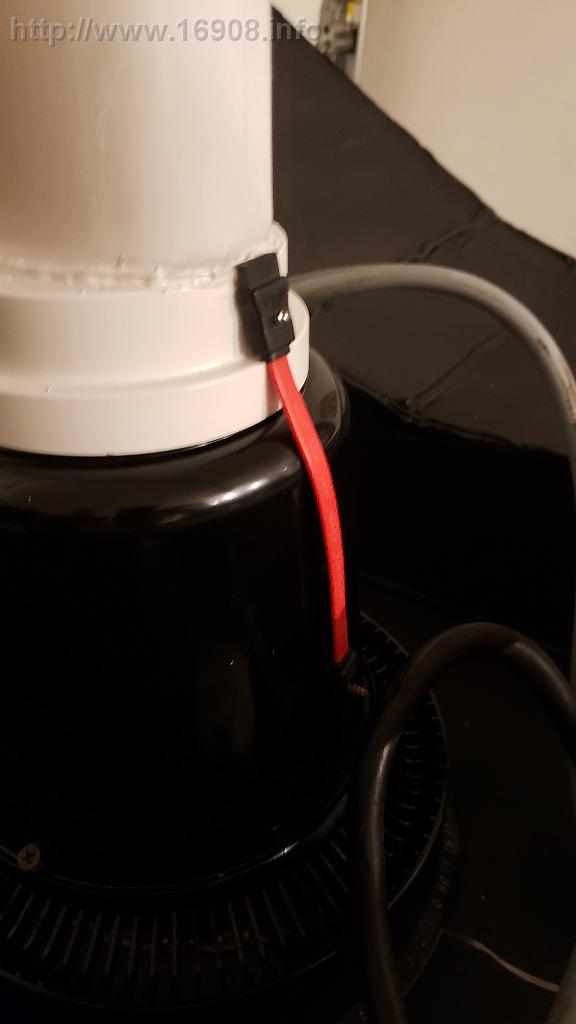
I connected Mr. Fusion with two screws, and a SATA cable. The cable is a cheap hinge, since I ran out of time to find an actual hinge. With some black spray paint and some wood screws, it all came together:

Costs: Roughly $7
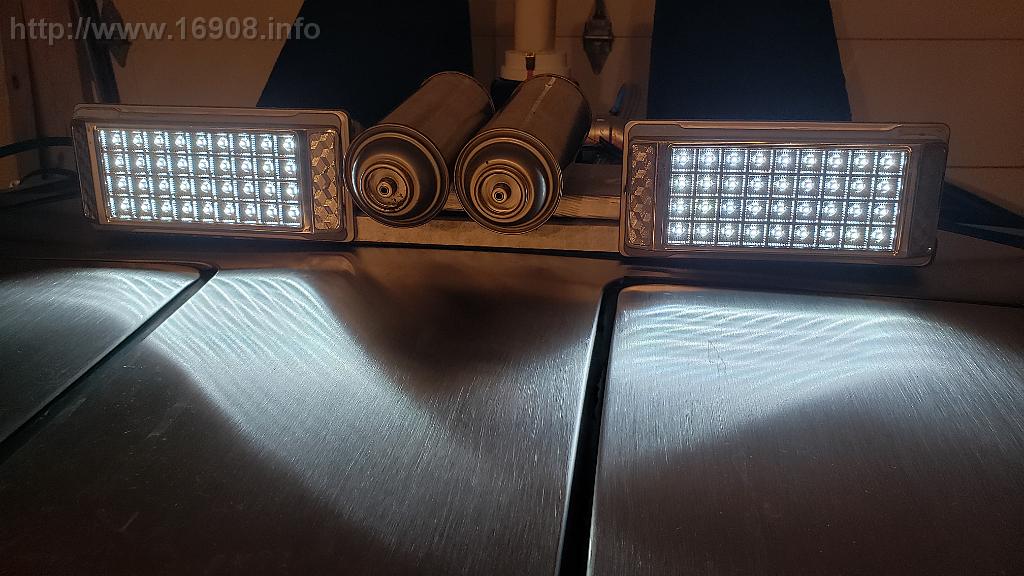
Wormhole Emitter
Scrap 1×4 wood, wood screws, silver spray paint, and empty spray paint cans.
I had some LED lights I originally purchased several years ago for my engine compartment, but they were too cheap to use. I finally found the perfect use for them. Speaker wire and electrical tape connects them together:
Side mounted electrical boxes and wires
I measured the marker lights, and found some cheap plastic boxes, slightly smaller in length.
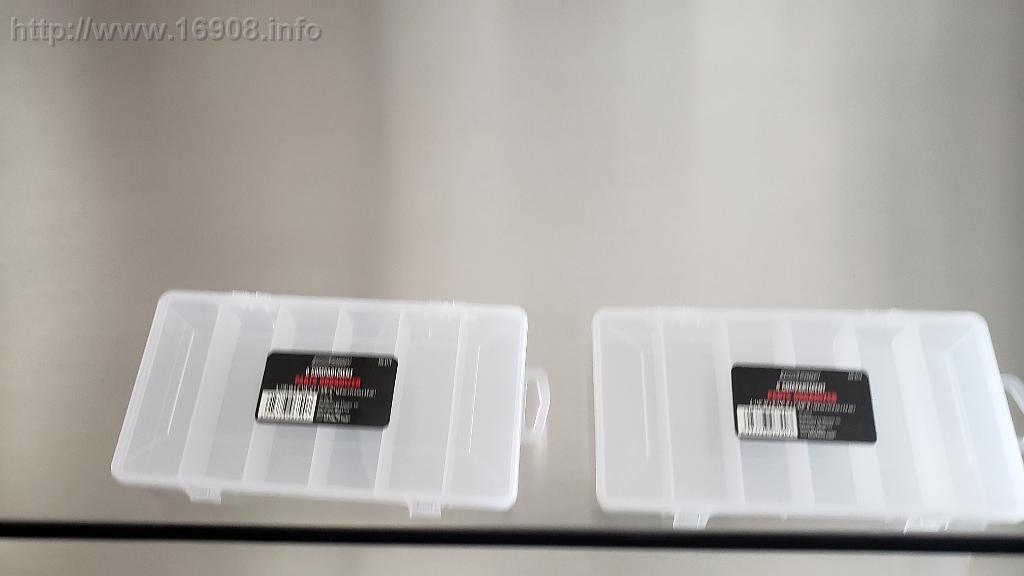


I cut off the pegboard hanger, painted them blue, and screwed on some electrical box covers:

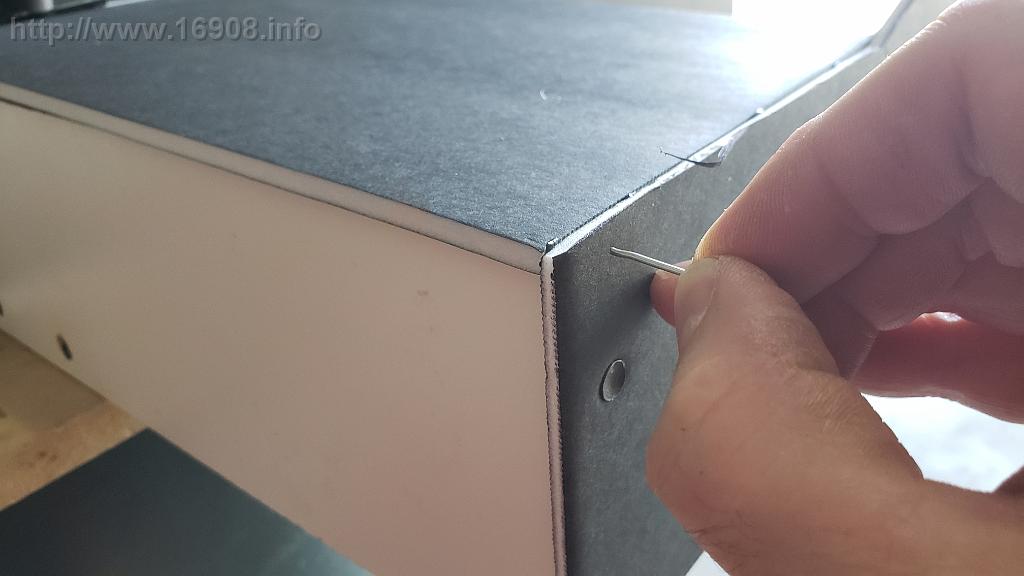
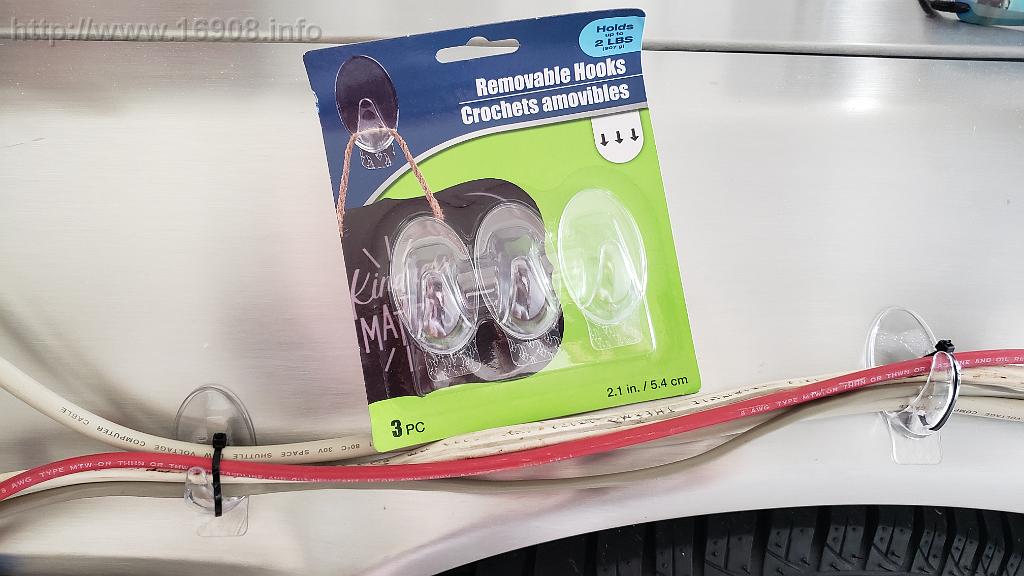
They are mounted to the body using the same mounting holes and screws used for the front marker lights. I have many old printer and SCSI cables I had been saving for this. I also have scrap wires, and cord ducting. Finally, to attach them to the stainless, I used cheap removable hooks with a hole drilled in them for a zip tie:
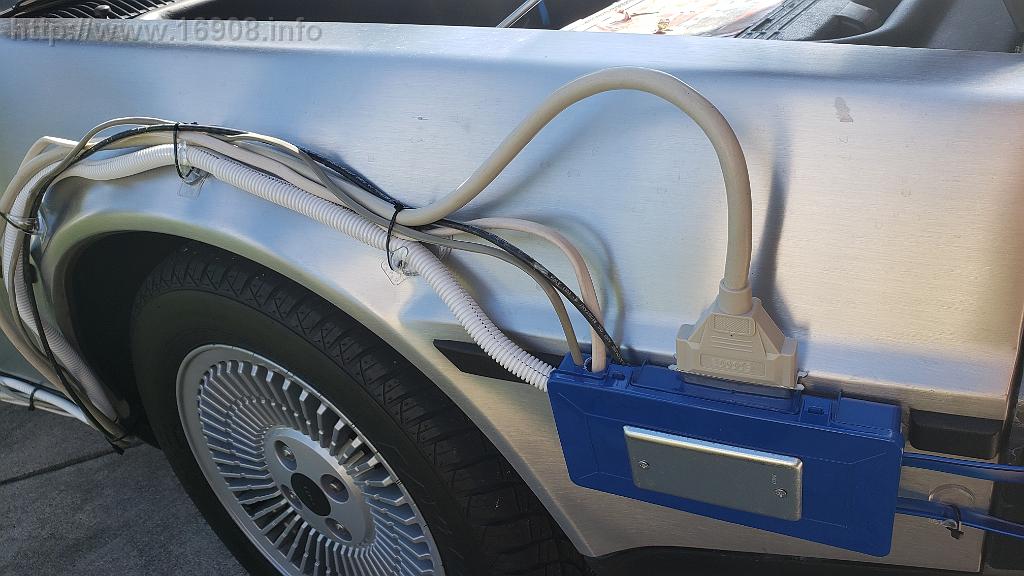

The box makes it easy to install, and add or remove components:

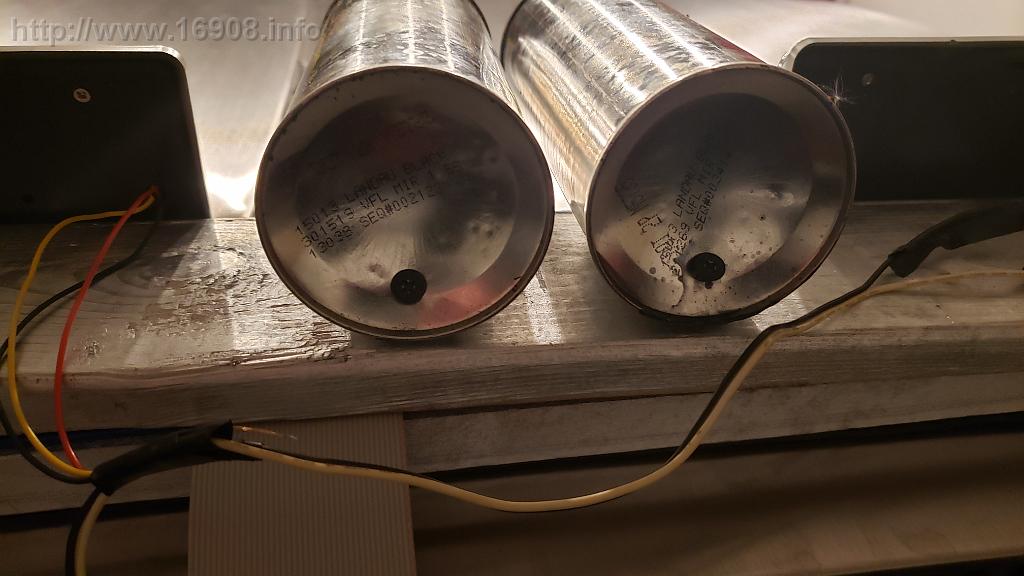
Miscellaneous capacitors, tanks, hoses, etc
There’s nothing special about any of these. It’s mainly leftover parts from the car that have been replaced, scrap materials from home improvement projects, and other junk.
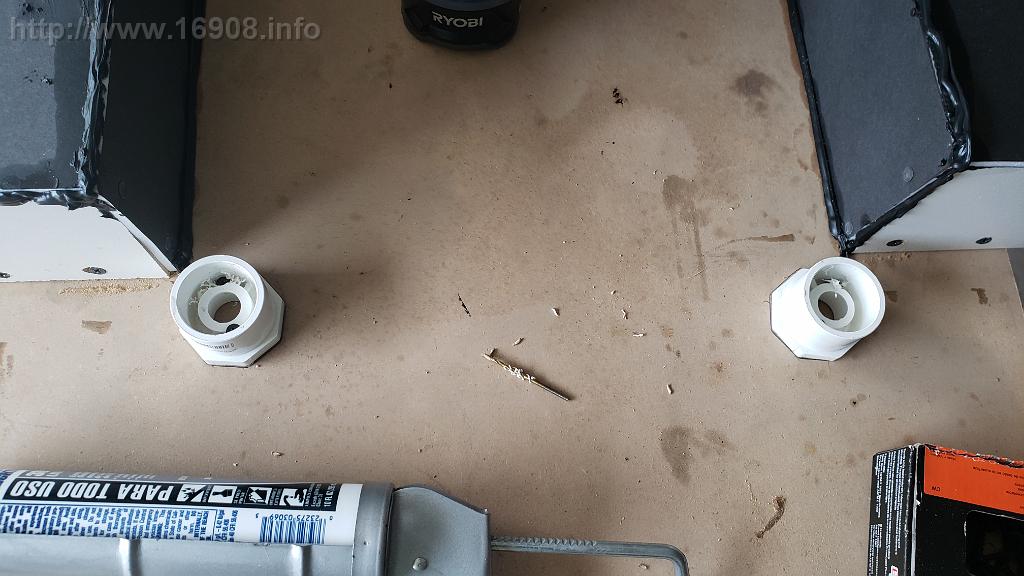
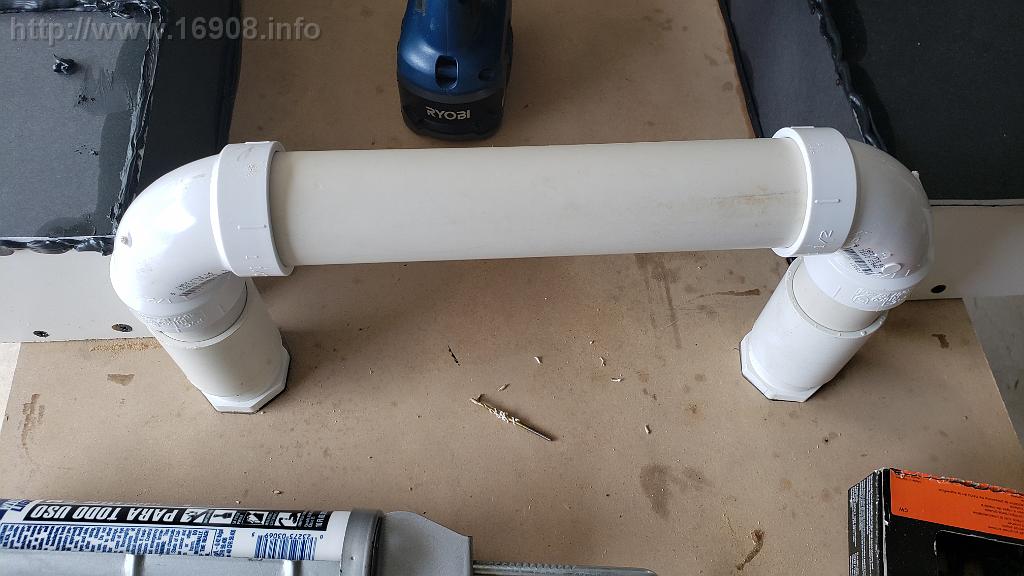
This PVC pipe also doubles as a carrying handle:
This empty container is my janitrol tank:

Delorean fuel hoses, a Delorean CV Boot, Delorean headlights, electrical boxes, BX wire, household copper pipe, an empty food container, a 220 electrical whip and outlet, a red light that I retrofitted with an LED, a PC IDE ribbon cable, a toilet tank hose, spark plug wires, and a fire extinguisher:


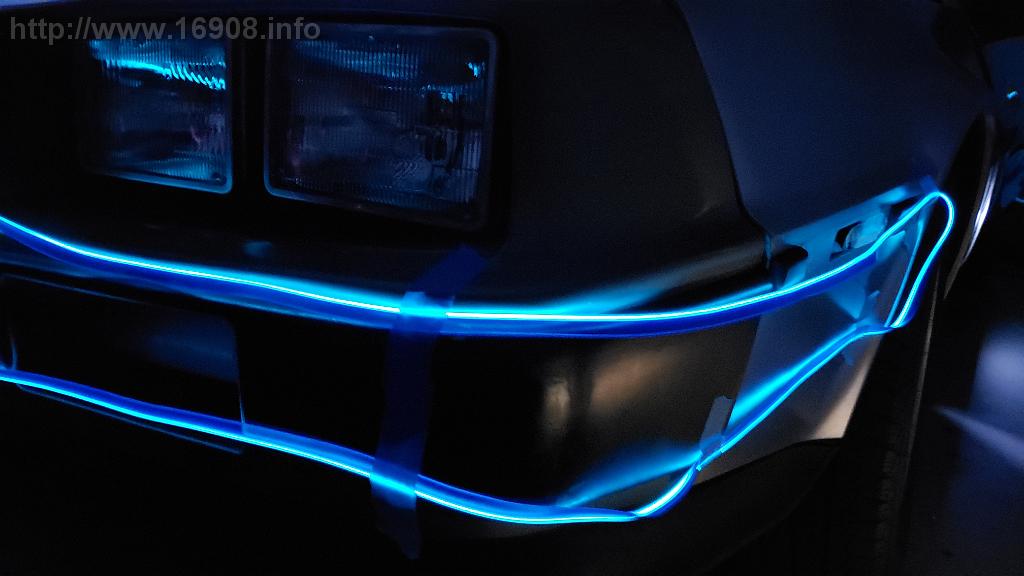
Flux bands
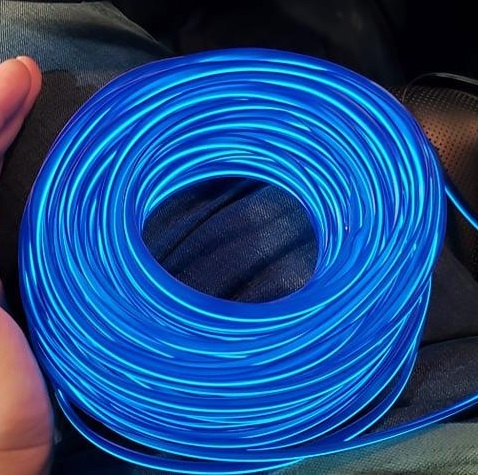
This would be the most expensive part of the project. Since it would be displayed at night, having working flux bands was essential. I opted for blue, as they appear in the movie. Note: the actual color used in the movie was white, but it appeared blue on film. After measuring the car, I found a 65 foot strip on eBay that should be perfect:
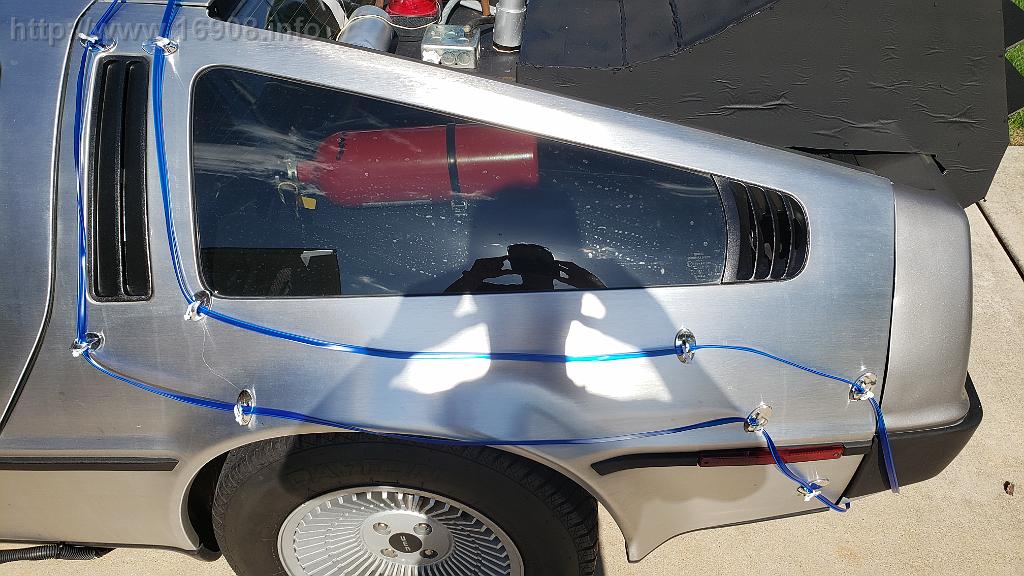
I attached them to the stainless using adhesive hooks, with a hole drilled in them, and a zip tie. I should have used the removable kind of adhesive hooks. To make them easy to remove, I first stuck the adhesive to felt to pick up some fibers and make it less tacky:

I kept the 65 foot strand as one strand, and concealed some of it in cord duct.

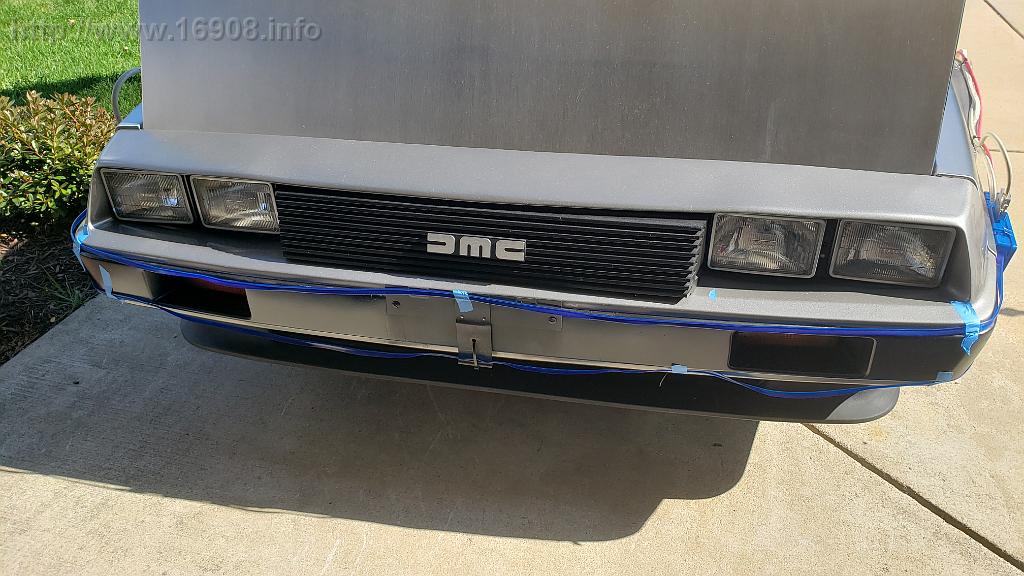
On the front and rear facias, I opted for painters tape:
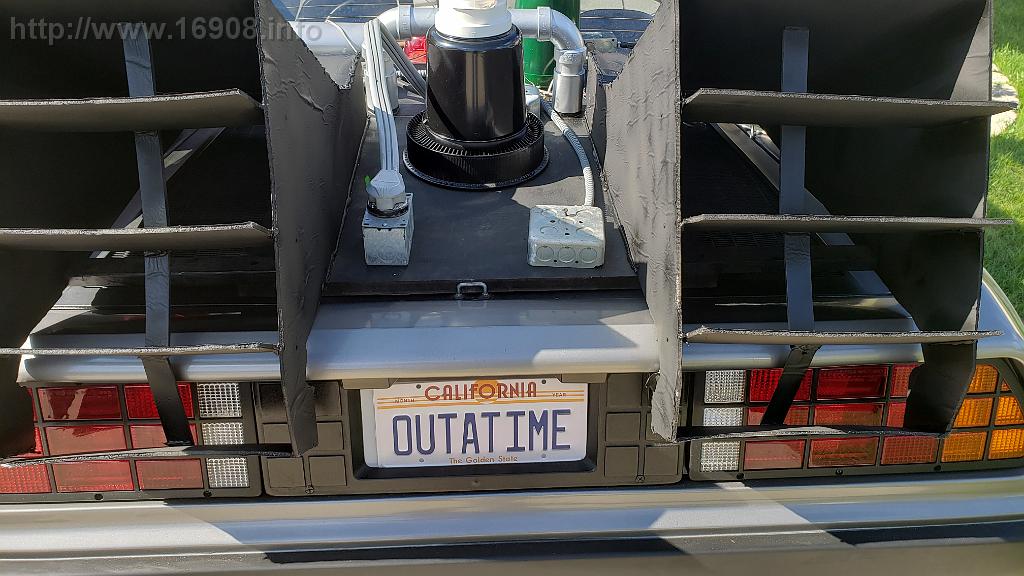
OUTATIME license plate
I found the image online, printed it on some photo paper, and used painters tape to stick it over my real plate at the event. Cost to me: $0.
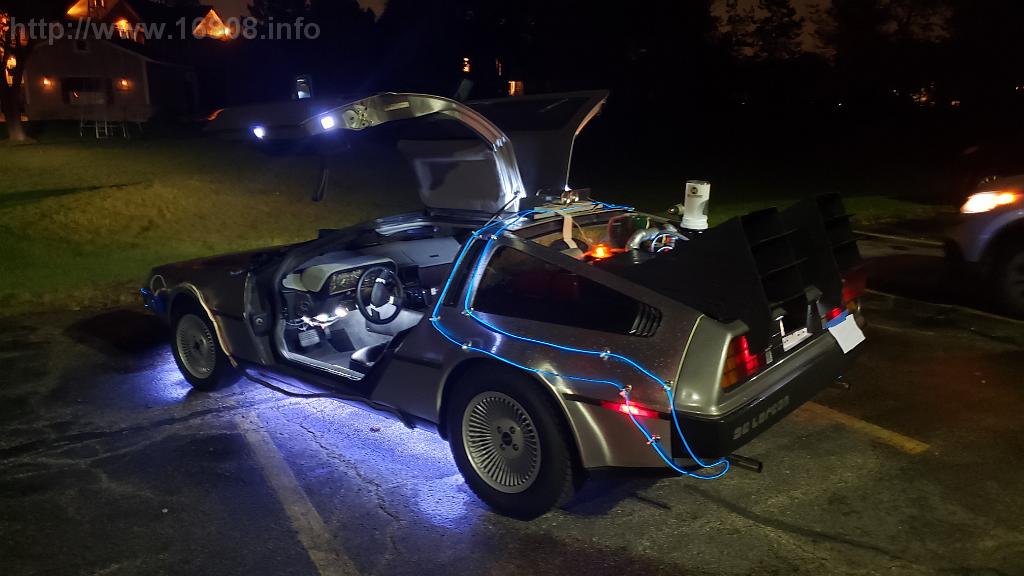
I’ve got around 40 hours into the project, including this blog post! Several people helped me on this project, and I could not have done this without them.
It was fun to build, and the car got some great reactions at the event. Unfortunately, the car narrowly missed winning an award. Maybe I’ll enter it again in a few years.
I intend to improve upon this “time machine costume” over time. Other than coming in over-budget, I accomplished my goals.
Final Pictures
Materials On Hand:
White, Gloss Black, Green, Blue Spray Paint
Masking Tape, painters tape
Hand Sanitizer refill bottle
White bottle top
Avery clear printable stickers
Hot Glue
IDE disk ribbon cable
1×4 wood
Black Zip ties
220 Electrical whip
220 Electrical outlet
Electrical boxes
1/2 copper plumbing
3/4 copper plumbing from hot water heater install (The water heater burst open on 10/22/2015, BTTF 2 day!)
Delorean CV boot
Delorean KJet fuel hoses (stock)
Delorean headlights (stock)
White 1/2 inch split cord duct
Black 1 inch cord duct
Parallel Printer cables
SCSI cables
Romex wire
Telephone wire
8 Gauge Electrical wire
Spark plug wires
6 inch PC fan
1-1/2 PVC pipe
1-1/2 PVC Couplers
Red light
Speaker wire
Small screws and bolts
Drywall or wood Screws
Kodak Photo Paper
Final Costs:
| Mini Project | Purchase | Vendor | Unit Cost | Quantity | Shipping | Tax | Total |
| Flux Bands | |||||||
| 65 Feet – Welted Neon LED Light Glow EL Wire | eBay |
$41.25 |
1 |
$0.00 |
$3.20 |
$44.45 |
|
| Removable hooks – 4 Pack | Dollar Tree |
$1.00 |
1 |
|
$0.06 |
$1.06 |
|
| Self Adhesive Hooks – 6 x 2in | Dollar Tree |
$1.00 |
4 |
|
$0.25 |
$4.25 |
|
| Clear Cable ties – 60 pieces | Dollar Tree |
$1.00 |
1 |
|
$0.06 |
$1.06 |
|
| Adhesive Hooks | Dollar Tree |
$1.00 |
3 |
|
$0.19 |
$3.19 |
|
| Reactor |
|
|
|
|
|
||
| Slide Carousel | Goodwill |
$1.99 |
1 |
|
$0.15 |
$2.14 |
|
| Food container | Dollar Tree |
$1.00 |
1 |
|
$0.06 |
$1.06 |
|
| Flexible LED light | eBay |
$4.00 |
|
|
|
$4.00 |
|
| Wormhole Emitter |
|
|
|
|
|
||
| 36 LED Silver Dome Light | eBay |
$7.18 |
2 |
$3.40 |
$1.11 |
$18.87 |
|
| Side electrical boxes and wires |
|
|
|
|
|
||
| Electrical Box cover | Home Depot |
$0.63 |
2 |
|
$0.10 |
$1.36 |
|
| 6-Compartment Small Parts Organizer | Menards |
$1.99 |
2 |
|
$0.34 |
$4.32 |
|
| Removable hooks – 3 Pack | Dollar Tree |
$1.00 |
3 |
|
$0.19 |
$3.19 |
|
| Base & Vents |
|
|
|
|
|
||
| 1/2in MDF Panel 2×4 | Menards |
$6.76 |
1 |
|
$0.57 |
$7.33 |
|
| 2×3 carpet mat | Menards |
$1.99 |
1 |
|
$0.17 |
$2.16 |
|
| Black Foam Core | Dollar Tree |
$5.00 |
5 |
|
$1.56 |
$6.56 |
|
| Utility Knifes | Dollar Tree |
$1.00 |
1 |
|
$0.06 |
$1.06 |
|
| Carpet Tacks | Menards |
$2.29 |
1 |
|
$0.19 |
$2.48 |
|
| Black Silicone | Menards |
$3.97 |
1 |
|
$0.34 |
$4.31 |
|
| 1-1/2 PVC Bushings | Home Depot |
$1.57 |
2 |
|
$0.24 |
$3.38 |
|
| 1-1/2 PVC Elbow | Home Depot |
$0.94 |
2 |
|
$0.15 |
$2.03 |
|
| Flat Black Spray Paint | Home Depot |
$1.48 |
1 |
|
$0.11 |
$1.59 |
|
| Rubberized Undercoating | Home Depot |
$5.48 |
1 |
|
$0.42 |
$5.90 |
|
|
|
|
|
Total |
$125.77 |