Door Launchers!

One of the coolest features of the DeLorean is the gullwing doors that rise effortlessly. With most modern cars, you get remote keyless entry things making it easy to unlock, lock, and even start your car. DeLorean Parts Northwest has taken keyless entry a step farther, and offers door launching! To me, being able to lock, unlock, and launch your doors remotely greatly adds to the “wow” factor with the car.

I chose the Basic Remote Door Opening System. I skipped the other available options, including remote start, trunk release, and alarm in favor of keeping it simple and inexpensive. I read through the directions, and without any prior knowledge of the DeLoreans doors and wiring, I knew this would take some time. I also decided to attempt this project without reviewing the workshop manual (I don’t own it yet). Against recommendations, I tried using cheap wire crimpers. I couldn’t find a good set anywhere! After my first few poorly done crimps, I switched over to vice grips. Not pretty, but they did the job. I also didn’t use a multimeter. To find the wire that goes to each door, I used a length of scrap wire, a taillight bulb, and a 9 volt battery creating a simple circuit.

I planned to photograph everything during my installation since I wasn’t impressed with the photos that came in the instructions. However, as I worked through the installation, I realized there isn’t much to photograph. So here are some installation tips that I came up with for anyone else attempting this project:

-Read the instructions. Every page. Read them over again, at least twenty times. Sleep on them, letting them absorb into your brain through osmosis. Then read them again.

-Make copies of the directions. Only one cut out template is included, and you have two doors. Also, the paper can get dirty/greasy/grimy/torn while working on your cars.

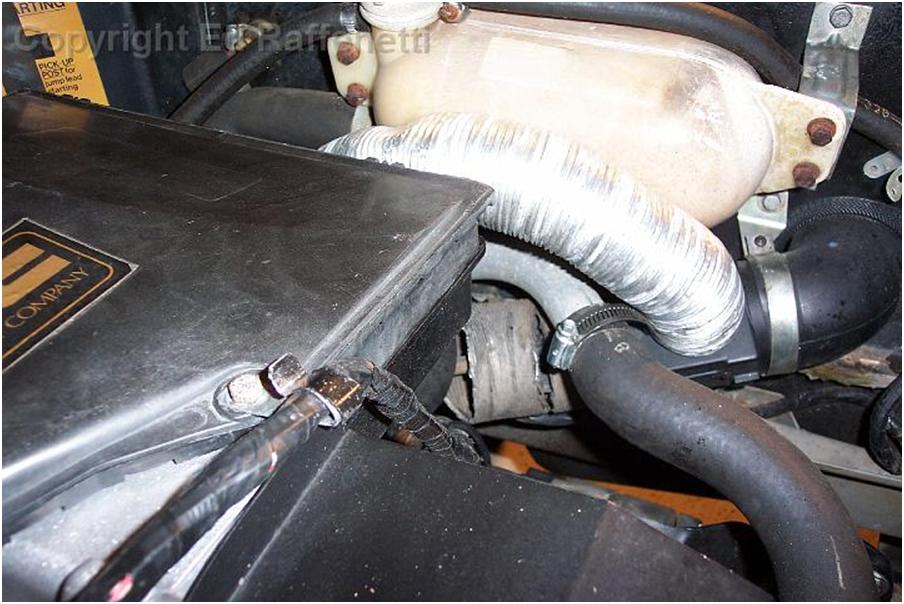
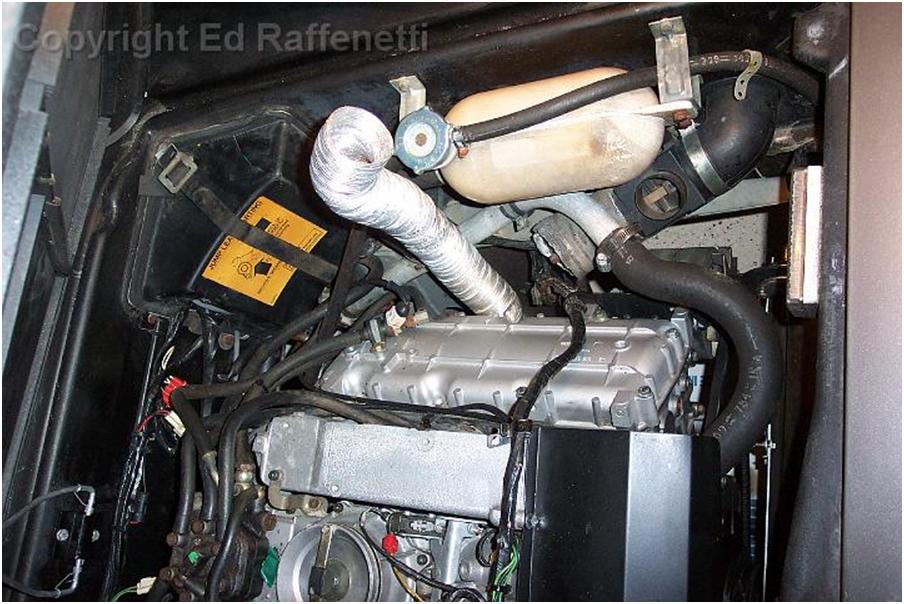
-Get familiar with your electrical compartment (http://dmctalk.com/showthread.php?t=5133)

-Get some good wire crimpers. Not the cheapo ones that most stores sell.

-Center punch before drilling! Drilling into metal isn’t easy, and your bit will slide around! The drilling needs to be precise.

 -Use wiring option 1A
*Cut the wire on the door side of the connector instead of prying it out. The wire wasn’t prying out easily, and I didn’t want to damage the 25 year old plastic connector.

-Use blue colored wire from the doors to the electrical compartment. They will match the wires that connect to the relays.

-Label all your wires and relays. Differentiate your right and left doors. (I still haven’t done this)

-Bend the end of the rod on the actuator side so the rod won’t slide out (shown below, thanks Ken K!)

-Go one step at a time, checking your work. Don’t do everything at once.

I installed everything, and my driver’s door didn’t release. Passenger door works maybe 75% of the time. My driver’s door was also not locking and unlocking in harmony with the passenger door. I found the link rod that connects to the interior lock switch was bent, hitting the lower door panel. I bent it back into shape using the passenger door as a template. I’m happy to say I solved that problem on my own!

Ken K found that the door seals need to be lubricated so that the doors will release cleanly. He also found I needed to bend the end of the link rod on the actuator side even more than I had:

My driver’s door still only release 5% of the time. Possibly because the door seal looks like it was installed out of place compared the passenger side:


Driver’s side


Passenger side

My electrical compartment is a rat’s nest now. I have no idea how to straighten this up. The previously added relays the door lock actuators (which replace the solenoids), the newly added relays from the door launch actuators, and the keyless entry unit for the door launchers really fill the compartment:

Oh well, at least I lock, unlock, and sometimes open the door for my passenger. I might look into adding the trunk release someday, which would be nice in case I ever break my trunk release cable.

Supplies/Costs:

(Blue) 7 Butt Splice wire connectors: $0.99 at Home Depot
(Blue) 16 Gauge Automotive wire: $5.89 at Autozone
K2100DP-B Wings-A-LoftT Basic Remote Door Opening System: $199.95 at http://www.delorean-parts.com

Cooling System Self Bleeder Kit

My car had been running hot, possibly because of trapped air in the cooling system that could prevent the fans from coming on. I’d previously bled my coolant, but I must not have gotten all the air out of the system. I’d seen many owners describe the usefulness of a self-bleeding kit, so I decided I needed one. However, my car was at Ken’s shop during the month of June, and he flushed and refilled the coolant. He was able to get all the air out.

I ordered a self bleeder, but I didn’t get it in time before my car went back to Ken’s shop. I figured I’d try installing it myself.

One of the first steps: Drain the cooling system.

Nope, sorry. The car is running great now, and I want to leave the cooling system alone for 1 to 2 driving seasons. For now, the kit will sit on my garage shelf.

Cost:

K1012DP-A Wings-B-Cool™ Cooling System Self-Bleeder Kit: $29.95
Shipping: Domestic 2-3 Days $7.00
from DeLorean Parts Northwest, LLC

Whole lot of maintenance…

The car wasn’t running smoothly, and had stalled on me several times. I thought this might be because of a loose vacuum connection on the delay valve. I also had transmission fluid leaking out. I would find out later that I probably overcompensated, and added too much fluid back, which made the leak seem even worse. I decided I had to get the car looked at.

On Monday June 11th, I drove the car to work. I left work early to head out to DMC (Midwest). The car was running very warm. Once I got off I-90, I decided to stop for gas. Filled up the tank, attempted to start the car, nothing. It just cranked and cranked. Walked around back, and there’s a puddle of coolant under my engine. $H1T!

Called Ken, he had me try the Hot Start Quick Fix (which I now understand, but didn’t at the time). I probably failed to do this properly. And during my time trying to start the car, the starter decided to “stick” and just keep cranking even after I took the key out of the ignition. Panick set in, since I figured I’d drain the battery. It’s warm out, and I’m sweating bullets while wearing my good work clothes. While troubleshooting, people decide to come over and ask me questions: “Is this a DeLorean?” Not now!!!!

Disconnected the battery, reconnected it, but it still cranked. Called DMC (Midwest), and they had me change the relay for the starter. No more cranking. Tried the hot start quick fix again, and the car started! Went into the gas station, bought a bottle of water, and added some to the coolant.

Go to DMC (Midwest) and left the car there over night. In the morning, I was emailed the diagnosis:

Missing Transmission dipstick bracket
Need two vacuum hoses
Front main seal leaking (again?)
Bad RPM Relay (Explains the stalling)
Other bad relays
Wrong coolant bottle cap
Possible bad accumulator
Other smaller issues

To my surprise, Ken came and picked up the car. He did all the work, and even worked on my attempted door launchers install. I didn’t end up needing a new accumulator. Since Ken was really great about everything, I didn’t want to trouble him with getting the car back. I decided I’d go pick up the car. On Sunday June 24th, with the help of my girlfriend, we drove down in my daily driver (2004 Dodge Stratus Coupe), and drove back separate. Ken recommended I add a bottle of fuel injector cleaner on my next refill. After a few tanks of gas between cars, we got back home without any problems. I’m proud to say the car now drives better than ever.

Ken’s work:

Flush coolant
Install new Stainless water bottle and cap
New front main seal
Door lock adjustments
Replace some relays
Install transmission dipstick bracket
Install/replace two vacuum hoses
Test AC
Other small stuff

Costs:

Stainless Coolant Tank: $151 from SpecialTAuto.com
$3? Fuel Injector Cleaner from Meijer
Couple tanks of gas
Other costs withheld

Cold Air Intake Hose

My stock air intake hose was torn, and I wasn’t too sure about the crumpled heat stove tube that feeds into the intake:

So I found directions for a simple cold air intake hose: http://dmctalk.com/showthread.php?t=4935
Got the 3″ Spectre Air duction from Autozone:

And went to work removing the stock intake hose and air filter box:

Air filter looks dirty. I now plan to upgrade to a K&N


Not too pretty lookin:


I cleaned up the air filter box, and took off the old yellowed DMC sticker. I’ll get a replacement soon.

I chose to not eliminate the elbow that feeds into the pontoon, and connected the hose to the elbow. This setup looks a lot cleaner already! Now I just need a longer screw to close the bracket that holds the elbow:


Got a screw at Ace Hardware (unfortunately not stainless):

Not too sure if (and how) I should remove the manifold heat stove shield thing. That’s it! Drove around for awhile, can’t notice any difference <shrugs>

At least it looks better. I decided the yellowed coolant bottle and rusted bracket screws don’t look too great, and the old bottle makes me a little nervous. A new stainless coolant bottle is on order.

Costs:

3″ Spectre Air Ducting from Autozone: $19.99
2″ Screw from Ace Hardware: $0.19